Introducing FISSURE: A Toolbox For The RF Hacker

No matter what the job at hand is, if you’re going to tackle it, you’re going to need the right kit of tools. And if your job includes making sense out of any of the signals in the virtual soup of RF energy we all live in, then you’re going to need something like the FISSURE RF framework.

Exactly what FISSURE is is pretty clear from its acronym, which stands for Frequency Independent SDR-Based Signal Understanding and Reverse Engineering. This is all pretty new — it looks like [Chris Poore] presented a talk at DEFCON a few weeks back about using FISSURE to analyze powerline communications between semi-trucks and their trailers, and they’ve got a talk scheduled for next month’s GNU Radio Conference as well. We’ve been looking through all the material we can find on FISSURE, and it appears to be an RF hacker’s dream come true. They’ve got a few examples on Twitter, like brute-forcing an old garage door opener with a security code set by a ten-position DIP switch, and sending tire pressure monitoring system (TPMS) signals to a car. They also mention some of the framework’s capabilities on the GitHub README; we’re especially interested in packet crafting for various protocols. The video below has some more examples of what FISSURE can do.

It looks like FISSURE could be a lot of fun, and very handy for your RF analysis and reverse engineering work. If you’ve been using Universal Radio Hacker like we have, this looks similar, only more so. We’ll be downloading it soon and giving it a try, so be on the lookout for a hands-on report.

Continue reading “Introducing FISSURE: A Toolbox For The RF Hacker”

screenshot from the video linked, showing example code that lights up an LED, and in a small window, also shows the LED lit up on a small Pi Pico board connected over USB

Your MicroPython Board Can Be Your Tinkering Peripheral

[Brian Pugh] has shared a cool new project that simultaneously runs on desktop Python and MicroPython – the Belay library. This library lets you control a MicroPython device seamlessly from your Python code – interacting with real-world things like analog/digital trinkets, servos, Neopixels and displays, without having to create your own firmware or APIs.

You need a serial-connected MicroPython board – even an ESP8266 should do. Then, you can intersperse your Python code with MicroPython-written functions, and call them whenever you need your connected device to do something – keeping the entire logic of your project within a single device. [Brian] provides quite a few examples, even for more complex things like displays. No doubt, there are limitations, but this looks to be a powerful tool in a hacker’s arsenal.

Readers might be reminded of an Arduino library called Firmata – an old-time way to do such connectivity. We’ve also previously covered a Pi Pico firmware that does a similar thing, and even features a breakout board for all your experimentation needs!
Continue reading “Your MicroPython Board Can Be Your Tinkering Peripheral”

Adding Perlin Noise To 3D Printed Parts, With Python

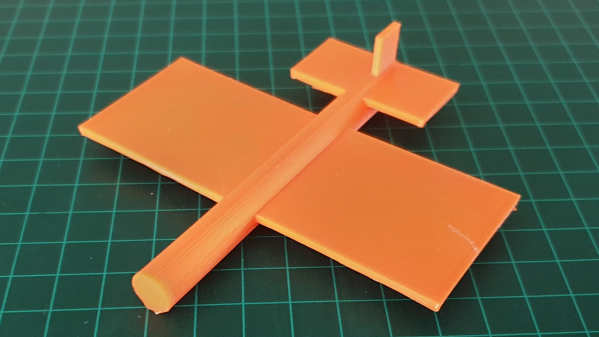
Want to add a bit of visual flair to 3D printed parts that goes maybe a little more than skin-deep? That’s exactly what [volzo] was after, which led him to create a Python script capable of generating a chunk of Perlin noise, rendered as an STL file. What does that look like? An unpredictably-random landscape of hills and valleys.

The script can give printed parts a more appealing finish.

The idea is to modify a 3D model with the results of the script, leaving one with something a bit more interesting than a boring, flat surface. [volzo] explains how to use OpenSCAD to do exactly that, but it’s also possible to import the STL file the script creates into the CAD program of one’s choice and make the modifications there with some boolean operations.

If the effect looks a bit bit familiar, it’s likely because he used the method to design part of the 3D printed “toy” camera that we featured recently.

[volzo]’s method isn’t entirely plug and play, but it could still be a handy thing to keep in your back pocket when designing your next part. There are also other ways to modify the surfaces of prints for better aesthetics; we’ve previously covered velocity painting (also known as ‘tattooing’ in some slicers) and also fuzzy skin.

Perlin noise was created by [Ken Perlin] in the early 80s while working on the original Tron movie as a way to help generate more realistic-looking textures. It still fulfills that artistic function in a variety of ways, even today.

A Simple Web-Based Wiring Harness Tool

When building electronic assemblies there is quite often the need to construct custom cables to hook things up. It’s all very well if you’re prototyping by hand, or just building one or two of a thing, but if you’re cranking them out using outside help, then you’re going to want to ensure that cable is described very accurately. [Christian Nimako-Boateng Jr.] presents for us the first version of wirely, a wiring harness tool. This is a web-based tool that allows one to describe the cable ends and connectivity between them, producing a handy graphic and exports to excel in a format that should be easy to follow.

Based around the wireviz Python library running on a flask-based backend, image data are sent to the web assembly front-end and rendered with OpenGL. Configuration files can be imported and exported as JSON, making it easily linkable to other tools if required. Helpfully, the tool also seems to support some kind of revision control, although we didn’t try that yet. The process is straightforward enough, one simply defines a few groups (these relate to individual PCBs or other floating items in the assembly) which each contain one or more connectors. First, the connectors are described with part numbers, and wire gauge data, before defining the list of connections (wires) showing which signal and physical pins are connected together. Nothing more complex than that yet. We think there is still some more functionality that the tool could manage, such as shielding and guarding details, twisted pair definitions and a few others, but for a first pass, wirely looks pretty handy.

If you want a more heavyweight option using IEC 60617 symbols for describing wiring harnesses, then look no farther than QElectroTech, and yes, we have covered wireviz before, just for those that want to cut out the middleman and describe their cables in Python directly.

Automate Internet Life With Python

Most of us are adept enough with computers that you know what they can easily do and what they can’t. Invent a new flavor of ice cream? Not easy. Grab the news headlines related to Arduinos from your favorite news feed? Relatively easy. But, of course, the devil is in the details. FreeCodeCamp has a 3-hour course from [Frank Andrade] that dives into the gory details of automating web tasks using Python and a variety of libraries like Path, Xpath, and Selenium. You can watch the course, below.

Topics start off with grabbing tables from websites and PDFs. But it quickly graduates to general-purpose web scraping and even web automation. These techniques can be very useful for testing browser-based applications, too.

By the end, you’ve created an executable that grabs news every day and automatically generates an Excel report. There’s also a little wind down about WhatApp automation. A little something for everyone. We also greatly approved of [Frank]’s workspace which appears in the background. Looks like he would enjoy reading Hackaday.

Honestly, while we’ve seen easier methods of automating the browser, there’s something appealing about having the control something like Python affords. Sure beats building hardware to simulate a human-in-the-loop.

Continue reading “Automate Internet Life With Python”

Computer Vision Extracts Lightning From Footage

Lightning is one of the more mysterious and fascinating phenomenon on the planet. Extremely powerful, but each strike on average only has enough energy to power an incandescent bulb for an hour. The exact mechanism that starts a lightning strike is still not well understood. Yet it happens 45 times per second somewhere on the planet. While we may not gain a deeper scientific appreciation of lightning anytime soon, but we can capture it in various photography thanks to this project which leverages computer vision machine learning to pull out the best frames of lightning.

The project’s creator, [Liam], built this as a tool for stormchasers and photographers so that they can film large amounts of time and not have to go back through their footage manually to pull out the frames with lightning strikes. The project borrows from a similar project, but this one adds Python 3 capabilities and runs on a tiny netbook for more easy field deployment. It uses OpenCV for object recognition, using video files as the source data, and features different modes to recognize different types of lightning.

The software is free and open source, and releases are supported for both Windows and Linux. So far, [Liam] has been able to capture all kinds of electrical atmospheric phenomenon with it including lightning, red sprites, and elves. We don’t see too many projects involving lightning around here, partly because humans can only generate a fraction of the voltage potential needed for the average lightning strike.

No Tool Left Behind With The Help Of Homemade Shadow Boards

Shadowed tool storage — where a tool outline shows at a glance what’s missing from storage — is a really smart way to keep your shop neat. They’re also super important for cases where a tool left behind could be a tragedy. Think, where’s-that-10-mm-socket-while-working-on-a-jet-engine? important. (It’s always the 10-mm socket.)

But just because shadow boards are smart, doesn’t mean they’re easy to make. That’s why [Scott Prince] came up with this semi-automated method for making toolbox shadow boards. The job of tracing around each tool on some sort of suitable material and cutting out the shapes seems straightforward, but the trick comes in organizing the outlines given the space available and the particular collection of tools.

[Scott]’s method starts with capturing images of each individual tool. He used a PiCam and a lightbox housed, strangely enough, in a storage bench; we’d love to hear the full story behind that, but pretty much any digital camera would do for the job. After compensating for distortion with OpenCV, cropping the images, and turning the image into a vector outline of the tool, [Scott] was left with the task of putting the tools into logical groups and laying them out sensibly. After tweaking the tool outlines and adding finger cutouts for easy pickup, [Scott] put his CNC router to work. He chose to use a high-density polyethylene product made by his employer, which looks fantastic, but MDF would work fine too.

We have to admit to a fair degree of toolbox envy now that we’ve seen what shadow boards can do. We’re a bit torn, though — [Zach Friedman]’s Gridfinity storage system has a lot going for it, too.