While we absolutely support the right of everyone to express their opinions, it seems to us that it’s rarely wise to turn your vehicle into a mobile billboard for your positions. Aside from potentially messing up the finish on your car, what’s popular and acceptable at home might attract unwanted attention while traveling abroad, leading to confrontations that might make your trip a little more eventful than it needs to be.
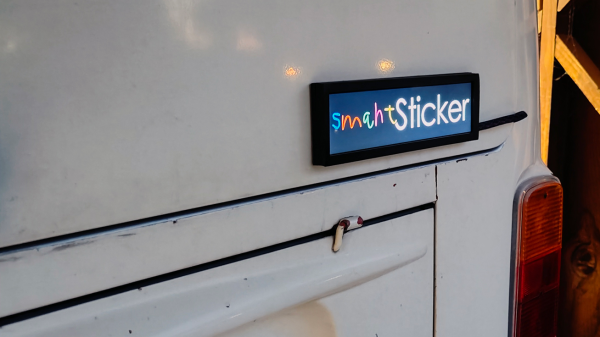
So why not let technology help you speak your mind in a locally sensitive manner? That’s the idea behind [Pegor]’s “smahtSticker”, an AI-powered bumper sticker that provides the ultimate in context-sensitive urban camouflage. The business end of smahtSticker — we’re going to go out on a limb here and predict that [Pegor] hails from the Boston area — is an 8.8″ (22-cm) wide HDMI display capable of 1920×480 resolution. That goes on the back of your car and is driven by a Raspberry Pi Zero with a GPS module. The Pi grabs a geolocation every second, and if you’ve moved more than 25 feet (7.6 m) — political divisions are at least that granular in the US right now, trust us — it grabs your current ZIP code using GeoPy. That initiates a query to the OpenAI API to determine the current political attitudes in your location, which is used to select the right slogan to display. You’ll fit in no matter where you wander — wicked smaht!
Now, of course, this is all in good fun, and with tongue planted firmly in cheek. The display isn’t weatherized at all, so that would need to be addressed if one felt like fielding this. Also, ZIP codes may be good for a lot of things, but it’s not the best proxy for political alignment, so you might want to touch that part up.