Retrocomputing is an enjoyable and educational pursuit and — of course — there are a variety of emulators that can let you use and program a slew of old computers. However, there’s something attractive about avoiding booting a modern operating system and then emulating an older system on top of it. Part of it is just aesthetics, and of course the real retrocomputing happens on retro hardware. However, as a practical matter, retrocomptuters break, and with emulation, you’d assume that CPU cycles spent on the host operating system (and other programs running in the background) will take away from the target retrocomputer.
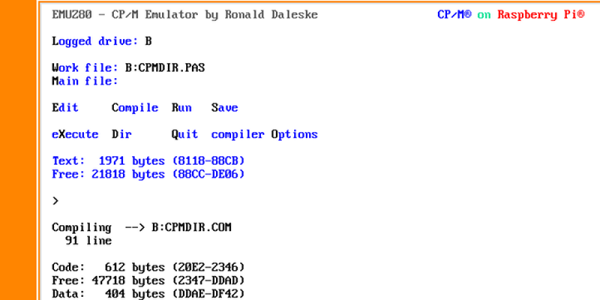
If you want to try booting a “bare metal” Z80 emulator with CP/M on a Raspberry Pi, you can try EMUZ80 RPI. The files reside on an SD card and the Pi directly boots it, avoiding any Linux OS (like Raspian). It’s available for the Raspberry Pi Model B, A+, and the Raspberry Pi 2 Model B. Unlike the significant boot times of the standard Linux distros on the earliest models of Pi, you can boot into CP/M in just five seconds. Just like the old days.
The secret to this development is an open source system known as Ultibo, a framework based on Open Pascal which allows you to create bare metal applications for the Raspberry Pi. The choice of Free Pascal will delight some and annoy others, depending on your predilections. Ultibo is still very much in active development, but the most common functions are already there; you can write to the framebuffer, read USB keyboards, and write to a serial port. That’s all you really need to make your own emulator or write your own Doom clone. You can see a video about Ultibo (the first of a series) below.
Continue reading “Raspberry Pi Boots CP/M” →

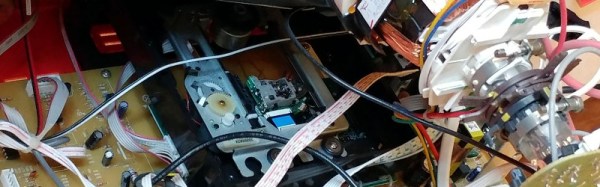
 This is however not merely a Pi stuffed inside the rear casing with a few holes for cables, instead he took away the substantial part of the DVD mechanism and mounted his Pi safely in a plastic box. Some USB extension cables bring all four USB sockets to the front panel through the DVD slot with a bit of Sugru to hold them in place. An HDMI panel-mount extension goes to the TV’s rear connector panel, as does a power switch for the Pi which is wired to a USB charger mounted on a trailing mains socket inside the case. The composite video from the Pi is wired to the TV’s AV in video socket.