Sensing, Connected, Utility Transport Taxi For Level Environments

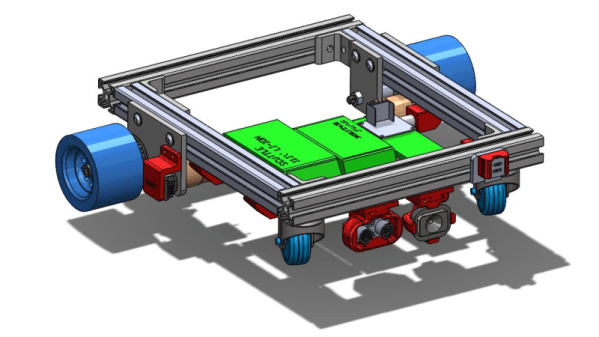
If that sounds like a mouthful, just call it SCUTTLE – the open-source mobile robot designed at Texas A&M University. SCUTTLE is a low cost (under $350) robot designed for teaching Aggies at the Multidisciplinary Engineering Technology (MXET) program, where it is used for in-lab lessons and semester projects for the MXET 300 – Mobile Robotics undergraduate course. Since it is designed for academic purposes, the robot is very well documented, making it easy to replicate when you follow the instructions. In fact, the team is looking for others to build SCUTTLE’s and give them feedback in order to improve its design.

Available on the SCUTTLE website are a large collection of videos to walk you through fabrication, electronics setup, robot assembly, programming, and robot operation. They are designed to help students build and operate the mobile robot within one semester. Most of the mechanical and electronics parts needed for the robot are off-the-shelf and easy to procure and the rest of the custom parts can be easily 3D printed. Its modular design allows you the freedom to try different options, features and upgrades. SCUTTLE is powerful enough to carry a payload up to 9 kg (20 pounds) allowing additional hardware to be added. To keep cost low and construction easy, the robot uses a simple, two wheel drive system, using a pair of geared motors. This forces the robot to literally scuttle in a “non-holonomic” fashion to move from origin to destination in a sequence of left / right turns and forward moves, so motion planning is interestingly tricky.

The SCUTTLE robot is programmed using Python3 running under Linux and has been tested working on either a BeagleBone Blue or a Raspberry Pi. The SCUTTLE software guide is a good place to get acquainted with the system architecture.

The standard configuration uses ultrasonic sensors for collision avoidance, a standard USB camera for vision, and encoders coupled to the wheel drive pulleys for determining position with respect to the starting origin. An optional USB LiDAR can be added for area mapping. The additional payload capability allows adding on extra sensors, actuators or battery packs.

To complement information on the website, additional resources are posted on GitHub, GrabCAD and YouTube. Building a SCUTTLE robot ought to be a great group project at maker spaces wanting to get hackers started with Robotics. We have covered many Educational Robot projects in the past, but the SCUTTLE really shines with its ability to carry a pretty decent payload at a low cost.

Continue reading “Sensing, Connected, Utility Transport Taxi For Level Environments”

Traffic Updates On The Seven Seas: Open Source Chart Plotter Using A Raspberry Pi

As the Raspberry Pi in its various forms continues to flow into the wild by the thousands, it’s interesting to see its user base expand outside beyond the hacker communities. One group of people who’ve also started taking a liking to it is sailing enthusiasts. [James Conger] is one such sailor, and he built his own AIS enabled chart plotter for a fraction of the price of comparable commercial units.

AIS transponders in the Mediterranean. VesselFinder

Automatic Identification System (AIS) is a GPS tracking system that uses transponders to transmit a ship’s position data to other ships or receiver stations in an area. This is used for collision avoidance and by authorities (and hobbyists) to keep an eye on shipping traffic, and allow for stricken vessels to be found easily. [James]’ DIY chart plotter overlays the received AIS data over marine charts on a nice big display. A Raspberry Pi 3B+, AIS Receiver Hat, USB GPS dongle and a makes up the core of the system. The entire setup cost about $350. The Pi runs OpenCPN, an open source chart plotter and navigation software package that [John] says is rivals most commercial software. As most Pi users will know the SD card is often a weak link, so it’s probably worth having a backup SD card with all the software already installed just in case it fails during a voyage.

We’ve seen AIS receiver stations built using the RTL-SDR, as well as a number of projects around the AIS equivalent in aviation, ADS-B. Check out [John]’s video after the break. Continue reading “Traffic Updates On The Seven Seas: Open Source Chart Plotter Using A Raspberry Pi”

Ambitious LED Cube Provides Endless Video Game Scrolling; Plays Castlevania

LED cubes are all the rage right now, and rightly so given the amount of work that goes into them and the interesting things people find to do with them. Not content to make yet another position-sensitive display or an abstract design, though, [Greig Stewart] opted for something a bit more ambitious: an LED cube with a playable game of Castlevania.

As ambitious projects often do, this one required leveraging the previous art, some of which we’ve featured before. [Greig] pulled inspiration and information from cube builders like [polyfloyd], [Greg Davill], and [kbob] to put the six 64-LED matrix panels to work. Getting the structural elements figured out was an early stumbling block, but [Greig] pulled it off with 3D-printed brackets and a hinge that’s a work of art in itself; the whole thing looks like something the Borg would have built. The Raspberry Pi inside made a Gameboy emulator possible, and his first stab at it was to have six different games running at once, one on each panel. He settled on just one game, the classic side-scroller Castlevania, played on just four of the panels. Some wizardry was required to de-scroll the game so that the character walks around the cube rather than having the background scroll; you can check out the results in the clip below.

Currently, the cube sits on a lazy susan with a small motor controlling the swiveling in response to a foot control. [Greig] wants to put the motor under control of the game so that physical scrolling is synced with gameplay; we heartily endorse that plan and look forward to the results.

Continue reading “Ambitious LED Cube Provides Endless Video Game Scrolling; Plays Castlevania”

Raspberry Pi NAS Makes Itself At Home In Donor PC

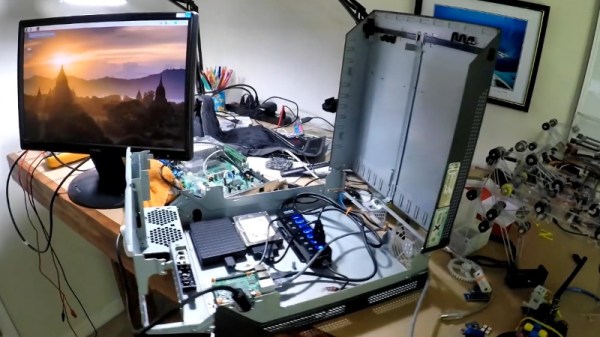
It’s safe to say that most of us have at least one Raspberry Pi hanging from a USB cable someplace, silently hammering away at some unglamorous task that you’d rather not do on a “real” computer. With as cheap as they are, it’s not like there’s a big concern about where it sets up shop. But if you’re like [Jeremy S. Cook] and want your $35 Linux computer to be a permanent member of the family, then his tips on turning an old PC into a gloriously overkill Pi NAS may be of interest.

The main component [Jeremy] salvages from the old Lenovo desktop PC is, obviously, the case itself. Stripped of its original components, the case gives him plenty of room to mount the Pi as well as a couple of hard drives and a powered USB hub. To prevent the bottom of the Raspberry Pi from shorting out against the metal computer case, he designed and 3D printed a mount for it. Everything else is held down with hook and loop fastener, making it quick and easy to move things around and make adjustments.

While it might not be strictly necessary, [Jeremy] also took the time to salvage the computer’s old heatsink. Being far too large to fit on the Pi as-is, he ran a line down the back of it with his mill and snapped it in half. He uses a bit of thermal tape to hold the bisected heatsink onto the Pi’s SoC, with a couple pieces of electrical tape to make sure it doesn’t short out on anything.

Raspberry Pi NAS builds are exceptionally popular, and we’ve seen more than we can count over the years. You can build one out of parts from IKEA, and if you don’t mind plastic, you can always 3D print the whole thing. If you really want to go minimal, you can even hang some files on the network with little more than a Pi Zero stuck into a USB port.

Continue reading “Raspberry Pi NAS Makes Itself At Home In Donor PC”

Be Anyone Or Anything With Facial Projection Mask

In the market for a low-poly change to your look? Hate the idea of showing up for a costume party only to find out someone is wearing the same mask as you? Then this face changing front-projection mask may be just the thing for you.

To be honest, we’re not sure just how much [Sean Hodgins]’ latest project has to do with cosplay. He seems to be making a subtle commentary about dealing with life in the surveillance state, even though this is probably not a strategy for thwarting facial-recognition cameras. [Ed Note: Or maybe it’s just Halloween?]

The build consists of a Raspberry Pi and a pico projector of the kind we’ve seen before. These are mated together via a custom PCB and live inside a small enclosure that’s attached to the end of a longish boom. The boom attaches to the chin of 3D-printed mask, which in turn is connected to the suspension system of a welding helmet. Powered by a battery pack and controlled by a smartphone app, the projector throws whatever you want onto the mask – videos, effects, even images of other people. Even with some Photoshop tweaks to account for keystone distortion from the low angle of projection, there’s enough distortion that the effect is more artistic than masquerade. But honestly, having your face suddenly burst into flames is pretty cool. We just wonder what visibility is like for the wearer with a bright LED blasting into your eyes.

As a bonus, [Sean] has worked this build into a virtual treasure hunt. Check out 13thkey.com and see what you can make from the minimal clues there.

Continue reading “Be Anyone Or Anything With Facial Projection Mask”

Mozilla WebThings: An Open Platform For Building IoT Devices

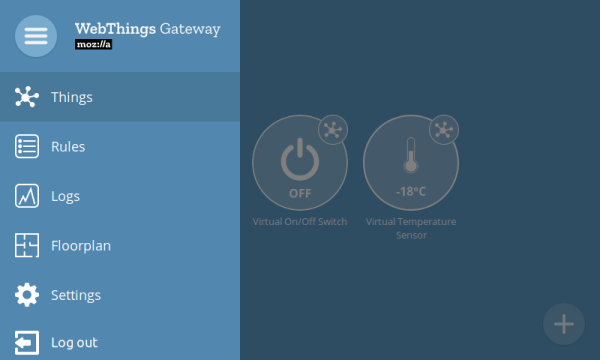
Mozilla recently officially released their IoT platform. This framework comes with “Gateway” software that can run on a Raspberry Pi and a framework that can run on any number of devices.

As we’ve seen, IoT is a dubious prospect for consumers. When you throw in all the privacy issues, support issues, and end-of-life issues; it gets even worse. Nobody wants their light bulbs to stop working because a server in faraway land shut down, but that’s an hilariously feasible scenario.

WebThings comes with a lot out of the box. It comes with a user interface, logging, rules, and an easy-to-understand API. Likewise the actual framework allows for building on many common devices and can be written in Node, Python, Java, Rust, Micropython, and used as an Arduino library. This opens it up for everything from a eBay ESP32 to a particle board.

We’ve started to notice some projects that use it trickling in on the tip line and on hackaday.io. We’re interested to see what kind of community grows around this, and are curious if it won’t be too long before easy-to-hack kits start showing up on your favorite online retailers.

There’s good documentation and of course, being open source, you can check out the source for yourself.

Simple Seismic Sensor Makes Earthquake Detection Personal

When an earthquake strikes, it’s usually hard to miss. At least that’s the case with the big ones; the dozens or hundreds of little quakes that go largely unnoticed every day are interesting too, and make sense to track. That’s usually left to the professionals, with racks of sensitive equipment and a far-flung network of seismic sensors. That doesn’t mean you can’t keep track of doings below your feet yourself, with something like this DIY seismograph.

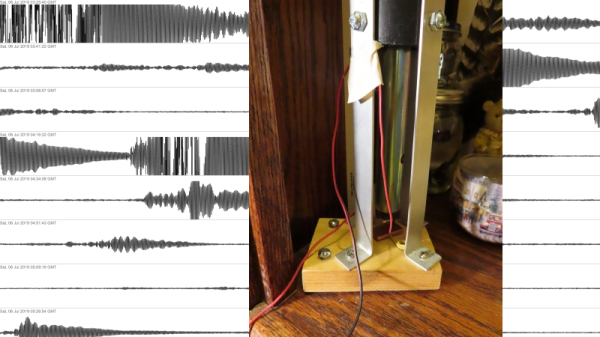
Technically, what [Alex] built is better called a “seismic detector” since it’s not calibrated in any way. It’s just a simple sensor for detecting ground vibrations, whether they be due to passing trucks or The Big One. [Alex] lives in California, wedged between the Hayward, Calaveras, and San Andreas faults in San Jose, so there is plenty of opportunity for testing his device. The business end is a simple pendulum sensor, with a heavy metal bob hanging from a long wire inside a length of plastic pipe. Positioned close to the bob is a copper plate; the bob and the plate form an air-dielectric variable capacitor that controls the frequency of a simple 555 oscillator. The frequency is measured by a PIC microcontroller and sent to a Raspberry Pi, which displays the data on a graph. You can check in on real-time seismic activity in San Jose using the link above, or check out historical quakes, like the 7.1 magnitude Ridgecrest quake in July. [Alex]’s sensor is sensitive enough to pick up recent quakes in Peru, Fiji, and Nevada, and he even has some examples of visualizing the Earth’s core using data from the sensor. How cool is that?

We’ve seen other seismic detectors before, like this piezo-based device, or even one made from toilet parts. We like the simplicity of the capacitive sensor [Alex] used, though.