For a while now, Mac Pro towers have had the nickname “cheese grater” because of their superficial resemblance to this kitchen appliance. Apple has only been a company since the 70s, though, and is much newer than one of its historic rivals, IBM. In fact, IBM is old enough to have made actual cheese-related computers as far back as the 1910s, and [Hand Tool Rescue] recently obtained one of these antique machines for a complete restoration.
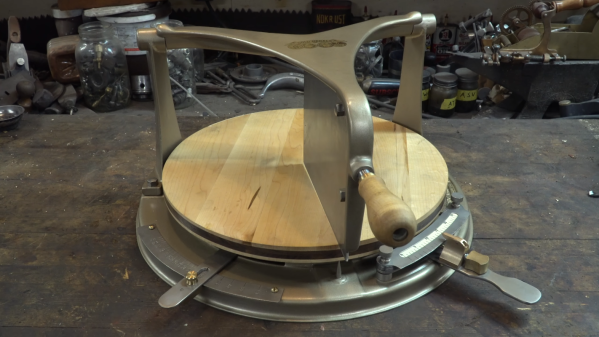
The tool arrived to the restoration workshop in a state so poor that it was difficult to tell what many of the parts on the machine did except for the large cleaver at the top. The build starts with a teardown to its individual parts, cleaning and restoring them to their original luster, machining new ones where needed, and then putting it all back together. The real mystery of this build was what the levers on the underside of the machine were supposed to do, but after the refurbishment it was discovered that these are the way that portions the cheese wheel would be accurately sized and priced before a cut was made.
By placing a section of a wheel of cheese on the machine and inputting its original weight with one of the levers, the second lever is adjusted to the weight of cheese that the customer requested, which rotates the wheel of cheese to the correct position before a cut is made. To us who are spoiled with a world full of electronic devices, a mechanical computer like this seems almost magical, especially with how accurate it is, but if your business in the 1910s involved cheese, this would have been quite normal. In fact, it would be 50 more years before IBM created the machines that they’re more commonly known for.
Thanks to [Jasper Jans] for the tip!


 Using a combination of OCR and manual transcription to retrieve the code, [Mattis] took a deep dive into cleaning up the errors and solving a whole lot of system library and linking issues. Adding to the difficulty is that his PDP-11 is slightly different from the one used in 1974 when this port was written.


