Faux-Retro “Tape” Player Runs On ESP32 And 80s Vibes

At first glance, this gorgeous retro-styled audio player built by [Max Kern] could absolutely pass for the genuine article. But then you take a closer look and realize that the “tape” it’s playing is actually an animation running on a 320 x 240 IPS display, and the Play and Rewind buttons on the front aren’t the chunky electromechanical affairs of yesteryear but actually cleverly repurposed MX keyboard switches.

By now you’re probably realizing that this player is quite a bit smaller than you first imagined, which in turn, means that it even its case is a modern fabrication. While it might perfectly encapsulate the look and feel of a piece of 1980s consumer electronics, it was squirted out on a thoroughly modern desktop 3D printer.

Even so, [Max] made sure to include draft angles in the CAD design and and a distinctive separation line so the case looked like it was injection molded. Following similar logic, he decided against using a modern rechargeable battery pack to power the electronics, opting instead for a more era-appropriate set of AA batteries.

In terms of hardware, the custom PCB is home to an ESP32 WROOM, a MAX98357A I2S audio amplifier, a FT231XS USB-to-serial chip, with enough passives and regulators to keep them all well fed and happy. The ESP32 has more than enough computational horsepower to chew through MP3 files, which are conveniently loaded via an SD slot built into the side of the player. As the player was actually intended for audio books, onboard playback is limited to a mono speaker; though there is a 3.5 mm audio jack to plug in a pair of headphones for when the built-in speaker isn’t up to the task.

Check out the video after the break to see how the player is assembled, as well as a demonstration of its simple three-button user interface. It looks like a joy to use, though the lack of fast forward and rewind sound effects took us a bit by surprise given the otherwise impeccable attention to detail. We’ll assume there’s some technical limitation that makes this particularly difficult to implement, and that their absence is currently keeping [Max] up at night.

As impressive as the final product is, we can’t say it’s a surprise. Frankly, we wouldn’t expect anything less from [Max] at this point. His adaptive OLED macro pad wowed us back in 2020, and his ZeroBot is still one of the slickest designs for a DIY two-wheeled robots we’ve ever seen.

Continue reading “Faux-Retro “Tape” Player Runs On ESP32 And 80s Vibes”

Raspberry Pi Simulates The Real Analog TV Experience

If you’ve laid hands on a retro analog TV, have the restoration bug, and you plan to make the final project at least somewhat period-correct, you face a bit of a conundrum: what are you going to watch? Sure, you can serve up just about any content digitally these days, but some programs just don’t feel right on an old TV. And even if you do get suitably retro programming, streaming isn’t quite the same as the experience of tuning your way through the somewhat meager selections as we did back in the analog days.

But don’t worry — this Raspberry Pi TV simulator can make your streaming experience just like the analog TV experience of yore. It comes to us from [Rodrigo], who found a slightly abused 5″ black-and-white portable TV that was just right for the modification. The battery compartment underneath the set made the perfect place to mount a Pi, which takes care of streaming a variety of old movies and shorts. The position of the original tuning potentiometer is read by an Arduino, which tells the Pi which “channel” you’re currently tuned to.

Composite video is fed from the Pi’s output right into the TV’s video input, and the image quality is just about what you’d expect. But for our money, the thing that really sells this is the use of a relay to switch the TV’s tuner back into the circuit for a short bit between channel changes. This gives a realistic burst of static and snow, just like we endured in the old days. Hats off to [Rodrigo] for capturing everything that was awful about TV back in the day — Mesa of Lost Women, indeed! — but still managing to make it look good.

Continue reading “Raspberry Pi Simulates The Real Analog TV Experience”

Framework Board Gets This Round Display PC Rolling

The Framework laptop is already a very exciting prospect for folks like us — a high-end computer that we can actually customize, upgrade, and repair with the manufacturer’s blessing? Sounds like music to our ears. But we’re also very excited about seeing how the community can press the modular components of the Framework into service outside of the laptop itself.

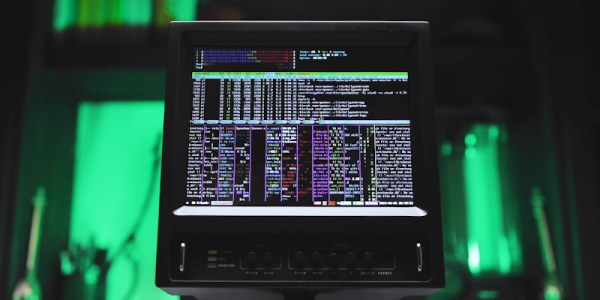
A case in point, this absolutely gorgeous retro-inspired computer built by [Penk Chen]. The Mainboard Terminal combines a Framework motherboard, five inch 1080 x 1080 round LCD display, and OLKB Preonic mechanical keyboard into a slick 3D printed enclosure that’s held together with magnets for easy access. Compared to the Raspberry Pi that we usually find tucked into custom computer builds like this, the Framework board offers incredible performance, not to mention the ability to run x86 operating systems and software.

[Penk] has Ubuntu 22.04 LTS loaded up right now, and he reports that everything works as expected, though there are a few xrandr commands you’ll need to run in order for the system to work properly with the circular display. The standard Ubuntu UI doesn’t look particularly well suited to such an unusual viewport, but we imagine that’s an issue you’ll have to learn to live with when experimenting with such an oddball screen.

It was just a few weeks ago that we brought you word that Framework was releasing the mechanical drawings for their Mainboard module, and we predicted then that it would be a huge boon to those building bespoke computers. Truth be told we expected a cyberdeck build of some sort to be the first one to hit our inbox, but you certainly won’t catch us complaining about seeing more faux-vintage personal terminals.

Verbot Goes To The Dark Side

What happens to old, neglected 1980s toy robots? According to the [Randi Rain], they turn to the dark side! Way back in the ’80s, Tomy had an entire line of robots — from keychain wind-up toys to rolling, talking machines almost 2 feet tall. Tucked into the middle of this line was Verbot. Verbot’s claim to fame is that it is a voice-controlled robot. More than that, it was speaker-dependent. Train the robot with commands like “go forward” and then watch as it responds to your every command.

As you might guess, the speech recognition wasn’t great by today’s standards. Recognition was handled by a Microcontroller — a Mitsubishi product that was possibly a mask programmed 8051 variant. Pretty novel for an 80s toy — in fact, there’s a patent for it.

Continue reading “Verbot Goes To The Dark Side”

A Great Resource For The Would-Be Pinball Machine Builder

Those of us beyond a certain age will very likely have some fond memories of many an hour spent and pocket money devoured feeding the local arcade pinball machine. At one time they seemed to be pretty much everywhere, but sadly, these days they seem to have largely fallen out of favour and are becoming more of speciality to be specifically sought out. Apart from a few random ones turning up — there’s a fun Frankenstein-themed machine in the Mary Shelley Museum in Bath, England — a trip to a local amusement arcade is often pretty disappointing, with modern arcade machines just not quite scratching that itch anymore, if you ask us. So what’s an old-school hacker to do, but learn how to build a machine from scratch, just the way we want it? A great resource for this is the excellent Pinball Makers site, which shows quite a few different platforms to build upon and a whole ton of resources and guides to help you along the way.

Continue reading “A Great Resource For The Would-Be Pinball Machine Builder”

Polar Planimeter Quantifies Area By Plotting Perimeter

These days it’s hard to be carry the label “maker” or “hacker” without also being proficient in some kind of CAD- even if the C is for Cardboard. But before there was CAD there was Drafting and its associated arts, and one couldn’t just select a shape and see its area in the square unit of your choice. So how could an old school draftsman figure out the area of complex shapes? [Chris Staecker] introduces us to the polar planimeter, a measuring tool created specifically for the purpose and explained in full in the video below the break.

The polar planimeter being discussed is a higher end unit from the 1960’s. Interestingly, the first polar planimeters were invented in the early 19th century even before the math that describes their function was completed. A lever is placed in a fixed position on one end and into the planimeter on the other. The planimeter itself has another arm with a reticle on it. The unit is zero’d out with a button, and the outline of the shape in question is traced in a clockwise fashion with the reticle.

What makes the polar planimeter capable of measuring in multiple dimensions is the fixed arm. The fixed arm pivots around, allowing the planimeter to track angle changes which affects the output. So, the planimeter isn’t just measuring the length of the perimeter, but the size of the perimeter. The final measurement is output in square inches.

Overall it’s a really slick tool we didn’t know existed, and it’s fascinating to see how such problems were solved before everything could be done with a mouse click or two. Be sure to check out this 100+ year old reference set to round out your knowledge of past knowledge. Thanks to [Zane] for the great tip!

Continue reading “Polar Planimeter Quantifies Area By Plotting Perimeter”

retro breadboard

Retro Breadboard Gives Up Its 1960s Secrets

When we see [Ken Shirriff] reverse engineering something, it tends to be on the microscopic level. His usual forte is looking at die photos of strange and obsolete chips and figuring out how they work. And while we love those efforts, it’s nice to see him in the macro world this time with a teardown and repair of a 1960s-era solderless breadboard system.

If you’d swear the “Elite 2 Circuit Design Test System” featured in [Ken]’s post looks familiar, it’s probably because you caught his partner-in-crime [CuriousMarc]’s video on the very same unit, an eBay score that arrived in non-working condition. The breadboard, which retailed for $1,300 in 1969 — an eye-watering $10,000 today — was clearly not aimed at the hobbyist market. Truth be told, we didn’t even know that solderless breadboards were a thing until the mid-70s, but live and learn. This unit has all the bells and whistles, including three variable power supplies, an array of switches, buttons, indicator lamps, and jacks for external connections, and a pulse generator as well as a legit function generator.

Legit, that would be, if it actually worked. [Ken]’s contribution to the repair was a thorough teardown of the device followed by reverse-engineering the design. Seeing how this thing was designed around the constraints of 1969 technology is a real treat; the metal can transistor and ICs and the neat and tidy PCB layout are worth the price of admission alone. And the fact that neon lamps and their drivers were cheaper and easier to use than LEDs says a lot about the state of the art at the time.

As for the necessary repairs, [Marc]’s video leaves off before getting there. That’s fine, we’re sure he’ll put [Ken]’s analysis to good use, and we always enjoy [Marc]’s video series anyway. The Apollo flight comms series was a great one, too. Continue reading “Retro Breadboard Gives Up Its 1960s Secrets”