Brain Transplant Makes One Arcade Machine Play Games From Another

We’re used to games consoles in which the same hardware plays a variety of different games, but if we were to peer inside arcade cabinets of an older vintage we’d find custom boards unique to every game. Some boards from the same manufacturers shared common hardware traits even if they weren’t identical though, and [twistedsymphony] has taken advantage of this to make one vintage Taito game — Gun & Frontier — run on the hardware for another, Ah Eikou no Koshien. It’s a fascinating tale across a forum thread, that’s well worth a read even if you will never touch a vintage arcade board.

We might expect that the tool of choice would be a logic analyser or similar, but unexpectedly the solution to this hack was found in MAME. The arcade emulator conceals a wealth of information about these boards, from which you can discover their differences and try out possible solutions. The hardware hacks are surprisingly straightforward, a few bodge wires and an extra address line for a larger ROM. A programmable logic array required dumping and rewriting to fix a graphics corruption issue and a little bit of ROM tweaking after emulating a controller problem in MAME was required, but it seems that yes, one game can run on another. Certainly less painful than the Taito hack that required a chip to be decapped.

[via r/ReverseEngineering]

How To Keep Unique Equipment Running When Parts Run Out

[JGlass] deals with public-facing technology, which he says includes things like theatre equipment, retail displays, and museum displays. Many of these pieces of technology are literally one-of-a-kind devices, even if they were constructed from what was once off-the-shelf, commercially available parts. When these machines need servicing, replacement parts aren’t always available, and reverse engineering comes in handy. He recently began documenting exactly how to approach this process by using the identification and replacement of an obsolete 7-segment industrial display as an example.

The particular part shown is the Lascar EM32-4-LED, which up and died in a unique piece of equipment. The trouble is that the EM32-4-LED is out of production and unobtainable, and the Programmable Logic Controller (PLC) that drives the whole thing is a black box that cannot be modified. It’s very good news that a datasheet exists, but that’s often just a starting point. To create a one-off, drop-in solution requires a combination of research, troubleshooting, and design work.

To do this, [JGlass] starts off by walking through datasheet elements and explains that it’s important to build a high level understanding of function first, then drill down into details, and always be ready to verify, challenge, or throw out one’s assumptions. After establishing a high level understanding comes matching physical evidence to things like block and functional diagrams, then cracking open the faulty component to see if anything else can be learned. Only then are multimeters and probes taken out for more active research. All of this sleuthing must always be done with the end goal firmly in mind: creating a new device that acts like the one being replaced. Without focus, one can easily get lost in details and unknowns.

Reverse Engineering is a process, and the more tools, the better. If you missed our earlier post about a hacker’s guide to JTAG, here’s your chance to check it out and be all the more prepared for the next time you need to do some electron detective work of your own.

Reverse Engineering A Saab’s In-Dash Display

For [Leigh Oliver], there’s something undeniably appealing about the green on black instrumentation of the 2003 Saab 9-3 Gen2. Perhaps it’s because the Infotainment Control Module 2 (ICM2) screen brings a bit of that classic Matrix vibe to the daily commute. Whatever the reason, it seemed the display deserved better than to be stuck showing the nearly 20 year old stock user interface. Luckily, you can control it via I2C.

Though as you might expect, that fact wasn’t obvious at first. [Leigh] had to start by taking the ICM2 apart and reverse engineering the display board. With a multimeter and high resolution photographs of both sides of the PCB, all of the traces were mapped out and recreated in KiCAD. This might not have been strictly necessary, but it did serve as good practice for using KiCAD; a worthwhile tip for anyone else looking to build practical experience creating schematics.

With everything mapped out, [Leigh] was able to connect a BusPirate V3 up to the board and pretty quickly determine it was using I2C to control the display. As far as figuring out how to repurpose existing displays goes, this was perhaps the best possible scenario. It even allowed for creating a display library based on Adafruit_GFX which offers graphical capabilities far beyond what the ICM2 module itself is capable of.

Even with so much progress made, this project is really just getting started. [Leigh] has managed to put some impressive imagery on the black and green Saab display, but the hardware side of things is still being worked on. For example, there’s some hope that an I2C multiplexer would allow the display to easily and quickly be switched between “stock” mode and whatever enhanced version comes about thanks to the new libraries and an ESP8266 hiding behind the dashboard.

If you don’t have a sufficiently vintage Saab to take advantage of this project, don’t worry. Tapping into the OBD port with an OLED display can get you similar results on a wide range of vehicles.

Reverse Engineering An RGB Keyboard Under Linux

Hardware support under Linux is far better than it ever has been in the past. These days, most things “just work” out of the box, and you probably won’t have to compile any custom kernel modules. Certainly a far cry from where things were a decade ago. But that doesn’t mean everything will work to 100% of its abilities. Take for example, the Duck keyboard that [Cynthia Revström] has. Sure it works as a basic keyboard under any OS, but getting those fancy RGB LEDs working is another story entirely.

Don’t get the wrong idea here, [Cynthia] isn’t just trying to get the keyboard to flash along to music; the goal was to use the RGB lighting of the Ducky keyboard for notifications that the user can’t possibly ignore. Even the most laser-focused among us would have a hard time not noticing that the entire keyboard is blinking red. But the “DuckyRGB” software that you need to do something like that is Windows-only and apparently distributed via a sketchy Google Drive link. Yikes.

The first step to creating an alternative was to spin up a Windows VM and install DuckyRGB. From there, Wireshark could listen in between the virtual computer and the Ducky keyboard to see what the software was sending over the wire. After identifying a version number being sent in the clear, [Cynthia] was able to isolate the LED commands by searching for the hex color codes. From there, it was a relatively simple matter of writing some glue code to connect it up to an alert service and get notifications going.

There was only one problem; the keyboard didn’t work anymore. Turns out the tool that [Cynthia] wrote to control the keyboard’s LEDs was claiming the device so the kernel couldn’t access it for normal input. It took a detour with HIDAPI to get everyone playing together nicely, and now changing the color of your Ducky keyboard on Linux doesn’t turn it into a paperweight.

Even if you don’t have a Ducky keyboard, or aren’t particularly interested in having its LEDs blinked at you if you do, this project is a phenomenal example of practical USB reverse engineering. [Cynthia] says the inspiration for this project came from friend [Ben Cox], who’s write-up on creating USB userspace drivers we covered last year. If you’ve got and old USB gadget with Windows-only drivers, maybe it’s time you take a crack at unlocking it.

Bike Lock Secures Car

[Buttim] loses his car a lot, which might sound a little bit like the plot from an early-00s movie, but he assures us that it’s a common enough thing. In a big city, and after several days of not driving one’s car, it can be possible to at least forget where you parked. There are a lot of ways of solving this problem, but the solution almost fell right into his lap: repurposing a lock from a bike share bicycle. (The build is in three parts: Part 2 and Part 3.)

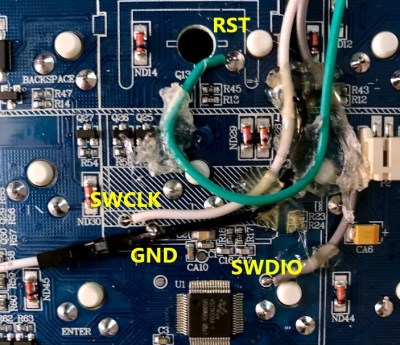
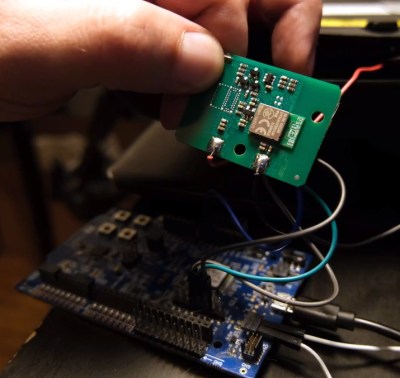
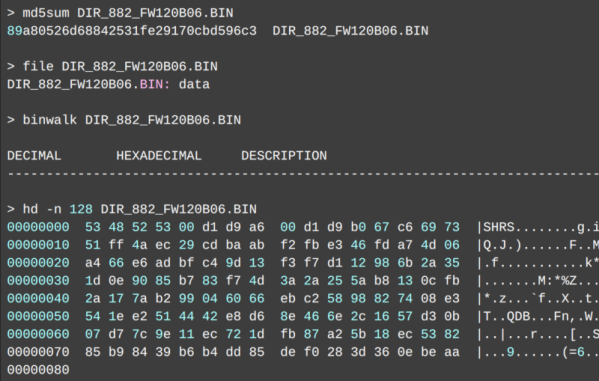
These locks are loaded with features, like GPS, a cellular modem, accelerometers, and in this case, an ARM processor. It took a huge amount of work for [Buttim] to get anything to work on the device, but after using a vulnerability to dump the firmware and load his own code on the device, spending an enormous amount of time trying to figure out where all the circuit traces went through layers of insulation intended to harden the lock from humidity, and building his own Python-based programmer for it, he has basically free reign over the device.

To that end, once he figured out how it all worked, he put it to use in his car. The device functions as a GPS tracker and reports its location over the cellular network so it can’t become lost again. As a bonus, he was able to use the accelerometers to alert him if his car was moving without him knowing, so it turned into a theft deterrent as well. Besides that, though, his ability to get into the device’s firmware reminded us of a recent attempt to get access to an ARM platform.

A Hacker’s Guide To JTAG

If you’re reading Hackaday, you’ve almost certainly heard of JTAG. There’s an excellent chance you’ve even used it once or twice to reflash an unruly piece of hardware. But how well do you actually know JTAG? More specifically, do you know how useful it can be when reverse engineering hardware?

Whether you’re a JTAG veteran or a novice, this phenomenal guide written by [wrongbaud] is sure to teach you a thing or two. Starting with a low-level explanation of how the interface actually works, the guide takes you though discovering JTAG ports on unknown targets, the current state-of-the-art in open source tools to interact with the device, and finally shows a real-world example of pulling and analyzing a gadget’s firmware.

There’s no way to do his write-up justice with a breakdown or a summary, so we won’t even try. Just get comfortable, maybe grab a drink, and dive in. It’s certainly not a short read, but there isn’t a wasted word on the page. Every piece of the puzzle, from how to figure out an unlabeled pinout to determining the instruction length, is explained in exactly the amount of detail you’re looking for. This is a guide for hackers written by a hacker, and it shows.

It will probably come as no surprise to find this isn’t the first time [wrongbaud] has done a deep dive like this. Over the last few months we’ve been covering his series of practical reverse engineering guides, and each one has been an invaluable resource. Perfect study guides for when a global pandemic has you stuck in the house.

Linux Fu: Tracing System Calls

One of the nice things about Linux and similar operating systems is that you can investigate something to any level you wish. If a program has a problem you can decompile it, debug it, trace it, and — if necessary — even dig into the source code for the kernel and most of the libraries the program is probably using. However, the tools to do this aren’t ones you use every day. One very interesting tool is strace. Using it you can see what system calls any program makes and that can sometimes give you important clues about how the program works or, probably more often, why it doesn’t work.

Let’s consider the least complex use of the command. Suppose you want to make symlink from testxmit.grc to the /tmp directory. That command is simple:

ln -sf testxmit.grc /tmp

But if you tell strace to run it, the command becomes:

strace ln -sf testxmit.grc /tmp

You might want to redirect the output to a file using the shell or the -o option, though. Some commands generate a lot and often the first page or two of output isn’t really what you care about anyway. Continue reading “Linux Fu: Tracing System Calls”