8-bit Video Wall Made From 160 Gaming Keyboards

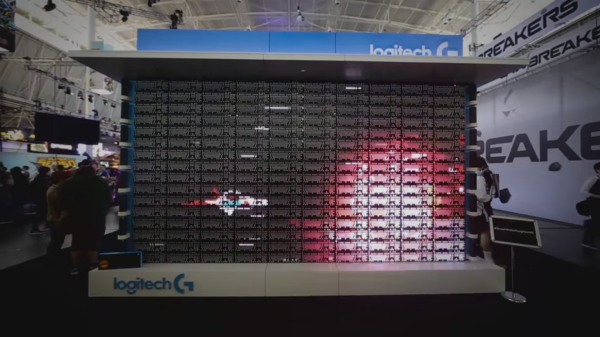
Well this is something we haven’t seen before. A video wall An 8-bit style video wall made from 160 RGB illuminated gaming keyboards.

On display at the PAX East gaming expo, the keys on 160 Logitech keyboards make up the “pixels” of a video wall showing a short film inspired from side-scroller video games. It’s the work of the production company iam8bit. Details on the system are scant, but we can learn a little from close observation of the video.

Continue reading “8-bit Video Wall Made From 160 Gaming Keyboards”

Beautiful Weather Station Uses Acrylic, RGB LED, And And ESP8266

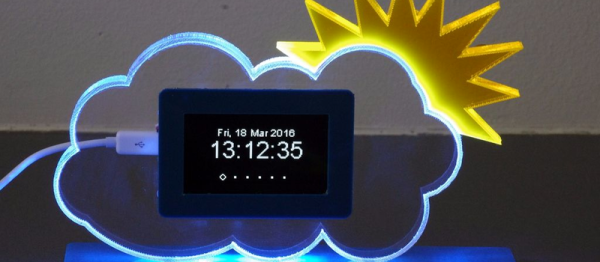
Everyone knows there’s form and there’s function. It isn’t fair, but people do judge on appearance, sometimes even overriding all other concerns. So while your Makerspace buddies might be impressed by your weather station built on a breadboard, your significant other probably isn’t. [Dennisv15] took an ordinary looking weather station design with a 0.96″ display and turned into an attractive desk piece with a much larger display and an artistic–and functional–enclosure.

The acrylic cloud lights up thanks to an RGB LED Neopixel strip and can indicate weather trends at a glance: red for warmer, blue for colder, flashing for inclement weather. The project was truly multidisciplinary, using a laser cutter to produce the body and the stand, a 3D-printed display bezel, and a PCB to make it easy to build.

Continue reading “Beautiful Weather Station Uses Acrylic, RGB LED, And And ESP8266”

Controlling RGB LEDs With The Pi Zero

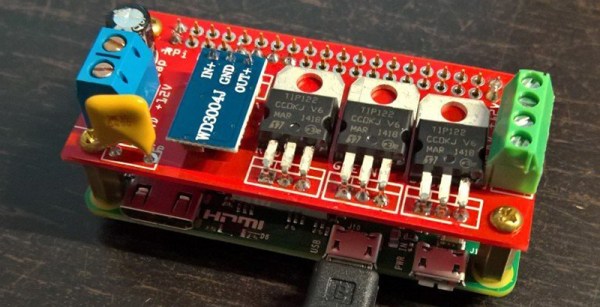
The Pi Zero is a great piece of hardware, even if you’re not designing another USB hub for it. [Marcel] wanted to control a few RGB LED strips from his phone, and while there are a lot of fancy ways you can do this, all it really takes is a Pi Zero and a few parts that are probably already banging around your parts drawers.

This isn’t a project to control individually addressable RGB LEDs such as NeoPixels, WS2812s, or APA102 LEDs. This is just a project to control RGB LEDs with five four connectors: red, green, blue, power, and or ground. These are the simplest RGB LEDs you can get, and sometimes they’re good enough and cheap enough to be the perfect solution to multi-colored blinkies in a project.

Because these RGB LEDs are simple, that means controlling them is very easy. [Marcel] is just connecting a transistor to three of the PWM pins on the Pi and using a TIP122 transistor to drive the red, green, and blue LEDs. You’ve got to love those TIPs package parts!

Control of the LEDs is accomplished through lighttpd. This does mean a USB WiFi dongle is required to control the LEDs over the Internet, but it is so far the simplest way we’ve seen to add multicolor blinkies to the web.


Raspberry_Pi_LogoSmall

The Raspberry Pi Zero contest is presented by Hackaday and Adafruit. Prizes include Raspberry Pi Zeros from Adafruit and gift cards to The Hackaday Store!
See All the Entries || Enter Your Project Now!

Building The World’s Smallest RGB LED Cube

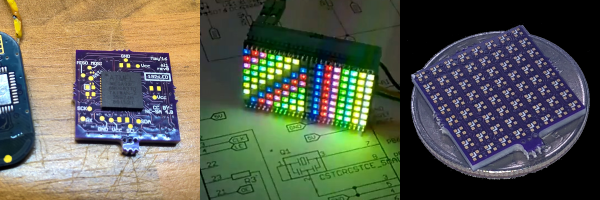
What’s the smallest RGB LED cube? A 1x1x1 cube is easy, but it’s a stupid joke and we’ve heard it before. No, to build the smallest LED cube, you’ll have to stuff 64 RGB LEDs into a cubic inch, like [Hari] did with his miniscule LED cube.

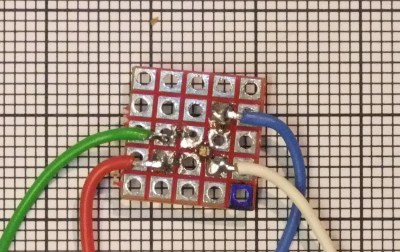
A single column of Charlieplexed LEDs. Note the resistor for scale.

One might think that individually addressable RGB LEDs are the way to go with an LED cube this small. Anything else would hide the LEDs behind a mess of wires. This isn’t the case with [Hari]’s LED cube – he’s using standard surface mount RGB LEDs for this build. But how is he connecting the things?

The entire build was inspired by the a much earlier project, the Charliecube. This LED cube, like [Hari]’s uses Charlieplexing to condense all the connections for a column of LEDs to only four wires. Repeat that sixteen times, and [Hari] built himself a tiny, one-inch cube of glowey goodness.

The cube itself was built with a PCB backplane designed in Eagle and fabbed at OSHPark. The LEDs are driven by an Arduino Nano. If you’d like to build your own, or you’re a masochist for dead bug soldering, you can grab all the design files over on [Hari]’s hackaday.io project page.

Continue reading “Building The World’s Smallest RGB LED Cube”

Recursive Soldering Iron Hacking

We’ve all done it. You’re walking out the door or maybe you’ve even gotten on the road when the question hits, “Did I leave the [coffee pot | stove | hair curler | soldering iron ] on?” [Daniel Johnson’s] problem was even worse. He couldn’t tell if his Hakko-936 soldering iron was off because the LED indicator wasn’t always on. Instead it flashed. He fixed that problem and along the way hacked his battery powered soldering iron since he was out of batteries. Now that’s perseverance.

Hacked Soldering Iron to Hack Soldering Iron
Soldering Iron Hack Recursion

The Hakko’s LED turned on whenever the power turned on to heat the tip. That was about every 5 seconds once the tip was hot. But just as a watched pot never boils, a watched LED never seems to flash. After determining the LED was driven by a comparator he decide to unsolder it as part of his hack. He wisely decided using the Hakko on itself was not a good idea so reached for the battery-powered portable iron, which was sadly battery-free. Undaunted, he wired the portable to a power supply and when 4.5 volts didn’t melt the solder cranked it up to 6 volts.

Back to the Hakko, he replaced the red LED with a RBG LED but used only the red and green leads. The green was tied to the 24v power supply through a hefty 47k ohm resistor, and the red was tied to the comparator. A little masking tape to hold things in place and provide insulation finished the job. Now when the Hakko is on the green LED is lit and the red LED shows the heating cycle. Quite clever.

RGB LED Ceiling Display

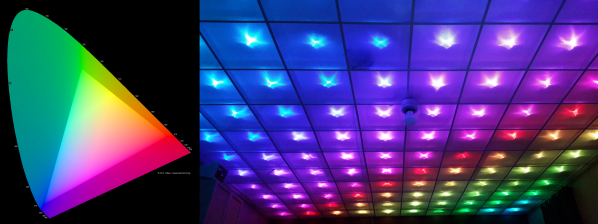
yP8PoVDisco Floor’s are passé. [dennis1a4] turned them upside down and built an awesome RGB LED ceiling display using some simple hardware and a lot of elbow grease. His main room ceiling was exactly 32 ft x 20 ft and using 2 sq. ft tiles, he figured he could make a nice grid using 160 WS2812B RGB LEDs. A Teensy mounted in the ceiling does all the heavy lifting, with two serial Bluetooth modules connected to it. These get connected to two Bluetooth enabled NES game controllers. Each of the NES controller is stuffed with an Arduino Pro Mini, a Bluetooth module, Li-Ion battery and a USB charge controller.

Bluetooth is in non-secure mode, allowing him to connect to the Teensy, and control the LEDs, from other devices besides the NES controllers. The Teensy is mounted at the centre of the ceiling to ensure a good Bluetooth link. Programming required a lot of thought and time but he did manage to include animations as well as popular games such as Snake and Tetris.

LED_Ceiling_deadbugThe hard part was wiring up all of the 160 LED pixels. Instead of mounting the 5050 SMD LED’s on PCBs, [dennis1a4] wired them all up “dead bug” style. Each pixel has one LED, a 100nF decoupling capacitor, and 91 ohm resistors in series with the Data In and Data Out pins – these apparently help prevent ‘ringing’ on the data bus. Check the video for his radical soldering method. Each SMD LED was clamped in a machine shop vice, and the other three parts with their leads preformed were soldered directly to the LED pins.

The other tedious task was planning and laying out the wiring harness. Sets of 10 LEDs were first wired up on the shop bench. He then tacked them up to the ceiling and soldered them to the 14 gauge main harness. The final part was to put up the suspended ceiling and close the 2 sq. ft. grids with opaque plastic.

[dennis1a4]  did some trials to figure out the right distance between each LED and the panel to make sure they were illuminated fully without a lot of light bleeding in to adjacent panels. This allowed him to get away without using baffles between the tiles.

Check out the video to see a cool time-lapse of the whole build.

Continue reading “RGB LED Ceiling Display”

The Ommatid Is An Awesome “Thing”

[Jonathan Foote] made a really cool device: the Ommatid spherical display and controller. Part woodworking craft project, part art, and part tremendous hack, the Ommatid is something that we don’t really have a name for. But you can watch it in action, running demo code, in a video below the break.

The sphere design started out with a “20-sided regular polyhedron” with which D&D players should be familiar, and then divided each triangular face into four more triangles. An 80-sided die? Almost. One triangle’s worth was sacrificed for the part that mounts to the base.

Each facet contains an RGB LED and an IR sensor so that it can tell when a hand is nearby. All of this input and output is run through a Raspberry Pi, so both the sensing and display interactions are easily modified. [Jonathan] runs us through the electronics, programming, and interactivity in a separate Instructable. We really like [Jonathan]’s idea of turning this device into an OSC controller / display.

Continue reading “The Ommatid Is An Awesome “Thing””