Colorful Clock

A Colorful Clock For Toddlers

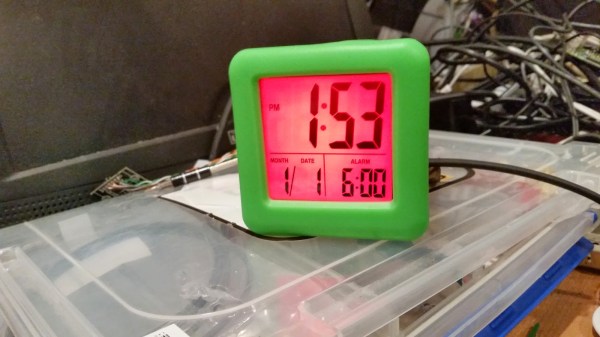
[Don] and his wife were looking for a way to teach their two-year old daughter how to tell time. She understood the difference between day and night, but she wasn’t old enough to really comprehend telling the actual time. [Don’s] solution was to simplify the problem by breaking time down into colored chunks representing different tasks or activities. For example, if the clock is yellow that might indicate that it’s time to play. If it’s purple, then it’s time to clean up your room.

[Don] started with a small, battery operated $10 clock from a local retailer. The simple clock had a digital readout with some spare room inside the case for extra components. It was also heavy enough to stay put on the counter or on a shelf. Don opened up the clock and got to work with his Dremel to free up some extra space. He then added a ShiftBrite module as a back light. The ShiftBrite is a high-brightness LED module that is controllable via Serial. This allows [Don] to set the back light to any color he wants.

[Don] already had a Raspberry Pi running his DIY baby monitor, so he opted to just hijack the same device to control the ShiftBrite. [Don] started out using a Hive13 GitHub repo to control the LED, but he found that it wasn’t suitable for this project. He ended up forking the project and altering it. His alterations allow him to set specific colors and then exit the program by typing a single command into the command line.

The color of the ShiftBrite is changed according to a schedule defined in the system’s crontab. [Don] installed Minicron, which provides a nice web interface to make it more pleasant to alter the cron job’s on the system. Now [Don] can easily adjust his daughter’s schedule via web page as needed.


SuperBowlLamp

Super Bowl Football Lamp Keeps You Informed

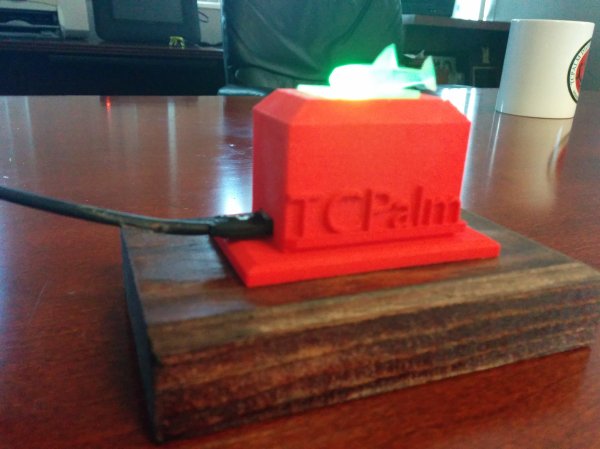
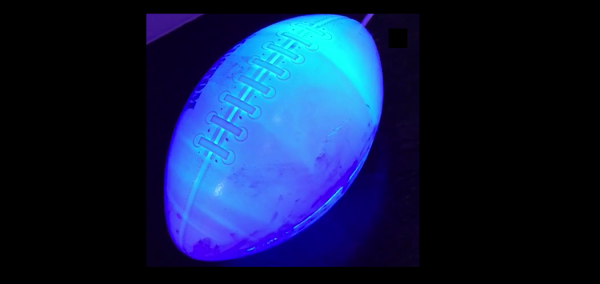
[David] loves to watch football. After his preferred team lost the playoffs, he wanted another reason to watch the big game last Sunday. He ended up building himself a football-shaped lamp that changes color based on who scored last.

[David] started with a Spark Core and a Spark Button. The Spark is the primary microcontroller and includes WiFi. The Spark Button is essentially a shield for the Spark that includes an accelerometer, some LEDs, and a few push buttons. The other part of this build was the housing. [David] used a toy football he got for free as swag from a parade.

As for the code, [David] started by first learning how to control the LEDs on the Spark Button. Then he wrote his own touchdown function to illuminate the football a specific color. Since the Spark uses the REST API, [David] is able to trigger this function by simply visiting the URL of his Spark. This makes it very simple to trigger the event.

The final part of this build was made easy thanks to IfThisThenThat (IFTTT). This is a web service that allows you to monitor and interact with various online web services. It can monitor one service, and then interact with another based on events that happen in the first service. In this case, [David] is using a “channel” added to IFTTT by ESPN. This channel can trigger when certain events happen for whatever team you specify. For this project [David] is monitoring touchdowns.

After combining all of these various services, [David] had a working light that would change colors based on which team scored. He did notice that IFTTT has anywhere between a 1 and 15 minute delay, and he hopes to improve upon this design by hooking directly to an API and skipping the extra service altogether.

Hackaday Links Column Banner

Hackaday Links: February 1, 2015

It’s Sunday evening, and that means Hackaday Links, and that means something crowdfunded. This week it’s UberBlox. It’s a modular construction system based on Al extrusion – basically a modern version of an Erector set. Random musings on the perceived value UberBlox offers in the comments, I’m sure.

[Trevor] sent in something from his Etsy shop. Normally we’d shy away from blatant self-promotion, but this is pretty cool. It’s reproductions of 1960s Lockheed flying saucer plans. We’re not sure if this is nazi moon base/lizard people from the inner earth flying saucer plans or something a little more realistic, but there you go.

3D computer mice exist, as do quadcopters. Here’s the combination. It looks like there’s a good amount of control, and could be used for some aerobatics if you’re cool enough.

Who doesn’t love LED cubes? They’re awesome, but usually limited to one color. Here’s an RGB LED cube. It’s only 4x4x4, but there’s a few animations and a microphone with a beat detection circuit all powered by an ATMega32u4.

A while ago we had a post about a solar powered time lapse rig. Time lapse movies take a while, and the results are finally in.

Hacklet 32 – LED Persistence Of Vision Displays

Blinking LEDs are good. Moving, spinning things are good too. Put them both together and you get a Persistence of Vision (POV) display. Hackers have been building these displays for years. This week’s Hacklet focuses on some of the best LED POV displays on Hackaday.io!

povtypeWe start with [EduardoZola] and POV as you type, write on the air. [Eduardo] used an Arduino Nano, a pair of 433 MHz radios, some blue LEDs and a motor to create a simple spinning display. A hall effect sensor keeps everything in sync. The entire display is powered by a 500 mAh LiPo battery. The awesome thing about this display is the interactive aspect. The transmitter module connects to a laptop via an on-board USB to serial converter. Typing into any serial terminal sends the text directly to the POV display, where the letters appear to hang in the air.


deathringNext up is [boolean] with Silent Orchestra POV aka “Death Ring”. [boolean] didn’t want to just create a POV ring, he wanted a huge 5 foot diameter display for his local Burning Man decompression. Death Ring is an aluminum ring spun by a 3HP motor. A hall effect sensor keeps everything synced up, and keeps Death Ring’s 3 horsepower motor in check. Light is provided by a PixelPusher and WS2812 RGB strips. The system is designed to be interactive, controlled with a Leap Motion controller or a Microsoft Kinect. An MPU-6050 keeps acceleration in check while processing maps video to the LED strip. An Arduino Yun allows the entire system to be controlled via WiFi. [boolean] and his team have taken Death Ring through several revisions. Judging by the quality of their aluminum welding though, they’re on the right track to an awesome end result!

locoHackaday.io power user [Davedarko] has been working on a POV display of a different sort. His Locomatrix is an 8×8 LED matrix which moves in and out on the Z axis. [Dave] originally created Locomatrix as his entry in the 2014 Hackaday Prize. We have to admit this is the first time we’ve seen this sort of display, but the idea is sound. In fact, [Bruce Land] posted in the comments to let [Dave] know that he’d seen a similar technique used with a CRT display back in 1964. We’re betting Dave’s 3D printed gears and LED matrix display will be more robust than a CRT tube slamming two and fro at several hundred pulses per minute!

CPOVFinally, we have Hackaday’s own [Mike Szczys] with CPOV – a Crappy Persistence of Vision display . CPOV is a proof of concept made from upcycled parts which [Mike] threw together in a couple of hours. He grabbed the motor from an old cassette deck, some plywood, perfboard, and of course LEDs to build his display. The processor is an ATtiny2313 running Adafruit’s MiniPOV 3 firmware. The system display doesn’t have a sync input, so [Mike] uses a novel form of Human-in-the-loop PWM control to keep the motor speed in check. CPOV is proof that Hackaday.io isn’t just for polished projects, but for proof of concepts, fails, and just plain research. Even if your project isn’t perfect, documenting it will help you learn from it. It might even inspire someone else to move forward and continue where you left off!

Want more POV goodness? Check out our new POV display list!

Our LEDs are going dim, so that’s about all the time we have for this Hacklet. As always, see you next week. Same hack time, same hack channel, bringing you the best of Hackaday.io!

RGB Bike Rim Lights

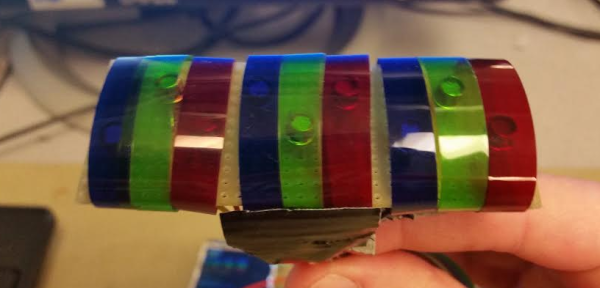
[Yvo] sent us his latest creation, this awesome POV RGB bicycle rim light build, which features a circular interweaving of common RGB LEDs that face outward along the rim as they display constantly changing animations based on the wheel’s rpm.

Like many POV wheel builds, [Yvo]’s takes advantage of a hall effect sensor and stationary magnet to determine how fast the wheels are spinning. Unlike most POV builds, however, [Yvo’s] creation doesn’t have just one or two RGB sticks clamped onto a spoke. Instead, his wheels boast several individual RGB LED modules mounted along the rim.

Each wheel has six modules, and each module contains a scratch-build LED controller (a daisy chain of 74HC595 shift registers) that fits into a custom-made 3D-printed enclosure. The enclosures mounts onto some aluminum strips along with the RGB LEDs, and the aluminum strips mount to the wheels by straddling the rim.

At speed, the lights go into POV mode to simulate headlights / brakes with white in the front and red in the back. Check out the difference these custom circular modules make when riding and when at rest in a video below.

Continue reading “RGB Bike Rim Lights”

AlienFX

Simple Terminal Hack Is Fit For Hollywood

We’ve all seen the cheesy hacker scenes in movies and on TV. Three dimensional file system browsers, computer chip cityscapes, and other ridiculous visualizations to make the dull act of sitting at a keyboard look pretty on the silver screen. While real hackers know those things are often silly and impractical, sometimes we do go out of our way to pretty things up a bit.

Hollywood might be able to learn a thing or two from this latest hack. [Yuri] modified his Linux terminal to change the color of the back lights on his laptop’s keyboard. It’s the kind of thing that actually would look good in a modern hacker movie, and [Yuri] is living proof that it’s something that a real-life hacker would actually use!

[Yuri] has been running Simple Terminal. The Simple Terminal project aims to build a replacement for the default xterm program that removes all of the unnecessary features and simplifies the source code. It also aims to make your terminal experience prettier. Part of making things prettier means that you can choose the font color for your terminals, and of course each terminal window can have its own color if you so choose.

[Yuri] happens to own an Alienware laptop. This laptop comes with RGB LEDs behind the keyboard, allowing you to light them up just about any color you could ever want. [Yuri] thought it would be cool if his keyboard color matched the font color of his terminal windows. Thanks to AlienFX, he was able to write a simple patch for Simple Terminal that does exactly this. Now whenever he selects a terminal window, the keyboard automatically switches colors to match the text in that window. Be sure to check out the video below. Continue reading “Simple Terminal Hack Is Fit For Hollywood”

Hacking The Crayola Digital Light Designer

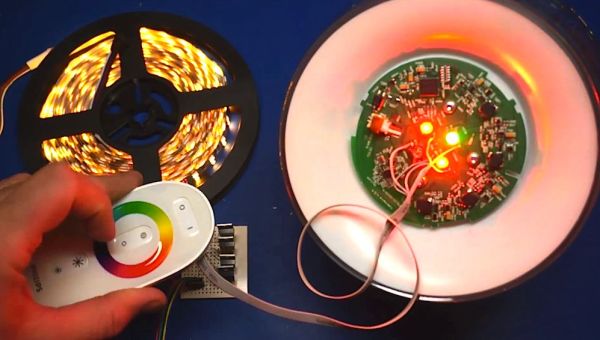
[Harry] wrote in with his hack of the Crayola Light Designer. The Light Designer is a pretty unique toy that lets kids write on a cone-shaped POV display with an infrared light pen. [Harry] cracked one open and discovered it has a spinning assembly with a strip of 32 RGB LEDs for the display and a strip of photodiodes to detect pen position. These were ripe for the hacking.

The spinning assembly uses several slip ring connections to send power and data to the spinning assembly. [Harry] connected a logic analyzer to several of the connections to determine which lines were clock, data, and frame select (the strip is split into 2 16-led “frames”). He went on to reverse-engineer the serial protocol so he could drive the strips himself.

Instead of reverse-engineering the microcontroller on the product’s PCB, [Harry] decided to use a Leostick (Arduino Leonardo clone) to control the LEDs and spinner. He mounted the Leostick on the shaft of the spinning assembly, and powered it over the slip ring connections. After adding some capacitance to make up for noisy power from the slip rings, [Harry] had the POV display up and running with his own controller. Check out the video after the break to see the hacked POV display in action.

Continue reading “Hacking The Crayola Digital Light Designer”