Winch Bot Records Hacks And Cats

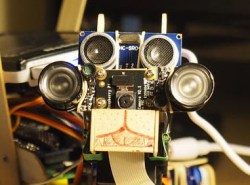
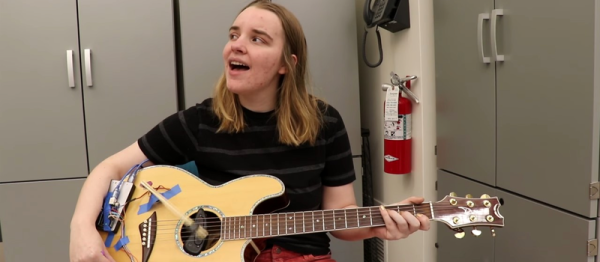
Some people are better than others when it comes to documenting their hacks. Some people, like [Micah Elizabeth Scott], aka [scanlime], set the gold standard with their recordings. Hacking sessions with the Winch Bot have been streamed regularly throughout the build and this is going to lead to a stacking effect in her next projects because the Winch Bot was designed to record hacking sessions. Hacking video inception anyone? Her Winch Bot summary video is after the break.

The first part of this build, which she calls the Tuco Flyer, was [Micah Elizabeth Scott]’s camera gimbal hack which we already covered and is a wonderful learning experience in itself. She refers to the gimbal portion as the “flyer” since it can move around. The Winch Bot contains the stationary parts of the Tuco Flyer and control where the camera will be in the room.

Continue reading “Winch Bot Records Hacks And Cats”

What’s The Best Way To Learn Electronics?

What’s the best way to learn electronics? It’s a pithy question to ask a Hackaday audience, most of whom are at least conversant in the field already. Those who already have learned often have just their own perspective to draw upon—how they themselves learned. Some of you may have taught others. I want to explore what works and what doesn’t.

Hobbyists Learn Differently Than Students

One thing I can say straight off is that students learn differently than people who learn at home. Hobbyists have the advantage of actually being interested, which is a quality a student may not enjoy. People have been teaching themselves electronics since the beginning, with analog projects–Heathkit models, BEAM robots, and ham radio sets–evolving into purely digital projects.

Let’s face it, Arduinos lower the bar like nothing else. There’s a reason why the Blink sketch has become the equivalent to “Hello World”. Dirt cheap and easily configured microcontrollers combined with breakout boards make it easy for anyone to participate.

However, ask any true EE and that person will tell you that following wiring diagrams and plugging in sensor boards from Sparkfun only teaches so much. You don’t bone up on terms like hysteresis or bias by building something from uCs and breakout boards. But do you need to? If you are truly interested in electronics and learn by making those Adafruit or Sparkfun projects, sooner or later you’ll want to make your own breakout boards. You’ll learn how to design your own circuit boards and figure out why things work and why they don’t. I don’t need to tell you the Internet has all the answers a neophyte needs–but the interest has to be there in the first place.

What’s the Best Way to Learn in the Classroom?

There is a product category within robotics kits that consists of “educational rovers” designed to be purchased in group lots by teachers so that each student or small group gets one. These rovers are either pre-built or mostly built—sure, you get to screw in motor mounts, but all the circuit boards are already soldered up for you, surface mount, no less. They come pre-configured for a variety of simple tasks like line following and obstacle avoidance. The Makeblock mBot is an example.

I think it’s part of that whole “learn coding” initiative, where the idea is to minimize the assembly in order to maximize the coding time. Insofar as soldering together a kit of through-hole components teaches about electronics, these bots mostly don’t do it. By all appearances, if there is a best way to learn electronics, this an’t it. However, regardless of what kind of project the teacher puts in front of the student, it still has to generate some sort of passion. What those robots provide is a moment of coolness that ignites the firestorm of interest.

I once led a soldering class that used Blinky Grids by Wayne and Layne as the focus. This is a fantastic kit that guides you through building a small LED matrix. It’s particularly cool because it can be programmed over a computer monitor with light sensors interacting with white and black squares on the company’s web site. When my students finished their grids, they all worked and had unique messages scrolling through. Now, that is a payoff. I’m not saying that any of those folks became hardware hackers as a result of my class, but it beat the hell out of a Christmas tree, am I right?

Getting back to that rover, what must be acknowledged is that the rover itself is the payoff, and that’s only as far as it goes if everyone loses interest. However, a lot of those rovers have expansion possibilities like bolting on another sensor or changing the method of programming–for instance, the mBot has both a graphic programming interface and can also be reflashed with a regular old Arduino bootloader.

Readers, share in comments your own perspective. How did you learn? How would you teach others?

Robot Graffiti

There’s talk of robots and AIs taking on jobs in many different industries. Depending on how much stock you place in that, it might still be fair to say the more creative fields will remain firmly in the hands of humans, right?

Well, we may have some bad news for you. Robots are now painting our murals.

Estonian inventor [Mihkel Joala] — also working at SprayPainter — successfully tested his prototype by painting a 30m tall mural on a smokestack in Tartu, Estonia. The creative procedure for this mural is a little odd if you are used to the ordinary painting process: [Joala] first takes an image from his computer, and converts it into a coordinate grid — in this case, about 1.5 million ‘pixels’. These pixels are painted on by a little cart loaded with five colours of spray paint that are able to portray the mural’s full palette once combined and viewed at a distance. Positioning is handled by a motor at the base of the mural controlling the vertical motion in conjunction with tracks at the top and bottom which handle the horizontal motion.

For this mural, the robot spent the fourteen hours trundling up and down a set of cables, dutifully spraying the appropriate colour at such-and-such a point resulting in the image of a maiden cradling a tree and using thirty cans of spray paint in the process.

Continue reading “Robot Graffiti”

Hackaday Links Column Banner

Hackaday Links: September 10, 2017

Hackaday is 13! We’re going through a bit of a rebellious phase. There’s hair where there wasn’t hair before. Thirteen years ago (Sept. 5, 2004), [Phil Torrone] published the first Hackaday Post. [Phil] posted a great writeup of the history of Hackaday over on the Adafruit blog — we were saved from the AOL borg because of the word ‘hack’ — and interviewed the former and current editors of your favorite DIY website. Here’s to 13 more years and to [Phil] finding a copy of the first version of the Jolly Wrencher designed in Macromedia Flash.

Hackaday is having an unconference in the UK! Tickets for next weekend’s event went fast, but don’t worry — we’re hosting a Bring A Hack the day before.

Hurricanes are an awesome force of nature. As we learned from Harvey a week ago, livestreamed footage from the eyewall of a hurricane is fascinating. [Jeff Piotrowski] seems to be the streamer of choice. If you’re looking for something to gawk at, here you go.

Another burn is over, and I still have no idea how they moved the fuselage of a 747 from Palmdale to the playa.

You know we’re doing this whole Hackaday Prize thing where we’re giving a ton of money to people for creating cool hardware, right? We’re almost done with that. The last round of The Hackaday Prize is going on right now. The theme is anything goes, or rather there is no theme. The goal of this round is to build cool stuff. This round ends on October 16th, and yes, we’ll have the results for the Assistive Technologies round out shortly.

[Prusa] makes a lot of printers, and that means he needs to make a lot of parts to make a lot of printers. Obviously, a PTFE-cutting robot is the solution to this problem

October 5th is the Open Source Hardware Summit in Denver. Hackaday and Tindie are going, and it’s going to be a blast.  The location has moved in the last week — now it’s about half a mile away from the old venue. The speaker schedule is up, board nominations are open, and somewhere, someone is organizing a Lulzbot/Sparkfun booze cruise the day after the summit. I should be getting a van to add capacity to this trip, so if you’re interested leave a note in the comments.

Educational Robot For Under $100

While schools have been using robots to educate students in the art of science and engineering for decades now, not every school or teacher can afford to put one of these robots in the hands of their students. For that reason, it’s important to not only improve the robots themselves, but to help drive the costs down to make them more accessible. The CodiBot does this well, and comes in with a price tag well under $100.

The robot itself comes pre-assembled, and while it might seem like students would miss out on actually building the robot, the goal of the robot is to teach coding skills primarily. Some things do need to be connected though, such as the Arduino and other wires, but from there its easy to program the robot to do any number of tasks such as obstacle avoidance and maze navigation. The robot can be programmed using drag-and-drop block programming (similar to Scratch) but can also be programmed the same way any other Arduino can be.

With such a high feature count and low price tag, this might be the key to getting more students exposed to programming in a more exciting and accessible way than is currently available. Of course, if you have a little bit more cash lying around your school, there are some other options available to you as well.

3D Printed Robotic Arms For Sign Language

A team of students in Antwerp, Belgium are responsible for Project Aslan, which is exploring the feasibility of using 3D printed robotic arms for assisting with and translating sign language. The idea came from the fact that sign language translators are few and far between, and it’s a task that robots may be able to help with. In addition to translation, robots may be able to assist with teaching sign language as well.

The project set out to use 3D printing and other technology to explore whether low-cost robotic signing could be of any use. So far the team has an arm that can convert text into finger spelling and counting. It’s an interesting use for a robotic arm; signing is an application for which range of motion is important, but there is no real need to carry or move any payloads whatsoever.

Closeup of hand actuators and design. Click to enlarge.

A single articulated hand is a good proof of concept, and these early results show some promise and potential but there is still a long ways to go. Sign language involves more than just hands. It is performed using both hands, arms and shoulders, and incorporates motions and facial expressions. Also, the majority of sign language is not finger spelling (reserved primarily for proper names or specific nouns) but a robot hand that is able to finger spell is an important first step to everything else.

Future directions for the project include adding a second arm, adding expressiveness, and exploring the use of cameras for the teaching of new signs. The ability to teach different signs is important, because any project that aims to act as a translator or facilitator needs the ability to learn and update. There is a lot of diversity in sign languages across the world. For people unfamiliar with signing, it may come as a surprise that — for example — not only is American Sign Language (ASL) related to French sign language, but both are entirely different from British Sign Language (BSL). A video of the project is embedded below.

Continue reading “3D Printed Robotic Arms For Sign Language”

Hackaday Prize Entry: E.R.N.I.E. Teaches Robotics And Programming

[Sebastian Goscik]’s entry in the 2017 Hackaday Prize is a line following robot. Well, not really; the end result is a line following robot, but the actual project is about a simple, cheap robot chassis to be used in schools, clubs, and other educational, STEAM education events. Along with the chassis design comes a lesson plan allowing teachers to have a head start when presenting the kit to their students.

The lesson plan is for a line-following robot, but in design is a second lesson – traffic lights which connect to a main base through a bus and work in sync. The idea of these lessons is to be fairly simple and straightforward for both the teachers and the students in order to get them more interested in STEM subjects.

What [Sebastian] noticed about other robot kits was that they were expensive or complicated or lacked tutorials. Some either came pre-assembled or took a long time to assemble. [Sebastian] simplified things – The only things required after the initial assembly of the chassis are: Zip-ties, electrical tape and a few screws. The PCB can’t be disassembled, but the assembled PCB can be reused.

The hardware [Sebastian] came up with consists of some 3mm material that can be laser cut (acrylic or wood) and a sensor board that has 5 IR LEDs and corresponding IR sensors. The chassis can be put together using nothing more than a Phillips screwdriver, and the sensor PCBs are well documented so that soldering them is as easy as possible. An Arduino is used as the brains of the unit.

[Sebastian] has come up with a great project and the idea of a platform like this with a couple of lesson plans included is a great one. He’s released the hardware under an Open Hardware license as well so others can share and add-on. Of course, there are other line following robots, like this miniature one created with analog circuitry, and there are other open source robots for teaching, like this one. But [Sebastian]’s focus on the lesson plans is a really unique way of approaching the problem – one that will hopefully be very successful.

Continue reading “Hackaday Prize Entry: E.R.N.I.E. Teaches Robotics And Programming”