Rotary Encoders Become I2C Devices

Rotary encoders are the bee’s knees. Not only do you get absolute positioning, you can also use a rotary encoder (with a fancy tact button underneath) for an easy UI for any electronics project. There’s a problem with rotary encoders, though: it’s going to use Gray code or something weird, and getting a rotary encoder to work with your code isn’t as easy as a simple button.

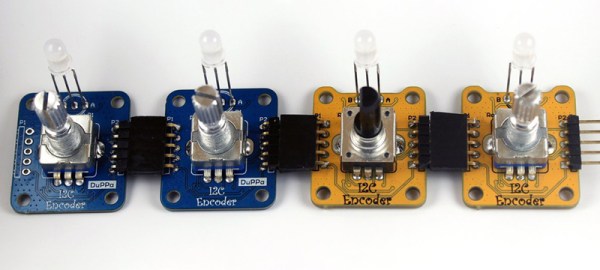
For his Hackaday Prize project, [fattore.saimon] has come up with the solution for using multiple rotary encoders in any project. It’s a board that turns a rotary encoder into an I2C device. Now, instead of counting rising and falling edges, adding a rotary encoder to a project is as easy as connecting four wires.

The project is built around the PIC16F18344, a small but surprisingly capable microcontroller that reads a rotary encoder and spits data out as an I2C slave device. Also on board are a few pins for an RGB LED, general purpose pins, the ability to set all seven bits of the I2C address (who wants 127 rotary encoders?), and castellated holes for connecting several boards together.

This project is an update of [fattore]’s earlier I2C Encoder, and there are a lot of improvements in the current version. It’s slightly smaller, has better connectors, and uses a more powerful microcontroller. That’s just what you need if you want a ton of rotary encoders for all those cool interactive projects.

Dumb Down Your Xiaomi Smart Lamp With A Custom Firmware

Undoubtedly, the ESP8266’s biggest selling point is its WiFi capability for a ridiculously low price. Paranoid folks probably await the day its closed-source firmware bits will turn against humanity in a giant botnet, but until then, hobbyists and commercial vendors alike will proceed putting them in their IoT projects and devices. One of those devices is the Yeelight desk lamp that lets you set its color temperature and brightness via mobile app.

[fvollmer] acquired such a lamp, and while he appreciated its design and general concept, he wasn’t happy that it communicates with external servers. So he did the only reasonable thing and wrote his own firmware that resembles the original functionality, but leaves out the WiFi part. After all, the ESP8266 has still a lot to offer in its core essence: a full-blown 32-bit microcontroller with support for the most common, hobbyist-friendly SDKs.

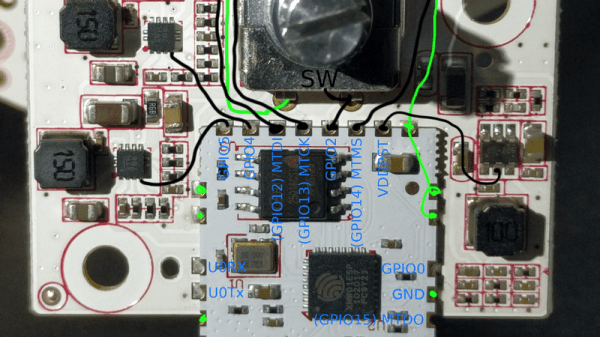
The lamp’s color temperature and brightness are set with a rotary encoder / push button combo switch, and the LEDs themselves are controlled via PWM. All things considered, it’s a rather straightforward endeavour, for which [fvollmer] chose the standalone C SDK. And in the end, it’s not like he’s unreasonably cautious to keep some control over his household items.

Tiny Function Generator On The ATtiny85, Complete With OLED

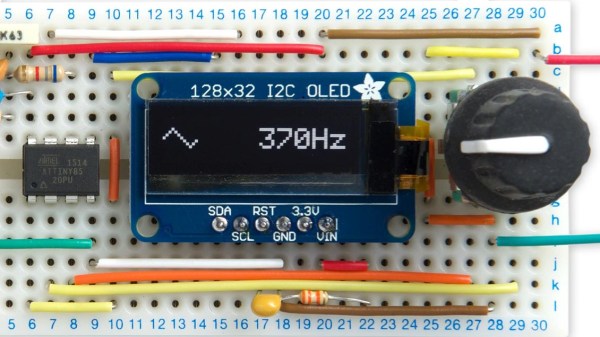
It’s easy to have a soft spot for “mini” yet perfectly functional versions of electronic workbench tools, like [David Johnson-Davies]’s Tiny Function Generator which uses an ATtiny85 to generate different waveforms at up to 5 kHz. It’s complete with a small OLED display to show the waveform and frequency selected. One of the reasons projects like this are great is not only because they tend to show off some software, but because they are great examples of the kind of fantastic possibilities that are open to anyone who wants to develop an idea. For example, it wasn’t all that long ago that OLEDs were exotic beasts. Today, they’re available off the shelf with simple interfaces and sample code.

The Tiny Function Generator uses a method called DDS (Direct Digital Synthesis) on an ATtiny85 microcontroller, which [David] wrote up in an earlier post of his about waveform generation on an ATtiny85. With a few extra components like a rotary encoder and OLED display, the Tiny Function Generator fits on a small breadboard. He goes into detail regarding the waveform generation as well as making big text on the small OLED and reading the rotary encoder reliably. His schematic and source code are both available from his site.

Small but functional microcontroller-based electronic equipment are nifty projects, and other examples include the xprotolab and the AVR-based Transistor Tester (which as a project has evolved into a general purpose part identifier.)

Roll Your Own Magnetic Encoder Disks

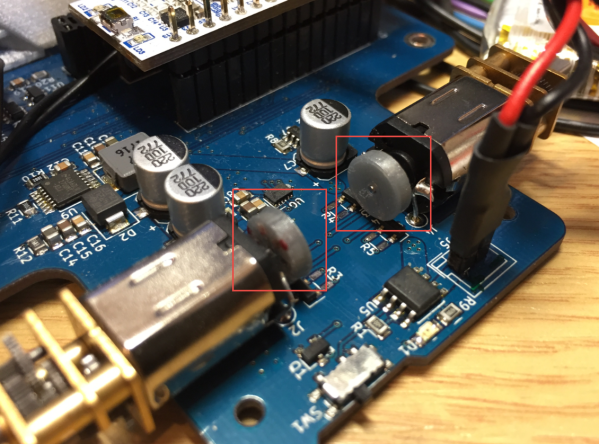
[Erich] is the middle of building a new competition sumo bot for 2018. He’s trying to make this one as open and low-cost as humanly possible. So far it’s going pretty well, and the quest to make DIY parts has presented fodder for how-to posts along the way.

One of new bot’s features will be magnetic position encoders for the wheels. In the past, [Erich] has used the encoder disks that Pololu sells without issue. At 69¢ each, they don’t exactly break the bank, either. But shipping outside the US is prohibitively high, so he decided to try making his own disks with a 3D printer and the smallest neodymium magnets on Earth.

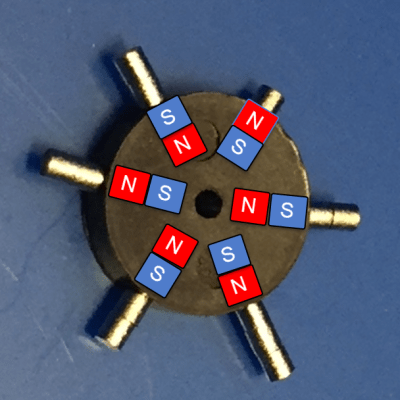
The pre-fab encoder disks don’t have individual magnets—they’re just a puck of magnetic slurry that gets its polarity on the assembly line. [Erich] reverse-engineered a disk and found the polarity using magnets (natch). Then got to work designing a replacement with cavities to hold six 1mm x 1mm x 1mm neodymium magnets and printed it out. After that, he just had to glue them in place, matching the polarity of the original disk. We love the ingenuity of this project, especially the pair of tweezers he printed to pick and place the magnets.

Rotary encoders are pretty common in robotics applications to detect and measure wheel movement. Don’t quite recall how they work? We’ll help you get those wheels turning.

via Dangerous Prototypes

Man-in-the-Middle Jog Pendant: Two Parts Make Easier Dev Work

In a project, repetitive tasks that break the flow of development work are incredibly tiresome and even simple automation can make a world of difference. [Simon Merrett] ran into exactly this while testing different stepper motors in a strain-wave gear project. The system that drives the motor accepts G-Code, but he got fed up with the overhead needed just to make a stepper rotate for a bit on demand. His solution? A grbl man-in-the-middle jog pendant that consists of not much more than a rotary encoder and an Arduino Nano. The unit dutifully passes through any commands received from a host controller, but if the encoder knob is turned it sends custom G-Code allowing [Simon] to dial in a bit acceleration-controlled motor rotation on demand. A brief demo video is below, which gives an idea of how much easier it is to focus on the nuts-and-bolts end of hardware when some simple motor movement is just a knob twist away.

Continue reading “Man-in-the-Middle Jog Pendant: Two Parts Make Easier Dev Work”

DIY Capacitive Rotational Encoder On The Cheap With FR4

Rotary encoders are critical to many applications, even at the hobbyist level. While considering his own rotary encoding needs for upcoming projects, it occurred to [Jan Mrázek] to try making his own DIY capacitive rotary encoder. If successful, such an encoder could be cheap and very fast; it could also in part be made directly on a PCB.

First prototype, two etched plates with transparent tape as dielectric material. Disc is 15 mm in diameter.

The encoder design [Jan] settled on was to make a simple adjustable plate capacitor using PCB elements with transparent tape as the dielectric material. This was used as the timing element for a 555 timer in astable mode. A 555 in this configuration therefore generates a square wave that changes in proportion to how much the plates in the simple capacitor overlap. Turn the plate, and the square wave’s period changes in response. Response time would be fast, and a 555 and some PCB space is certainly cheap materials-wise.

The first prototype gave positive results but had a lot of problems, including noise and possibly a sensitivity to temperature and humidity. The second attempt refined the design and had much better results, with an ESP32 reliably reading 140 discrete positions at a rate of 100 kHz. It seems that there is a tradeoff between resolution and speed; lowering the rate allows more positions to be reliably detected. There are still issues, but ultimately [Jan] feels that high-speed capacitive encoders requiring little more than some PCB real estate and some 555s are probably feasible.

This project is a reminder that FR4 (whether copper-clad, etched, or blank) shows up in clever applications: copper tape and blank FR4 can be used to quickly prototype RF filters, PocketNC built an entire small CNC tool around FR4, and our own [Voja] wrote a full guide on making beautiful enclosures from FR4.

Reading 16 Rotary Encoders At The Same Time

We’re digging these daisy-chainable encoders built by [fattore.saimon]. Each module consists of a rotary encoder attached to a PCB with a PIC16F15386 on the back. As we’ve covered in the past, the Microchip released their feature-rich PIC16 microprocessor just this year, and it’s great to see them start to crop up in projects. With 4 address jumpers on the back of each PCB, [fattore.saimon] is able to connect up to 16 of the encoders on the bus. The modules also have male and female plugs so he can connect them physically as well, to simplify wiring. Each module also has a PWMable bicolor LED for keeping track of each encoder’s setting.

If you’re interested in making your own you can buy the PCBs from Tindie or download the project files from the creator’s GitHub, including an Arduino library.

We love encoders here on Hackaday — building DIY encoders, as well as using them in projects like this precision cutting jig. And definitely read our colleague [Al]’s great piece on encoders.