Casting Silicone Parts With 3D-Printed Inserts For Stiffness

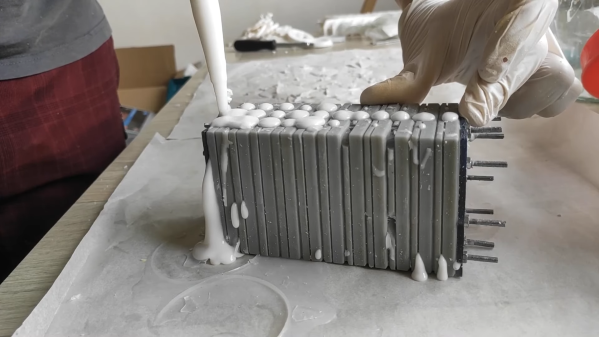
Prolific maker [Jan Mrázek] shared his process for casting soft silicone parts that nevertheless have some added stiffness, which he accomplished by embedding porous, 3D-printed “ribs” into the pieces during the casting process. The 3D-printed inserts act as a sort of skeleton, and as a result, the parts have a soft silicone surface but gain structure and rigidity that simply wouldn’t be obtained if the part were cast entirely in silicone. The nice thing is that no new materials or tools were needed; [Jan] 3D printed both the molds for the parts as well as the structural inserts. It’s always nice when one can use the same tool and materials to accomplish different functions.

The parts [Jan] is making are interesting, as well. He observed that the process of swapping resin in his printer’s build tank was an unpleasant experience for a number of reasons, chief among them being that resin is sticky and messy, and the shape of the build tank doesn’t make pouring resin from it a clean job.

His solution was to design a pour spout that could be pressed onto the build tank, and some specially-designed squeegees to allow scraping the tank clean with ease. Silicone is the ideal material for the parts because it turns out that sticky resin beads nicely on silicone’s surface. Anywhere else, resin tends to spread out and form a sticky mess, but on silicone resin it forms tidy drops and is much easier to clean up.

It’s a technique worth keeping in mind, because one never knows when it could come in handy. Fabricating soft robots for example tends to involve silicone casting and clever techniques. See [Jan]’s parts in action in the video, embedded below.

Continue reading “Casting Silicone Parts With 3D-Printed Inserts For Stiffness”

How To Make A Collapsible Container Without Breaking Down

How hard could it be to make a collapsible silicone container? Turns out, it’s really, really hard — collapsible containers have rigid guidelines. Just ask [Eric Strebel], who failed dozens of times before finally getting it right (video, embedded below).

[Eric] started with an SLA-printed two-part mold and a silicone formulation with a Shore durometer of A 40 — this is the measure of hardness for silicone, polymers, and elastomers in the sense that the piece will resist indentation. The first twenty-four attempts all came out looking great, but not a single one of them would collapse and stay collapsed.

Eventually, [Eric] went back to the drawing board and played with the angles of the flex points, the thickness of the living hinges, and the wall thicknesses, which have to be strong enough to stay collapsed.

For attempt #25, [Eric] took the part out of the mold about three hours in and tried curing it in the collapsed state. Persistence paid off, and the part finally collapses and stays that way. Get yourself some popcorn and check out the fail-fest after the break. You know what we always say — fail fast, fail often.

[Eric] has made many molds both from silicone and for silicone. Some of them are really big!

Continue reading “How To Make A Collapsible Container Without Breaking Down”

Modular Box Design Eases Silicone Mold-Making

Resin casting is a fantastic way to produce highly detailed parts in a wide variety of colors and properties, and while the process isn’t complicated, it does require a certain amount of care and setup. Most molds are made by putting a part into a custom-made disposable box and pouring silicone over it, but [Foaly] was finding the process of making and re-making those boxes a bit less optimized than it could be. That led to this design for a re-usable, modular, adjustable mold box that makes the workflow for small parts considerably more efficient.

The walls of the adjustable box are four identical 3D-printed parts with captive magnets, and the base of the box is a piece of laser-cut steel sheet upon which the magnetic walls attach. The positioning and polarity of the magnets are such that the box can be assembled in a variety of sizes, and multiple walls can be stacked to make a taller mold. To aid cleanup and help prevent contamination that might interfere with curing, the inner surfaces of each piece are coated in Kapton tape.

The result is a modular box that can be used and re-used, and doesn’t slow down the process of creating and iterating on mold designs. The system as designed is intended for small parts, but [Foaly] feels there is (probably) no reason it can’t be scaled up to some degree. Interested? The design files are available from the project’s GitHub repository, and if you need to brush up a bit on how resin casting works, you can read all about it here.

Spy Tech: CIA Masks In Five Minutes Or Less

You know the old trope: James Bond is killed but it turns out to be someone else in an incredibly good-looking Sean Connery mask. Mission: Impossible and Scooby Doo regularly had some variation of the theme. But, apparently, truth is stranger than fiction. The CIA has — or at least had — a chief of disguise. A former holder of that office now works for the International Spy Museum and has some very interesting stories about the real masks CIA operatives would use in the field.

According to the video you can see below, the agency enlisted the help of Hollywood — particularly the mask maker from Planet of the Apes — to help them with this project. Of course, in the movies, you can take hours to apply a mask and control how it is lit, how closely the camera examines it, and if something goes wrong you just redo the scene. If you are buying secret plans and your nose falls off, it would probably be hard to explain.

Continue reading “Spy Tech: CIA Masks In Five Minutes Or Less”

Solid Tips For Casting Colored Silicone Tires

For people who work with wheeled robots or RC vehicles, sooner or later one gets interested in making custom tires instead of dealing with whatever is available off the shelf. [concreted0g]’s preferred method is to design and 3D print wheel hubs, then cast some custom silicone tires to fit over them. Of course, the devil is in the details and this process can be a bit messy, so he’s shared useful tips on how to get reliable results with simple materials.

The casting material is cheap silicone caulking from a hardware store, and color can be added with a small amount of cheap acrylic paint. A few drops of glycerin added to the silicone thins it out slightly and helps it flow into a mold better. Mix well (the paint will also serve as a visual indicator of how well it is mixed), then scoop the mixture into the mold while trying to avoid creating air pockets. If your mold is in two pieces, assemble the mold and remove any overflow, then let it sit undisturbed for at least several hours while it cures.

Mounting the resulting tire to a wheel hub can be done with a thin film of super glue, which seems to work perfectly well for small tires and is easy to apply.

The rules are going to be a bit different for big objects. We know that silicone caulking can have difficulty fully curing when it’s applied thickly, especially when sealed into a mold with little to no airflow. In such cases, adding cornstarch (in about a 5:1 ratio of silicone to cornstarch by volume) is all that it takes to cure even thick wads of goop in less than an hour. Stirring cornstarch in tends to introduce more air bubbles into the mixture, but for larger pieces that can be an acceptable tradeoff. Cheap silicone caulking is versatile stuff, one just needs to know what to expect, and take a few steps to deal with the messiness.

Need something tougher? Maybe check out using slices of automotive silicone hose for robot wheels to get something that works just as well, but is a lot more durable.

Making Silicone Molds – Big Ones!

If you’ve got one of something and you want more, duplicating it with a silicone mold can be a great way to go. This is applicable to 3D printing something you need many copies of, and a whole variety of other usecases. [Eric Strebel] prides himself on his abilities in this area, and has put out a guide to producing very large silicone molds in a simple and reliable manner.

The overarching process is simple, but followed properly, it produces great results. [Eric] starts by building a mold box out of wood, coated in shellac to ensure it doesn’t stick to the silicone. The master part is then stuck to the base, surrounded by a lasercut cardboard strip which acts as a seal and key. Once properly degassed silicone is poured in and cured, the second half can be made. The mold is flipped in the mold box, the seal key removed,  and release agent applied to the silicone surfaces. With another pour and cure, the mold is ready for casting new parts.

While simple, if the correct equipment isn’t used or steps skipped, you’ll end up with a useless mold full of air bubbles or surface irregularities. It’s useful to see just what it takes to get a mold of such scale (13″ x 19″!) completed without flaws. We’ve featured [Eric]’s work before, such as his fine detail improvements on the Apple Pencil. Video after the break.

Continue reading “Making Silicone Molds – Big Ones!”

DIY Closed-Cell Silicone Foam

Most of us have a junk drawer, full of spare parts yanked from various places, but also likely stocked with materials we bought for a project but didn’t use completely. Half a gallon of wood glue, a pile of random, scattered resistors, or in [Ken]’s case, closed-cell silicone foam. Wanting to avoid this situation he set about trying to make his own silicone foam and had a great degree of success.

Commercial systems typically rely on a compressed gas of some sort to generate the foam. Ken also wanted to avoid this and kept his process simple by using basic (pun intended) chemistry to generate the bubbles. A mixture of vinegar and baking soda created the gas. After a healthy amount of trial and error using silicone caulk and some thinner to get the mixture correct, he was able to generate a small amount of silicone foam. While there only was a bit of foam, it was plenty for his needs. All without having a stockpile of extra foam or needing to buy any specialized equipment.

We appreciate this project for the ingenuity of taking something relatively simple (an acid-base reaction) and putting it to use in a way we’ve never seen before. While [Ken] doesn’t say directly on the project page what he uses the foam for, perhaps it or a similar type of foam could be used for building walk-along gliders.

Photo via Wikimedia Commons