Global Resistor Shortage, Economics, And Consumer Behavior

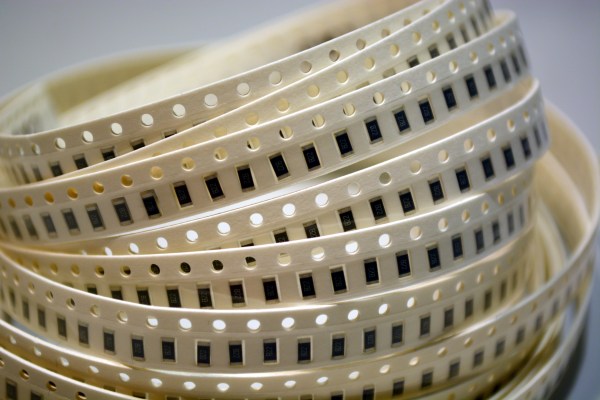
The passive component industry — the manufacturers who make the boring but vital resistors, capacitors, and diodes found in every single electronic device — is on the cusp of a shortage. You’ll always be able to buy a 220 Ω, 0805 resistor, but instead of buying two for a penny like you can today, you may only get one in the very near future.

Yageo, one of the largest manufacturers of surface mount (SMD) resistors and multilayer ceramic capacitors, announced in December they were not taking new chip resistor orders. Yageo was cutting production of cheap chip resistors to focus on higher-margin niche-market components for automotive, IoT, and other industrial uses, as reported by Digitimes. Earlier this month, Yaego resumed taking orders for chip resistors, but with 15-20% higher quotes (article behind paywall, try clicking through via this Tweet).

As a result, there are rumors of runs on passive components at the Shenzhen electronics market, and several tweets from members of the electronics community have said the price of some components have doubled. Because every electronic device uses these ‘jellybean’ parts, a decrease in supply or increase in price means some products won’t ship on time, margins will be lower, or prices on the newest electronic gadget will increase.

The question remains: are we on the brink of a resistor shortage, and what are the implications of manufacturers that don’t have the parts they need?

Continue reading “Global Resistor Shortage, Economics, And Consumer Behavior”

Make A Better, Spring-Loaded SMT Tape Strip Holder

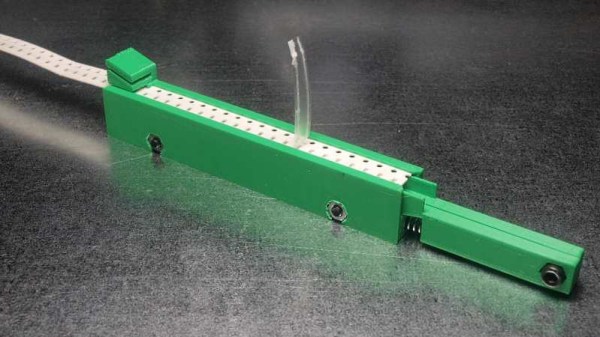
Every so often, a project is worth some extra work to see if the idea can go any further. [JohnSL] has been busy doing exactly that with his spring-loaded SMT tape holder project. Having done the original with 3D printing, he has been working on designing for injection molding. This isn’t a motorized feeder, it’s still a manual tool but it is an improvement over the usual workshop expedient method of just sticking segments of tape down to the desktop. Tape is fed into the holders from one end and spring tension holds the tape firm while a small slot allows the cover tape to be guided backward after peeling. As anyone who has used cut segments of tape to manually deal with SMT parts knows, small vibrations — like those that come from peeling off the clear cover — can cause the smaller components to jump around and out of their pockets, and any length of peeled cover gets awkward quickly.

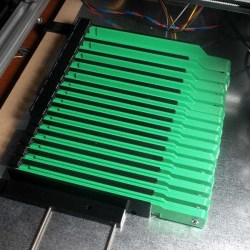
The design allows for multiple holders to mount side-by-side.

In [JohnSL]’s design, all SMT tapes sit at an even height regardless of size or tape thickness. A central support pushes up from the bottom with tension coming from a spring pulling sideways; the central support is forced upward by cams and presses against the bottom surface of the tape. As a result, the SMT tape gets supported from below with even tension and the whole assembly maintains a narrow profile suitable for stacking multiple holders side by side. The CAD files are available online along with a McMaster-Carr part number for the specific spring he used.

After working out the kinks on 3D printed prototypes, [JohnSL] decided to see if it would be feasible to design an injection molded version and made a video outlining the process, embedded below.

Continue reading “Make A Better, Spring-Loaded SMT Tape Strip Holder”

Improved Perfboard For Surface Mount Parts

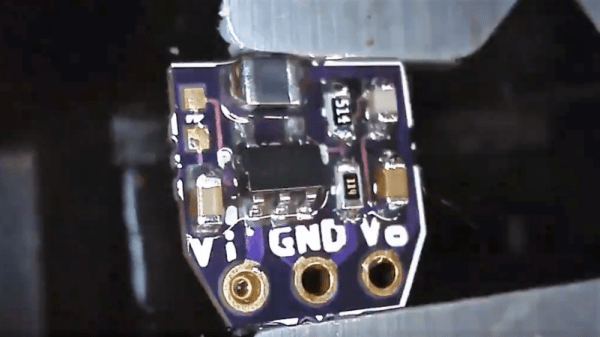
Look through the last two decades of electronics project built on perfboard, and you’ll notice a trend. Perfboard is designed for through-hole parts, but ever more frequently, the parts we need are only available as surface mount devices. What does this mean for the future of all those protoboard, veroboard, and tagboard designs? It’s not good, but fortunately, there may be an answer. It’s perfboard designed for mounting SOICs, SOTs, and other surface mount devices.

Perfboard is an extremely simple concept. Most through-hole electronic components are built around 0.1″ or 2.54 mm spacing between pins. Yes, there are exceptions, but you can always bend the middle pin of a transistor and put it in a hole. SMT devices are different. You can’t really bend the pins, and the pin pitch is too small for the 0.1″ holes in traditional perfboard.

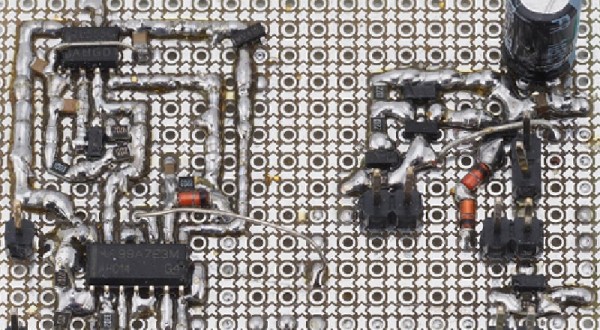
[electronic_eel] is changing that game up with his own design for perfboard. This perfboard has the traditional 0.1″ holes, but there are SMD pads sprinkled about between these holes. The result is being able to solder SOIC, SOT23-6, SOT23 and SOT363 devices directly to a board alongside 0603 and 0805 devices. Connect everything with a few beads of solder and you have a functional circuit made out of surface mount devices on something that’s still compatible with the old protoboard designs.

This isn’t the first time we’ve seen a new type of protoboard make it into production. A few years ago, Perf+, a bizarre ‘bus-based’ protoboard solution came onto the scene, although that wasn’t really designed for SMD parts. While [electronic_eel] doesn’t have any plans to sell his protoboard, the files are available, and you can easily design your own small piece of perfboard.

MeatBagPnP Makes You The Automatic Pick And Place

It’s amazing how hackers are nowadays building increasingly complex hardware with SMD parts as small as grains of sand. Getting multilayer PCB’s and soldering stencils in small quantities for prototyping is easier than ever before. But Pick-and-Place — the process of taking parts and stuffing them on the PCB in preparation for soldering — is elusive, for several reasons. For one, it makes sense only if you plan to do volume production as the cost and time for just setting up the PnP machine for a small run is prohibitive. And a desktop PnP machine isn’t yet as ubiquitous as a 3D printer. Placing parts on the board is one process that still needs to be done manually. Just make sure you don’t sneeze when you’re doing it.

Of course the human is the slow part of this process. [Colin O’Flynn] wrote a python script that he calls MeatBagPnP to ease this bottleneck. It’s designed to look at a row in a parts position file generated from your EDA program and highlight on a render of the board where that part needs to be placed. The human then does what a robotic PnP would have done.

A bar code scanner is not necessary, but using one does make the process a bit quicker. When you scan a code on the part bag, the script highlights the row on the spreadsheet and puts a marker on the first instance of it on the board. After you’ve placed the part, pressing the space bar puts a marker on the next instance of the same value. The script shows it’s done after all parts of the same value are populated and you can then move on to the next part. If you don’t have a bar code scanner handy, you can highlight a row manually and it’ll tell you where to put that part. Check it out in the video below.

Of course, before you use this tool you need some prior preparation. You need a good PNG image of the board (both sides if it is double-sided) scaled so that it is the same dimensions as the target board. The parts position file generated from your EDA tool must use the lower left corner of the board as the origin. You then tell the tool the board dimensions and it scales up everything so that it can put the red markers at the designated XY positions. The script works for single and double-sided boards. For a board with just a few parts, it may not be worth the trouble of doing this, but if you are trying to manually populate a complex board with a lot of parts, using a script like this could make the process a lot less painful.

The project is still fresh and rough around the edges, so if you have comments or feedback to offer, [Colin] is listening.

[Colin]’s name ought to ring a bell — he’s the hacker who built ChipWhisperer which took 2nd Prize at The Hackaday Prize in 2014. The MeatBagPnP project is a result of having worked at building increasingly complex boards manually and trying to make the process easier. In addition to the walk-through of how the script works after the break we’ve embedded his other video from three years back when he was stuffing parts — including BGA’s — the hard way and then reflowing them in a Chinese oven with hacked firmware.

Continue reading “MeatBagPnP Makes You The Automatic Pick And Place”

Hackaday Prize Entry: Reflowduino, The Open Source Reflow Oven Controller

Face it — you want a reflow oven. Even the steadiest hands and best eyes only yield “meh” results with a manual iron on SMD boards, and forget about being able to scale up to production. But what controller should you use when you build your oven, and what features should it support? Don’t worry — you can have all the features with this open source reflow oven controller.

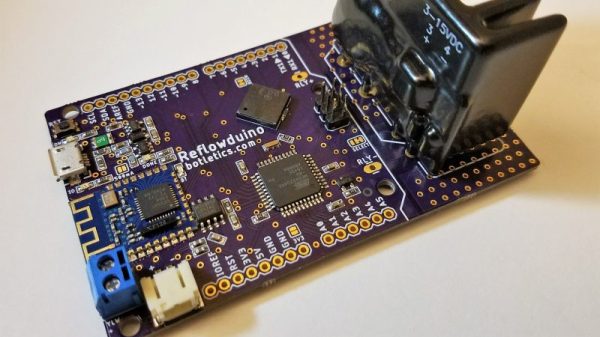
Dubbed the Reflowduino for obvious reasons, [Timothy Woo]’s Hackaday Prize entry has everything you need in a reflow oven controller, and a few things you never knew you needed. Based on an ATMega32, the Reflowduino takes care of the usual tasks of a reflow controller, namely running the PID loop needed to accurately control the oven’s temperature and control the heating profile. We thought the inclusion of a Bluetooth module was a bit strange at first, but [Timothy] explains that it’s a whole lot easier to implement the controller’s UI in software than in hardware, and it saves a bunch of IO on the microcontroller. The support for a LiPo battery is somewhat baffling, as the cases where this would be useful seem limited since the toaster oven or hot plate would still need a mains supply. But the sounder that plays Star Wars tunes when a cycle is over? That’s just for fun.

Hats off to [Timothy] for a first-rate build and excellent documentation, which delves into PID theory as well as giving detailed instructions for every step of the build. Want to try lower-end reflow? Pull out a halogen work light, or perhaps fire up that propane torch.

Hackaday Prize Entry: A Manual, CNC Pick And Place Machine

Everyone who wants a 3D printer probably already has one, and even laser cutters and CNC machines are making their way into garages and basements ’round the world. Pick and place machines are the next great frontier of personal manufacturing, and even though that’s a long way off, [Tegwyn]’s project for this year’s Hackaday Prize is bringing us that much closer to popping down 0201 LEDs reliably.

This project is a manual pick and place machine — otherwise known as ‘tweezers’. It’s a bit more complicated than that, because the entire idea behind [Tegwyn]’s build is to decouple a human’s fine motor skills from the ability to place components on a board. To do that, this project is using an off-the-shelf, blue light special CNC machine. There’s not much to it, just a bit of aluminum extrusion and some threaded rods. However, with the addition of a vacuum pump, a hollow needle, and a few manual controls to move the axes around, the operator has very fine control over where a resistor, cap, or LED goes.

There are a few neat additions to the, ‘put a vacuum pump on a CNC machine’ idea. This is a 4 axis machine, giving the user the ability to rotate the part around a pad. There’s also a microscope hooked up to a small monitor mounted to the machine. If you’re assembling hundreds of boards, this is not the machine you want. If, however, you only need a handful, don’t mind spending a few hours placing parts, and don’t want to go insane with tiny QFN packages, this is a great build and a great entry for the Hackaday Prize.

Continue reading “Hackaday Prize Entry: A Manual, CNC Pick And Place Machine”

No-Solder Breadboarding For SMD LEDs

Breadboarding is a great way to get started with electronics, and with the wide availability of those little wire jumpers, it’s never been easier – until you hit roadblocks due to poor connections and parasitic capacitance futzing with your signals. However, in today’s current climate, the latest and greatest modules are too often available only in SMD packages, and while breakout boards can help, it’s probably overcomplicating things a bit when it comes to SMD LEDs. It’s all good, though – [Simon Merrett] has a workaround, as part of his Yapolamp project.

[Simon] first took a flat strip of steel, and placed two neodymium magnets on top. The assembly was then wrapped in electrical tape for insulation, and two contacts were created with copper tape. The LEDs were then placed across the two contacts and wires were attached to join them to the breadboard. The 5630 LEDs [Simon] must contain some sort of ferrous material, because they were attracted to the magnets and sat neatly in place.

It’s a neat hack that would be particularly useful if you needed to quickly swap out LEDs, and saves them from damage by soldering. Meanwhile, check out this SMD LED matrix from 2009.