Simple Decoder Serves As Solo Ham’s Test Buddy

For a hobby that’s ostensibly all about reaching out to touch someone, ham radio can often be a lonely activity. Lots of hams build and experiment with radio gear much more than they’re actually on the air, improving their equipment iteratively. The build-test-tweak-repeat cycle can get a little tedious, though, especially when you’re trying to assess signal strength and range and can’t find anyone to give you a report.

To close the loop on field testing, [WhiskeyTangoHotel] threw together a simple ham radio field confirmation unit that’s pretty slick. It relies on the fact that almost every ham radio designed for field use incorporates a DTMF encoder in the microphone or in the transceiver itself. Hams have used Touch Tones for in-band signaling control of their repeaters for decades, and even as newer digital control methods have been introduced, good old analog DTMF hangs in there. The device consists of a DTMF decoder attached to the headphone jack of a cheap handy talkie. When a DTMF tone is received, a NodeMCU connected to the decoder calls an IFTTT job to echo the key to [WTH]’s phone as an SMS message. That makes it easy to drive around and test whether his mobile rig is getting out. And since the receiver side is so portable, there’s a lot of flexibility in how tests can be arranged.

On the fence about ham as a hobby? We don’t blame you. But fun projects like this are the perfect excuse to go get licensed and start experimenting.

Continue reading “Simple Decoder Serves As Solo Ham’s Test Buddy”

GPS Tracker Gets SMS Upgrade

In May of 2000, then-President Bill Clinton signed a directive that would improve the accuracy of GPS for anyone. Before this switch was flipped, this ability was only available to the military. What followed was an onslaught of GPS devices most noticeable in everyday navigation systems. The large amount of new devices on the market also drove the price down to the point where almost anyone can build their own GPS tracking device from scratch.

The GPS tracker that [Vadim] created makes use not just of GPS, but of the GSM network as well. He uses a Neoway M590 GSM module for access to the cellular network and a NEO-6 GPS module. The cell network is used to send SMS messages that detail the location of the unit itself. Everything is controlled with an ATmega328P, and a lithium-ion battery and some capacitors round out the fully integrated build.

[Vadim] goes into great detail about how all of the modules operate, and has step-by-step instructions on their use that go beyond what one would typically find in a mundane datasheet. The pairing of the GSM and GPS modules seems to go match up well together, much like we have seen GPS and APRS pair for a similar purpose: tracking weather balloons.

Rotary Cell Phone: Blast From A Past That Never Was

The 1970s called and they want their rotary dial cell phone back.

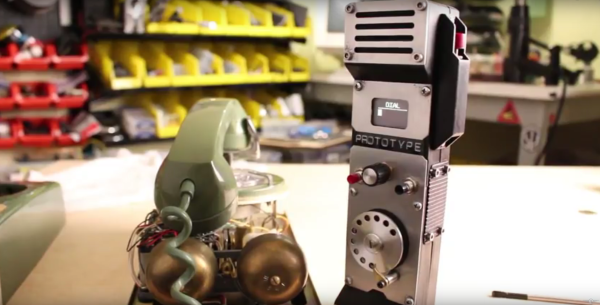
Looking for all the world like something assembled from the Radio Shack parts department – remember when Radio Shack sold parts? – [Mr_Volt]’s build is a celebration of the look and feel of a hobbyist build from way back when. Looking a little like a homebrew DynaTAC 8000X, the brushed aluminum and 3D-printed ABS case sports an unusual front panel feature – a working rotary dial. Smaller than even the Trimline phone’s rotating finger stop dial and best operated with a stylus, the dial translates rotary action to DTMF tones for the Feather FONA board inside. Far from a one-trick pony, the phone sports memory dialing, SMS messaging, and even an FM receiver. But most impressive and mysterious is the dial mechanism, visible through a window in the wood-grain back. Did [Mr_Volt] fabricate those gears and the governor? We’d love to hear the backstory on that.

This isn’t the first rotary cell phone hybrid we’ve featured, of course. There was this GSM addition to an old rotary phone and this cell phone that lets you slam the receiver down. But for our money a rotary dial cell phone built from the ground up wins the retro cool prize of the bunch.

Continue reading “Rotary Cell Phone: Blast From A Past That Never Was”

A Nokia Shield For The Arduino

The Nokia 3100 is a classic in the circles we frequent. The LCD in this phone is a very cheap and very common display, and it was one of the most popular phones since the phone from Bell, making it a very popular source of cool components.

Now everything is an Internet of Thing, and cellular data for microcontroller projects is all the rage. [Charles] thought it would be interesting to use the famous Nokia 3100 to transmit and receive data. After battling with some weird connectors, he succeeded.

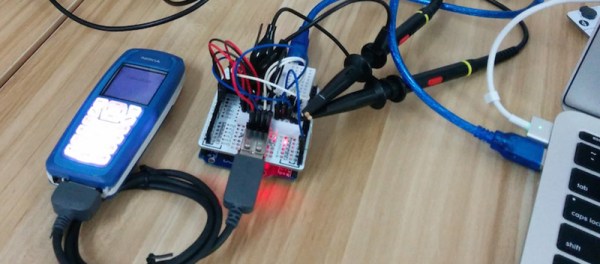
The Nokia 3100 doesn’t have a USB connector, as this phone was made before the EU saved us from a menagerie of cell phone chargers. Instead, this phone has a Nokia Pop-Port, a complex connector that still has TX and RX pins running at 115,200 bit/s 8N1. By fitting a USB socket onto a prototyping board, adding a few level shifters, and connecting the pins in the right order, [Charles] was able to get his Arduino talking to an old Nokia Brick.

[Charles] isn’t quite at the level of sending SMS from his confabulation, and even following a tutorial from [Ilias Giechaskiel] didn’t work. [Charles] is looking for help here, and if you have any suggestions, your input would be appreciated.

There is a problem with using a Nokia 3100 as a cheap Arduino cellular shield: it’s only 2G, and sometime soon those cell towers will be shut down. For now, though, it works, and once those 2G towers are shut down, there are plenty of options with cheap, early Android and iOS phones.

RasPi Doorbell

Raspberry Pi Doorbell Is Fully Featured

When you think of a doorbell, you typically don’t think of anything very complicated. It’s a button that rings a bell inside your home. That’s about it. [Ahmad] decided he wanted to turn his doorbell up to eleven (Google Doc) with this build. Using a Raspberry Pi, he was able to cram in loads of features.

When the doorbell button is pressed, many different events can be triggered. In the demo video, [Ahmad] shows how his phone receives a text message, and email, and a tweet. The system can even be configured to place a voice call via Google Hangouts using a USB microphone. [Ahmad] demonstrates this and shows how the voice call is placed almost instantly when the button is pressed. This may be a bit overkill, but it does demonstrate many different options depending on your own needs.

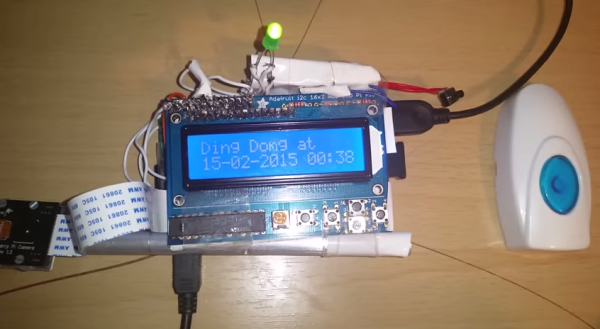
For the hardware side of things, [Ahmad] purchased a wireless doorbell. He opened up the ringer unit and hooked up the speaker wires to a couple of pins on the Raspberry Pi through a resistor. The doorbell unit itself is powered off of the 3.3V supply from the Pi. The Pi also has a small LCD screen which shows helpful information such as if the Internet connection is working. The screen will also display the last time and date the doorbell was pressed, in case you weren’t home to answer the door.

On top of all of that, the system also includes a Raspberry Pi camera module. This allows [Ahmad] to take a photo of the person ringing the doorbell as a security measure. He can even view a live video feed from the front door by streaming directly to YouTube live. [Ahmad] has provided a link to his Pi image in the Google Doc so others can use it and modify it as they see fit. Continue reading “Raspberry Pi Doorbell Is Fully Featured”

Alarm1

Adding WiFi And SMS To An Alarm System

[Don] wanted to bring his alarm system into the modern age. He figured that making it more connected would do the trick. Specifically, he wanted his alarm system to send him an SMS message whenever the alarm was tripped.

[Don] first had to figure out a way to trigger an event when the alarm sounds. He found a screw terminal that lead to the siren. When the alarm is tripped, this screw terminal outputs 12V to enable the siren. This would be a good place to monitor for an alarm trip.

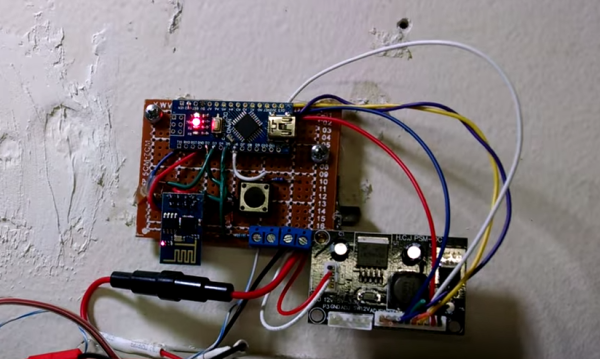
[Don] is using an Arduino nano to monitor the alarm signal. This meant that the 12V signal needed to be stepped down. He ran it through a resistor and a Zener diode to lower the voltage to something the Arduino can handle. Once the Arduino detects a signal, it uses an ESP8266 WiFi module to send an email. The address [Don] used is the email-to-SMS address which results in a text message hitting his phone over the cell network.

The Arduino also needed power. [Don] found a screw terminal on the alarm system circuit board that provided a regulated 12V output. He ran this to another power regulator board to lower the voltage to a steady 5V. This provides just the amount of juice the Arduino needs to run, and it doesn’t rely on batteries. [Don] provides a good explanation of the system in the video below. Continue reading “Adding WiFi And SMS To An Alarm System”

Controlling Nokia Phones With Arduino

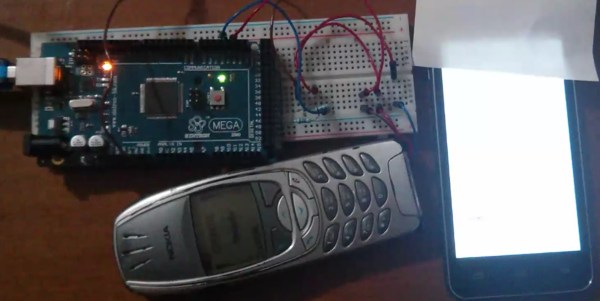
While [Ilias Giechaskiel] was waiting for his SIM900 shield to arrive, he decided to see what he could do with an old Nokia 6310i and an Arduino. He was researching how to send automated SMS text messages for a home security project, and found it was possible to send AT commands via the headphone jack of Motorola phones. But unfortunately Nokia did not support this, as they use a protocol known as FBus. With little information to go on, [Ilias] was able to break down the complicated protocol and take control with his Arduino.

With the connections in place, [Ilias] was able to communicate with the Nokia phone using a program called Gnokii — a utility written specifically for controlling the phone with a computer. Using the Arduino as an intermediary, he was eventually able tap into the FBus and send SMS messages.

Be sure to check out his blog as [Ilias] goes into great detail on how Nokia’s FBus protocol works, and provides all source code needed to replicate his hack. There is also a video demonstration at the end showing the hack in action.