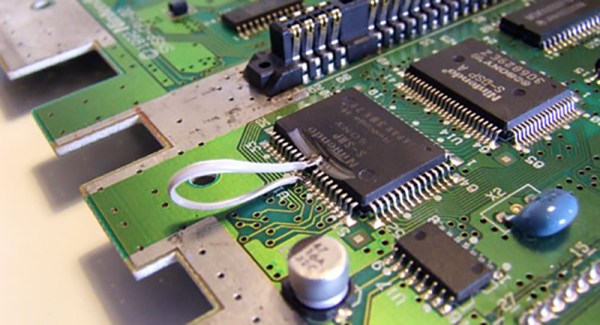
The bsnes emulator has a new overclocking mode to eliminate slowdowns in SNES games while keeping the gameplay speed accurate. We’re emulating old SNES hardware on modern machines that are vastly more powerful. Eliminating slowdowns should be trivial, right? For an emulator such as bsnes, which is written to achieve essentially pixel-perfect accuracy when emulating, the problem is decidedly non-trivial. Stick around to learn why.
snes110 Articles
Creative Limitation And The Super Nintendo Sound Chips
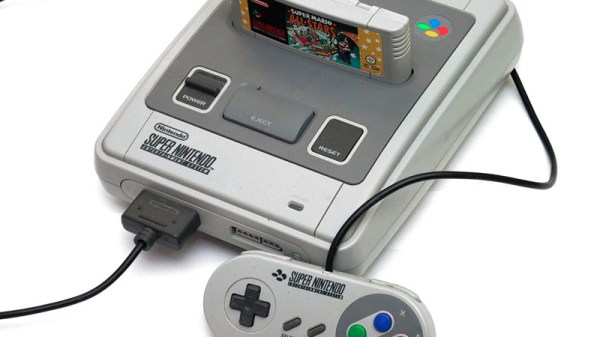
The Super Nintendo recently experienced a surge in popularity, either from a combination of nostalgic 30-somethings recreating their childhoods, or because Nintendo released a “classic” version of this nearly-perfect video game system. Or a combination of both. But what made the system worthy of being remembered at all? With only 16 bits and graphics that look ancient by modern standards, gameplay is similarly limited. This video from [Nerdwriter1] goes into depth on a single part of the console – the sound chips – and uses them to illustrate a small part of what makes this console still worth playing even now.
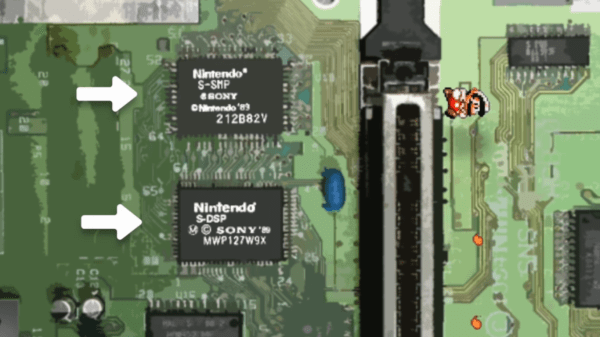
The SNES processed sound with two chips, a processing core and a DSP. They only had a capacity of 64 kb, meaning that all of a game’s sounds and music had to fit in this tiny space. This might seem impossible if you’ve ever played enduring classics like Donkey Kong Country, a game known for its impressive musical score. This is where the concept of creative limitation comes in. The theory says that creativity can flourish if given a set of boundaries. In this case it was a small amount of memory, and within that tiny space the composer at Rare who made this game a work of art was able to develop a musical masterpiece within strict limitations.
Even though this video only discusses the sound abilities of the SNES, which are still being put to good use, it’s a good illustration of what made this system so much fun. Even though it was limited, game developers (and composers) were able to work within its limitations to create some amazingly fun games that seem to have withstood the test of time fairly well. Not all of the games were winners, but the ones that were still get some playtime from us even now.
Continue reading “Creative Limitation And The Super Nintendo Sound Chips”
Micro-Sized Flex For Commercial Quality Bodging
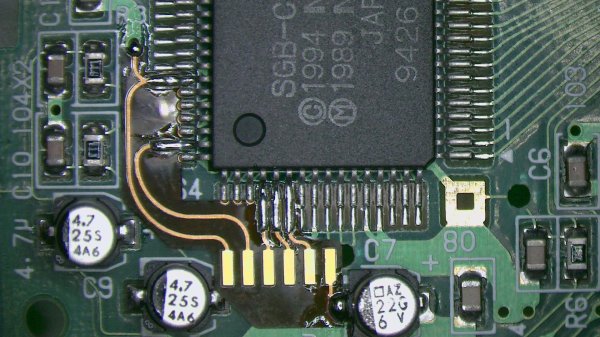
We love watching the creativity unleashed by the democratization of once-exotic technologies. The casualness by which one can order a cheap, small run of PCBs has unlocked a flood of fine pitch components and projects which look commercial quality even with a total build volume of one. Now the once mythical flex PCB has been falling from it’s stratospheric pricing and with OSHPark’s offering it feels like we’re at the inflection point. [qwertymodo] leveraged this by creating a beautifully twisted flex to add link port support to the Super Game Boy
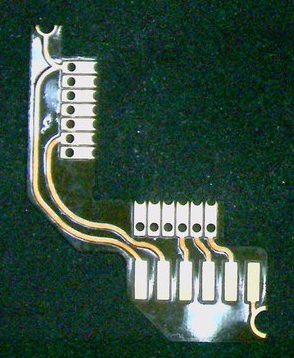 In the mid-90’s Nintendo released the Super Game Boy, a cartridge for the SNES which allowed you to play Game Boy games on the big screen. Each cartridge was in fact an entire Game Boy with the appropriate hardware to present it in a way the host console could interface with, but missing some of the hardware a standalone Game Boy would include like a link port to connect it to another system. This mod fixes this limitation by bridging the correct pins out from the CPU to a breakout board which includes the link port connector. For general background on what’s going on here, check out [Brian]’s article from April describing a different mod [qwertymodo] executed to the same system.
What’s fascinating is how elegant the mod is. Using a a flex here to create a completely custom, strangely shaped, one-of-a-kind adapter for this random IC, in low volume is an awesome example of the use of advanced manufacturing techniques to take our hacks to the next level. It reminds us a little of the method [Scotty] used to add the headphone jack to his iPhone 7 back in 2017. At the time that seemed like a technology only available to hackers who could speak a little Mandarin and lived in Shenzhen.
Detailed information on this hack is a little spread out. There is slightly more info in these tweets, and if you have a Super Game Boy crying out for a link port the adapter flexes are sometimes available here. Look beyond the break to see what the mod originally looked like sans-flex.
Continue reading “Micro-Sized Flex For Commercial Quality Bodging”
SNES Mode 7 Gets An HD Upgrade
Emulating SNES games hits us right in the nostalgic feels, but playing SNES games on an 1920×1080 monitor is a painful reminder of the limitations of SNES hardware. [DerKoun] felt the same consternation, and decided to do something about it. He realized that some SNES games have much higher resolution textures that weren’t being taken advantage of. The SNES had a revolutionary video mode, mode 7, that allowed a game to set a relatively high resolution background, and then rotate and scale that background during gameplay.
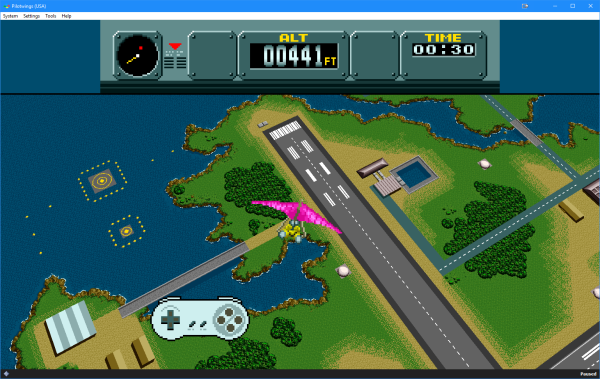
This pseudo 3d effect was amazing for its time, but taking a high resolution image and squashing it into a 320 by 240 pixel viewport makes for some painful artefacts. This is where [DerKoun]’s hack comes in. He wrote a modification to the bsnes emulator, allowing those rotations and scaling to happen in full resolution, vastly improving the visuals of mode 7 games.
The latest teaser for what’s to come is shown above, mapping the mode 7 backgrounds onto a widescreen viewport, as well as HD.
Come back after the break for some mind blowing SNES HD PilotWings action!
Update: Development discussion has continued in a new thread. Start with link above to get origin story and continue to the new dev thread for recent updates.
Continue reading “SNES Mode 7 Gets An HD Upgrade”
A Steady Hand Makes This Chip Work Again
What do you do when you’re working with some vintage ICs and one of the tiny legs pops off? That’s what happened to [Kotomi] when working with an old Super Nintendo. A single lead for the sound chip just snapped off, leaving [Kotomi] one pin short of a working system (the Google Translatrix). This is something that can be fixed, provided you have a steady hand and a rotary tool that’s spinning at thousands of RPM.
Fixing this problem relies on a little bit of knowledge of how integrated circuits are built. There’s a small square of silicon in there, but this tiny die is bonded to a metal leadframe, which looks like the ribcage of a robotic centipede. This leadframe is covered in epoxy, the pins are bent down, and you have an IC. Removing just a tiny bit of epoxy grants access to the leadframe which you can then solder to. Don’t breathe the repair, it’s not pretty, but it does work.
While this technique makes use of a Dremel to break into the chewy nougat center of a vintage chip, and in some ways this could be called decapsulation, it really isn’t. We’ve seen people drop acid to get to the center of a chip and a really hot torch will get to the middle of a ceramic chip, but this technique is just accessing the lead frame of the IC. All ICs have a stamped (or photoetched) metal frame to which the silicone die is bonded. Running a Dremel against some epoxy doesn’t access the silicon, but it does grant access to the signals coming off the chip.
SNES Portable Leverages Flash Cart For More Games
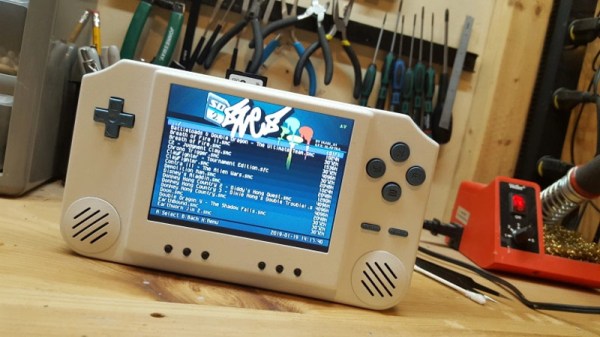
Handheld consoles have to make a lot of design choices that their TV connected brethren don’t have to worry about. Battery life is important, as is screen visibility, and the games can’t be too bulky or unwieldy if you’re going to be carrying them around all day. [Chris] is no stranger to building handheld versions of home consoles, and took a few of these lessons on board in his latest portable SNES build.
The motherboard was provided by a SNES Jr., a lightweight, compact model released towards the end of the console’s reign. This was small enough that it required no trimming, however [Chris] elected to replace the inefficient 7805 with a more modern switching regulator. The case was 3D printed on a typical FDM setup, while the buttons were produced on a Form 2 for better dimensional accuracy and surface finish.
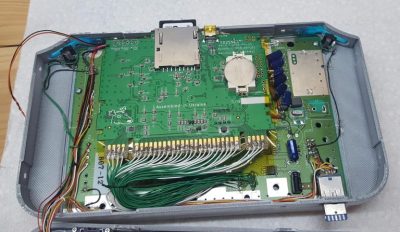
The real party piece, however, is the use of an SD2SNES flash cart. This allows a huge variety of ROMs to be loaded onto a single SD card, and played on the original console hardware. This is particularly useful in a portable build, as it becomes possible to carry all the games you could want, rather than having to juggle several full-sized SNES cartridges. The SD2SNES is wired in place permanently inside the console, with an impressive number of patch wires between the motherboard and the cartridge PCB. Despite the long lead length, [Chris] reports no issues with the connection.
There are some limitations – the flash cart doesn’t work properly for games using extra chips on the cartridge, like the SuperFX in Star Fox, for example. Despite this, it’s an excellent, high quality build that we’re sure is a lot of fun to play out and about.
We’ve seen [Chris]’s work before – this portable N64 is a particularly nice example. Video after the break.
Continue reading “SNES Portable Leverages Flash Cart For More Games”
NBA Jam ROM Hack On SNES Is Heating Up
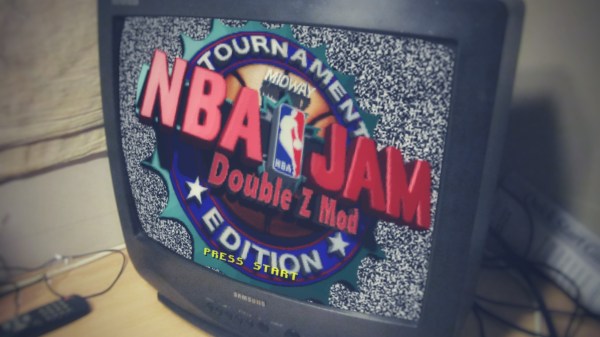
It’s a rare game that is able to bridge the gap between sports game fans and those that identify as hardcore gamers. Midway was able to bring those two groups onto common ground when they released NBA Jam to arcades in 1993. The game was an instant hit and was ported to 16-bit home consoles that same year. Compromises were made during those ports, so an attempt to make them more inline with the arcade release came in the form of NBA Jam: Tournament Edition a year later. However, in the heart of [eskayelle] NBA Jam: TE on the Super Nintendo didn’t go far enough. Now they have released a ROM hack that completely reworks NBA Jam: TE, and it’s called the “Double Z Mod”.
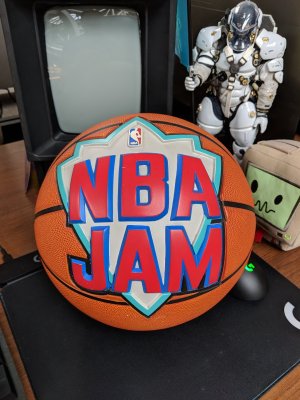
The concept behind the ROM hack was to bring about the NBA Jam game that fans deserved. All facets of pop culture from the early 90s were mixed in (not just former Presidents). According to the ROM hack’s notes, some of the things that were packed into the mod include:
• Assets from the original game have been restored, such as the Mortal Kombat banners.
• Modified certain players to give them a more “arcadey” feel.
• Soar to new heights with Air Jordan!
• Play as “The Worm”, Dennis Rodman, on at least four teams.
• Forget the Rookies, now play as the 1992 Dream Team.
• Tons of new secret characters including: Hulk Hogan, David Hasselhoff, Arnie as the T-800, and more.
• Expanded rosters are now as easy as inputting the “Konami code”
(Hint: B, A, B, A, Up, Down, B, A, Left, Right, B, A at the title screen menu)
In a gesture to give back to the ROM hacking community, [eskayelle] went as far to provide a collection of helpful tools to help potential SNES ROM hackers build their own NBA Jam: TE remixes. The document details ways to alter player photos, team colors, stats, and cosmetic tweaks. Since the Double Z mod focuses on being as 90s as possible, maybe this collection of tutorials will lead to a current NBA roster update.
To play the NBA Jam TE Double Z mod, you can use devices like the Retrode that allow easy dumping of an original cartridge onto a PC. From there the dumped ROM can be patched using an IPS patcher, like LunarIPS, which is as simple as locating two files in a browser window and hitting “Apply Patch”. In case you needed to see the Double Z mod in action, there is the clip below.

