A Dead Macbook GPU Shouldn’t Stop You, With This BGA Soldering Hack

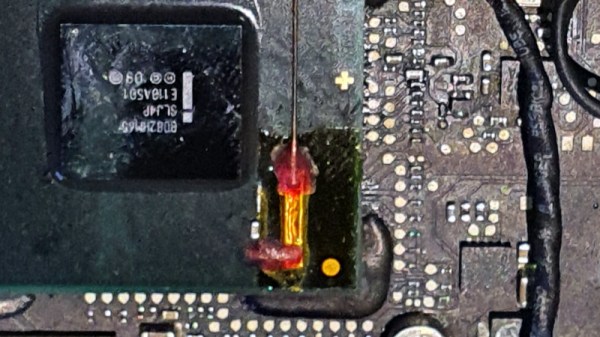
On some 2011 Macbook Pro models, there is a tendency for the Radeon GPU to fail. This should mean game over for the computer, but surprisingly salvation is offered by its having not one but two GPUs on board. The Intel processor also has a GPU, and Apple use a pile of logic in an FPGA to switch at will between them. The community have produced fresh FPGA code to revive a dead Mac on its Intel GPU, but at the expense of losing brightness control. [Ayilm1] has brought back the brightness with a clever BGA reworking hack that gains access to a brightness control line present on the Intel BD82HM65 Platform Controller Hub chip but not used in the Macbook.

We’re used to impressive soldering work here at Hackaday, and we’ve seen our share of wiring direct to the balls on an upturned BGA chip. This is a similar idea but at another level, as a section of the top insulation on an in-place BGA is removed to expose the microvia above the ball carrying the required signal. A tiny wire is soldered to the exposed pad and taken to a piece of copper tape stuck down to provide mechanical strength, and a piece of enameled copper wire is run from that to the other side of the PCB where lies its destination. It comes with FPGA code to take advantage of it, but even for non-Macbook owners, it’s an extremely impressive piece of work. It’s not the first fine-soldering Macbook fix we’ve seen, either.

Thanks [lightpink784] for the tip.
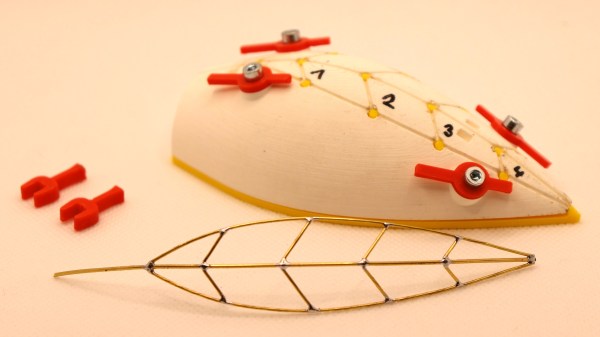
3D-Printed Tools Make Circuit Sculpture A Little Easier

Having the tools needed to do a job is a powerful thing. Having the tools needed to make more tools for doing cool things is even better, though, and that’s where [Jiří Praus] took things with this 3D-printed jig for making his blooming tulip circuit sculpture.

If you haven’t seen [Jiří]’s tulip, check out our coverage from back when he first built it. The brass wire and tube mechanism and some clever linkages let a single servo open the Neopixel-adorned petals at a touch. But what started as a one-off romantic gesture for his wife on Valentine’s Day became something more, and what was a labor of love turned into just labor very quickly. [Jiří]’s solution, explained in the brief video below, is a 3D-printed jig that holds all the wires that form the tulip petals locked into position. The wire that defines the spine of the petal goes into a groove and gets held down with removable clips. The edge wires are held by rotating clips, and the veins of the petals just lay in place in grooves. The area around each joint is hollowed out so [Jiří] can solder easily without melting the plastic jig.

The best part comes at the end, when it’s time to release the completed petal. For that, a tool with pins that looks a little like a hedgehog is inserted from below, and pins that fit into each joint’s hole pop the finished petal off. We can see how this tool would greatly increase the production of his tulips, so if that’s his goal, he’s on track.

If you’re into circuit sculpture, you’re in the right place. Check out [Mohit Bhoite]’s Supercon talk on the subject, or some more of the tools [Jiří] has come up with to improve his art.

Continue reading “3D-Printed Tools Make Circuit Sculpture A Little Easier”

Strike A Solder Joint Behind Enemy Lines

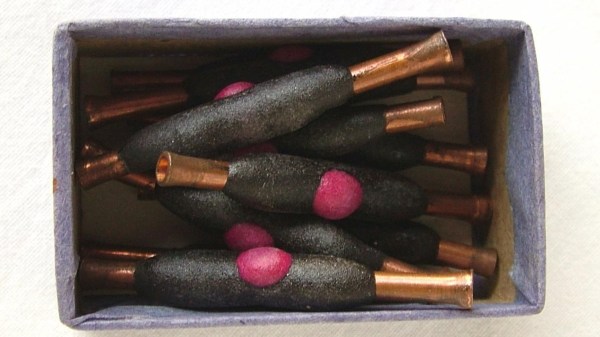
Imagine you’re out behind enemy lines in WW2, setting up demolition charges that may save the lives of your fellow soldiers. How do we make a solid connection between wires that will last? One of the solutions that were used by the OSS and SOE, the predecessors to the CIA and British Secret Service, were self soldering sleeves that could be lit like a match. [ElementalMaker] managed to get his hands on a box of these sleeves, and found that they work incredibly well, even after more than half a century.

The sleeves consist of a copper tube with solder and flux inside, and wax-covered pyrotechnic compound around the outside. A small blob of striker compound similar to a match head is used to set the soldering process in motion, using the striker surface on the outside of the oversize matchbox that the sleeves are packed in. The pack that the [ElementalMaker] got was made in 1964, but is supposedly no different from those used in WW2.

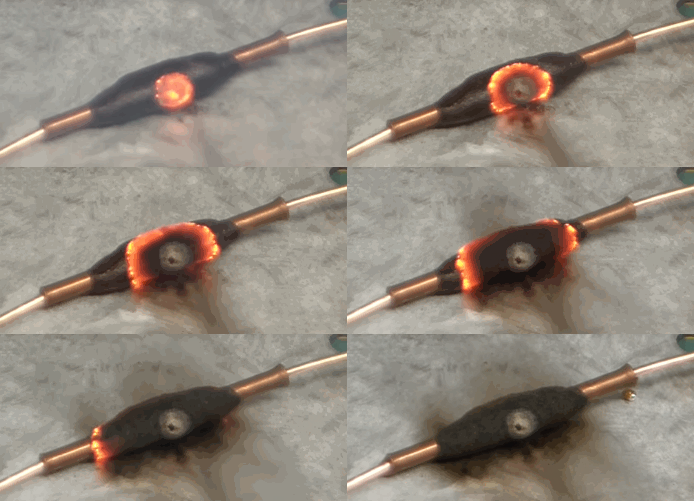
When lit, the pyrotechnic compound does not create any flame, it only smolders, probably to make it safer to use, and avoid detection at night. As the solder inside the sleeve melts, the operator is supposed to push the wires further into the tube to make them overlap. Although [ElementalMaker] didn’t cut open the sleeves, it definitely looks like a good joint, with solder oozing from the ends. Check out the video after the break! If you want to get your hands on a pack of these sleeves, it looks like a military surplus store in the UK managed to source some.

As horrible as war is, it’s undeniable that it inspires some creative innovations. Like soldiers hacking together parts from multiple guns to serve their immediate needs, or making guns shoot through spinning propellers without damaging them. Continue reading “Strike A Solder Joint Behind Enemy Lines”

Solder To Aluminum

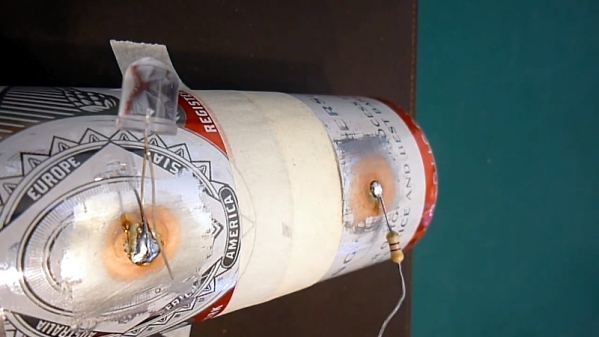
If you’ve ever tried to solder to aluminum, you know it isn’t easy without some kind of special technique. [SimpleTronic] recently showed a method that chemically plates copper onto aluminum and allows you to solder easily. We aren’t chemists, so we aren’t sure if this is the best way or not, but the chemicals include salt, copper sulfate (found in pool stores), ferric chloride as you’d use for etching PCBs, and water.

Once you have bare aluminum, you prepare a solution from the copper sulfate and just a little bit of ferric chloride. Using salt with that solution apparently removes oxidation from the aluminum. Then using the same solution without the salt puts a copper coating on the metal that you can use for soldering. You can see a video of the process below.

Continue reading “Solder To Aluminum”

Have JBC Soldering Handle, Will USB-C Power Deliver

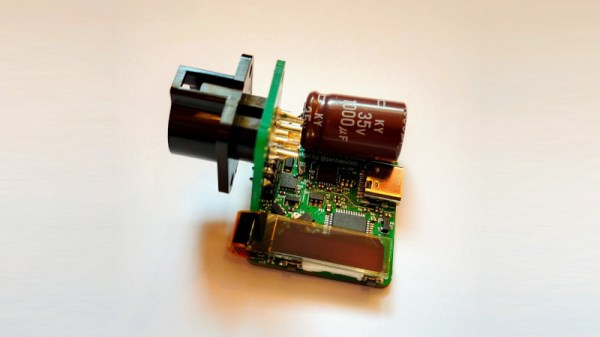
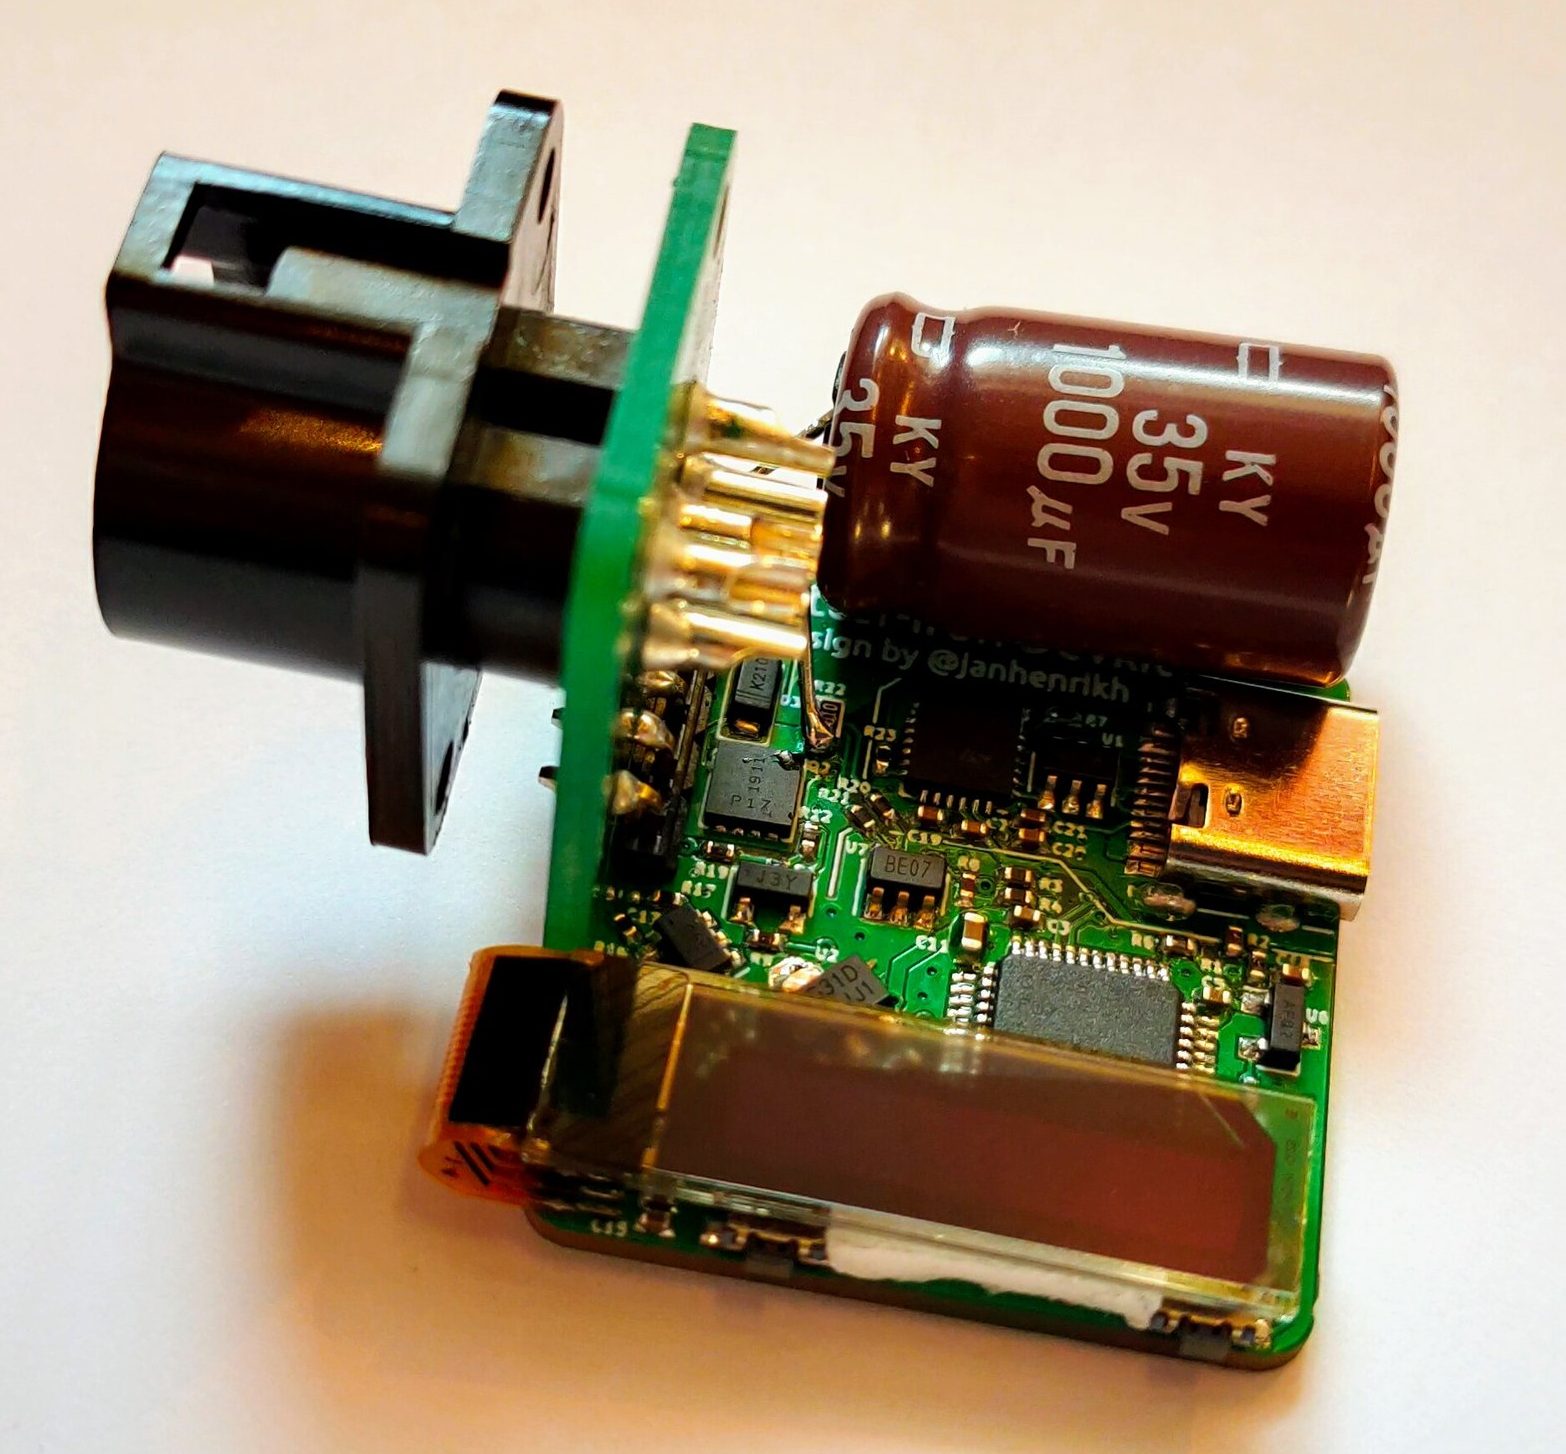
Frequent converter-of-tools-to-USB-C [Jana Marie Hemsing] is at it again, this time with a board to facilitate using USB Power Delivery to fuel JBC soldering iron handles. Last time we saw [Jana] work her USB-C magic was with the Otter-Iron, which brought Power Delivery to the trusty TS100 with a purpose built replacement PCBA. This time he’s taking a different approach by replacing the “station” of a conventional soldering station completely with one tiny board and one giant capacitor.

If you’ve been exposed to the “AC fire starter” grade of soldering iron the name JBC might be unfamiliar. They make tools most commonly found with Metcal’s and high end HAKKOs and Wellers on the benches of rework technicians and factory floors. Like any tool in this class each soldering station comes apart and each constituent piece (tips, handles, base stations, stands, etc) are available separately from the manufacturer and on the used market at often reasonable prices, which is where [Jana] comes in.

The Otter-Iron PRO is a diminutive PCBA which accepts a USB-C cable on one side and the connector from a standard JBC T245-A handle on the other. JBC uses a fairly typical thermistor embedded in the very end of the iron tip, which the Otter-Iron PRO senses to provide closed loop temperature control. [Jana] says it can reach its temperature setpoint from a cold start in 5 seconds, which roughly matches the performance of an original JBC base station! We’re especially excited because this doesn’t require any modification to the handle or station itself, making it a great option for JBC users with a need for mobility.

Want to make an Otter-Iron PRO of your own? Sources are at the link at the top. It sounds like v3 of the design is coming soon, which will include its own elegant PCB case. Check out the CAD render after the break. Still wondering how all this USB-PD stuff works? Check out [Jason Cerudolo’s] excellent walkthrough we wrote up last year.

Continue reading “Have JBC Soldering Handle, Will USB-C Power Deliver”

The Art Of USB Dongle Repair

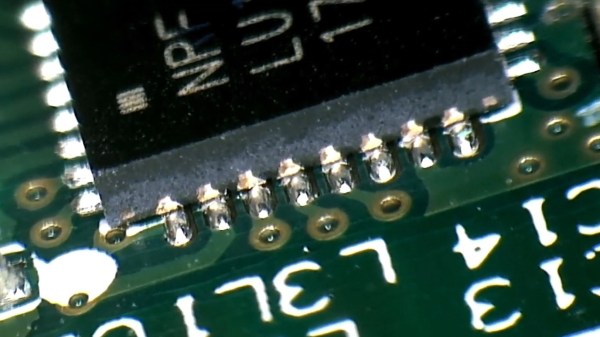
Faced with a broken USB dongle for our wireless devices, most of us would likely bin the part and order a replacement, after all the diminutive size of those things probably means hard to impossible repairability, right? Well, [The Equalizor] took it as a challenge and used the opportunity to practice his microscopic soldering skills just for funsies.

The wireless adapter in question, which came from one of his clients who accidentally bent it while it was plugged into a laptop, refused to be recognized by a computer under any circumstances. After sliding out the metal casing for the USB plug and snapping off the plastic housing, [The Equalizor] discovered that the slightly bent exterior hid a deeply cracked PCB. Then, with an inspection of the severed traces and lifted components, it was simply a matter of reflowing solder a few times to try to make the board whole again. Once the dongle was confirmed working, a new 3D shell was printed for it, replacing the original which had to be broken off.

It might not seem extraordinary to some people, but this video is a good example to show that repairs to delicate electronics in such a small scale are feasible, and can serve to reduce the amount of electronic waste we constantly dump out. Just because some electronics seem dauntingly elaborate or beyond salvaging, it doesn’t always mean there isn’t light at the end of the tunnel. You can see the work performed on this tiny dongle after the break.

Continue reading “The Art Of USB Dongle Repair”

Concrete Solder Squid Is A Solid Solution

Although it’s possible to buy a soldering setup out of the box, the one that works for you will likely develop over time. Honestly, it may never stop evolving. Sure, you can start with el-cheapo helping hands or a nice hobby vise, but it probably won’t end there. Why? Because no one of these tools will be right for all applications, unless you plan to solder the same thing over and over again. Sometimes it’s just easier to alligator clip a board in place than to slowly manipulate the jaws of a vise, but those helping hands have such a limited range of motion.

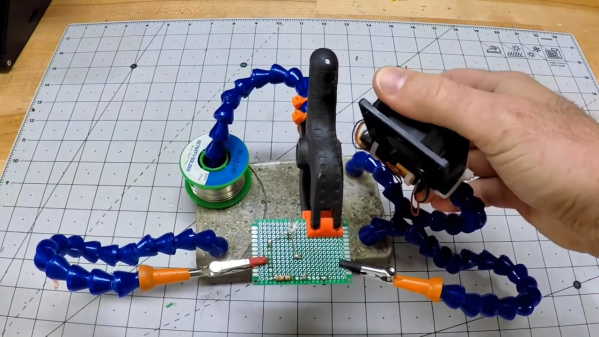
Have you been meaning to build a soldering squid out of coolant hose because that stuff just looks so dang cool and bendy? Well, then let Hackaday alum [JeremySCook] show you how it can be done. A few years ago he built a similar squid with a wooden base, but it just isn’t heavy enough, so he redesigned it with a concrete base. He took the opportunity to make some nice tweaks, like zip-tying a small PC fan and 9 V to make an endlessly repositionable ventilation system, and adding a big clip in the back for extra stability while soldering. And of course, threading the solder spool on to one of the hoses is genius.

If you follow [Jeremy] at all, you know he’s been playing around with concrete for a while now, and it’s neat to see him cement his devotion to the stuff by using it in the pursuit of better tools. He’s got the files for the printed mold up on GitHub, and the build video after the break should be all set up by now.

Not custom enough for you? Fire up that printer and make your own ball and socket arms.
Continue reading “Concrete Solder Squid Is A Solid Solution”