Upgrading A USB Soldering Iron!

Seeing the popularity of the TS-100 soldering iron, GitHub user [ole00] found himself desirous of a few of its features, but was put off by its lack of a power supply. What is a hacker to do? Find a cheaper option, and hack it into awesomeness.

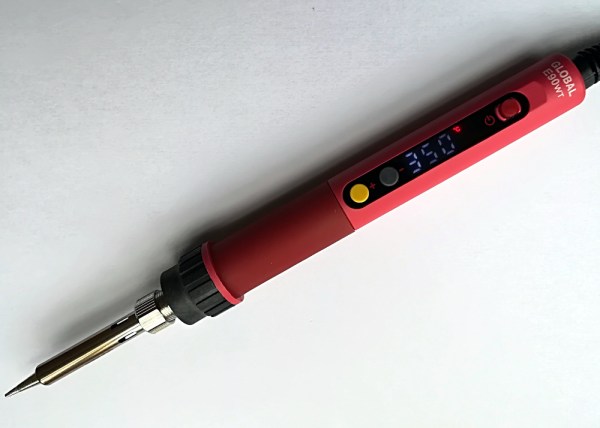
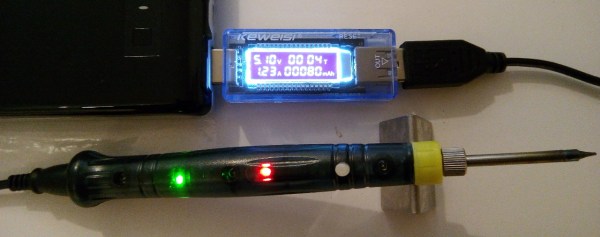
[ole00] stumbled across the inexpensive ZD-20U and — despite a handful (sorry!) of issues — saw potential: it’s compact, lightweight, and powered via a USB power cable. Wanting to use as much of the ZD-20U’s original board as possible, the modifications were restricted to a few trace cuts and component swaps. The major change was swapping out the 555 timer IC controlling the iron with am ATtiny13a MCU to give it a bit more control.

Continue reading “Upgrading A USB Soldering Iron!”

Hackaday Prize Entry: Reflowduino, The Open Source Reflow Oven Controller

Face it — you want a reflow oven. Even the steadiest hands and best eyes only yield “meh” results with a manual iron on SMD boards, and forget about being able to scale up to production. But what controller should you use when you build your oven, and what features should it support? Don’t worry — you can have all the features with this open source reflow oven controller.

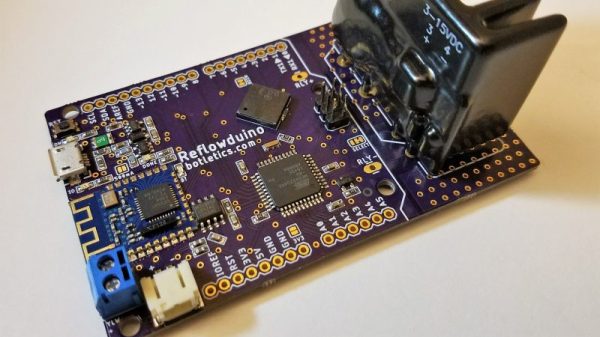
Dubbed the Reflowduino for obvious reasons, [Timothy Woo]’s Hackaday Prize entry has everything you need in a reflow oven controller, and a few things you never knew you needed. Based on an ATMega32, the Reflowduino takes care of the usual tasks of a reflow controller, namely running the PID loop needed to accurately control the oven’s temperature and control the heating profile. We thought the inclusion of a Bluetooth module was a bit strange at first, but [Timothy] explains that it’s a whole lot easier to implement the controller’s UI in software than in hardware, and it saves a bunch of IO on the microcontroller. The support for a LiPo battery is somewhat baffling, as the cases where this would be useful seem limited since the toaster oven or hot plate would still need a mains supply. But the sounder that plays Star Wars tunes when a cycle is over? That’s just for fun.

Hats off to [Timothy] for a first-rate build and excellent documentation, which delves into PID theory as well as giving detailed instructions for every step of the build. Want to try lower-end reflow? Pull out a halogen work light, or perhaps fire up that propane torch.

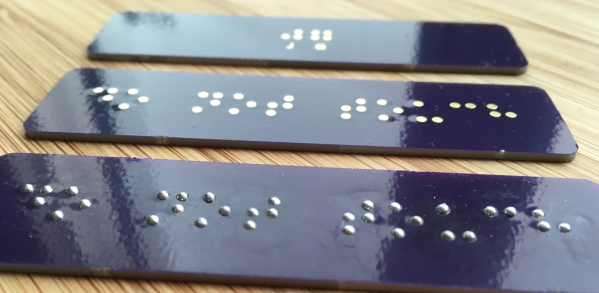
Making Braille Signs Out Of PCBs

[jg] recently passed some damaged Braille signs and took on the challenge of repairing them. Informed by his recent work on PCB lapel pins, [jg] immediately thought of using circuit boards for this project. He’d noticed that round solder pads made for uniform hills of solder, and this reminded him of the bumps in Braille.

He began by reading up on the standards of the Braille Authority of North America, which stipulates a dot height of 0.6mm. He loaded up the PharmaBraille font system and laid it out the dots in photoshop, then and imported it into KiCad and laid out the boards. When the PCBs had arrived from OSH Park, [jg] soldering up the pads (lead free, but of course) to see if he could get the hills to 0.6mm. He’s experimenting with different methods of melting the solder to try to get more even results.

Braille interfaces crop up a surprising amount in hacker projects. This refreshable Braille display and keyboard and the Braigo LEGO Braille printer are prime examples.

[thanks, Drew!]

Is It A MagLite Or A MagnaStat?

[David Schneider]’s love affair with Weller temperature controlled soldering irons began many years ago, but when he came to the point of needing a cordless iron he had problems finding one that replicated his trusty mains-powered soldering station. His solution was simple, to build his own, and in a stroke of genius he did so with an odd combination of a Weller MagnaStat element and bit, and a repurposed MagLite flashlight.

The Weller parts are all available off-the-shelf as spares, and the MagLite was easy to source. But its D cells would never give the required 24 V for the iron, so he had to incorporate a set of 14500 Li-ion cells with built-in electronic protection. The element protrudes from the front of the flashlight, giving an iron that seems to do the business but to our eyes looks rather unwieldy. Still, it does the job, and provides a far more sturdy and reliable iron than any cordless one we’ve yet seen, so we think that’s a result.

We’ve reviewed a Weller MagnaStat in the past,with a special look at availability of bits for older models.

Get Down To The Die Level With This Internal Chip Repair

Usually, repairing a device entails replacing a defective IC with a new one. But if you’ve got young eyes and haven’t had caffeine in a week, you can also repair a defective chip package rather than replace it.

There’s no description of the incident that resulted in the pins of the QFP chip being ablated, but it looks like a physical insult like a tool dropped on the pins. [rasminoj]’s repair consisted of carefully grinding away the epoxy cap to expose the internal traces leading away from the die and soldering a flexible cable with the same pitch between the die and the PCB pads.

This isn’t just about [rasminoj]’s next-level soldering skills, although we’ll admit you’ve got to be pretty handy with a Hakko to get the results shown here. What we’re impressed with is the wherewithal to attempt a repair that requires digging into the chip casing in the first place. Most service techs would order a new board, or at best solder in a new chip. But given that the chip sports a Fanuc logo, our bet is that it’s a custom chip that would be unreasonably expensive to replace, if it’s even still in production. Where there’s a skill, there’s a way.

Need more die-level repairs? Check out this iPhone CPU repair, or this repair on a laser-decapped chip.

[via r/electronics]

EMMC Hacks For The Speed And Capacity Upgrade Win

You could say that it is the essence of a site like this one, that the kind of people who form our readership are also the kind of people who examine the specs of the devices in front of them to reveal hidden features. Such was the case with [Ryan], who noticed that the eMMC controller on his 96Boards HiKey development board supports both HS200 data transfer speeds and 1.8v signaling, both of which it wasn’t using.

In unlocking the extra performance, he takes readers through a primer on the device tree, and is happy to report that his transfer rate has increased from 26 to 36 MB/s, a tidy return on his work.

However, the story doesn’t end there. The 8GB Samsung eMMC chip wasn’t quite as roomy as he’d have liked, so it was time to replace it with a 32GB version. Even with careful desoldering, he managed to lift a few pads, though very fortunately they were ones that were either NC or power rails that were duplicated elsewhere. Some tricky reflowing of what is quite a formidable BGA package to do by hand, and he was rewarded with a working board featuring higher flash capacity. We salute him for taking it on, we probably wouldn’t have had the courage.

We’ve brought you a similar upgrade before, this time an eMMC on a Nexus 5 phone.

Thanks [darkspr1te] for the tip.

Think You Know Everything About Soldering?

[Joshua] has frequent discussions about his soldering techniques with viewers of his YouTube channel. He finally decided to interview [Randy Rubinstein] who is the president of SRA Soldering. In nearly an hour, they talk about everything from solder alloys to proper temperature. They also talk about lead exposure, flux cleaning, and lead-free solder.

They also talk about strategies for rework with lead-free and using special solder for removing SMD components. Honestly, although the first frame of the video says “your solder sucks,” we didn’t really find any earth-shattering revelations about something everyone’s doing wrong. We did, however, find a lot of good advice and some interesting details about things like the uses for different solder alloys.

Continue reading “Think You Know Everything About Soldering?”