We’ve all seen emulated Apple II and Commodore 64 boards about the place. Few of us have heard of the Romanian ZX Spectrum clone known as the Cobra, let alone any efforts to replicate one. However, [Thomas Sowell] has achieved just that, and has shared the tale with us online.
The Cobra was named for its origins in the city of Brasov – hence, COmputer BRasov. The replica project was spawned for a simple reason. Given that sourcing an original Romanian Cobra would be difficult, [Thomas] realized that he could instead build his own, just as many Romanians did in the 1980s. He set about studying the best online resources about the Cobra, and got down to work.
The build started with board images sourced from Cobrasov.com, and these were used to get a PCB made. [Thomas] decided to only use vintage ICs sourced from the Eastern Bloc for authenticity’s sake, too. Most came from the former USSR, though some parts were of East German, Romanian, or Czechoslovakian manufacture. The project took place prior to the Russian invasion of Ukraine, so there weren’t any hassles shipping across borders.
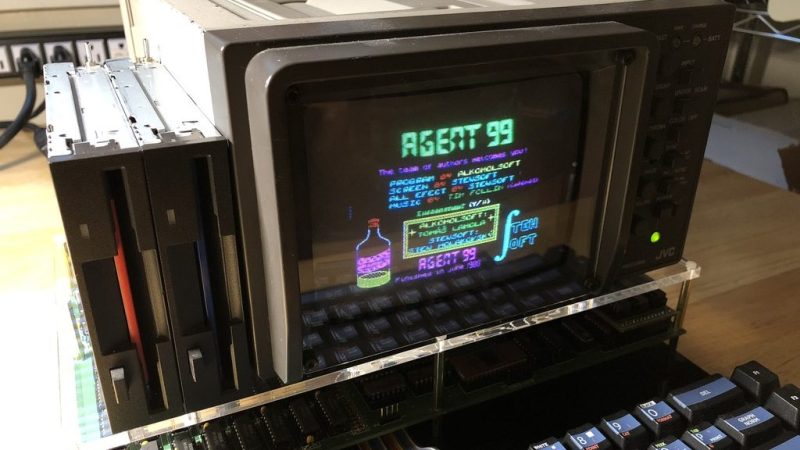
With everything hooked up and the EEPROMs given a real Cobra ROM image, the computer burst into life. There were some hiccups, with an overheating video IC and some memory glitches. However, with some nifty tweaks and replacements subbed in, the computer came good. Other work involved adding a custom keyboard and modifying 3.5″ floppy drives to work with the system.
Overall, the build is a faithful tribute to what was an impressive piece of engineering from behind the Iron Curtain. [Thomas]’s work also embodies the DIY ethos behind many homebrew Cobra computers built back in the day.
If all this talk has got you curious about the full history of the Cobra and Romania’s underground computer movement, we have everything you’re looking for right here!