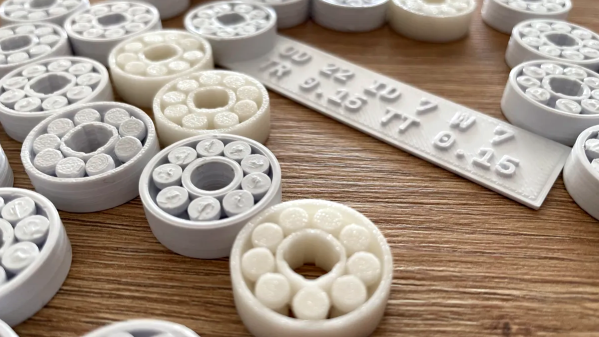
3D printing bearings with an FDM printer can be an iffy endeavor, but it doesn’t have to be that way. [Matvey Kukuy]’s Ultimate 608 Bearing with Calibration Kit is everything you’ll need to dial in and print functional 608-style print-in-place bearings on your 3D printer.
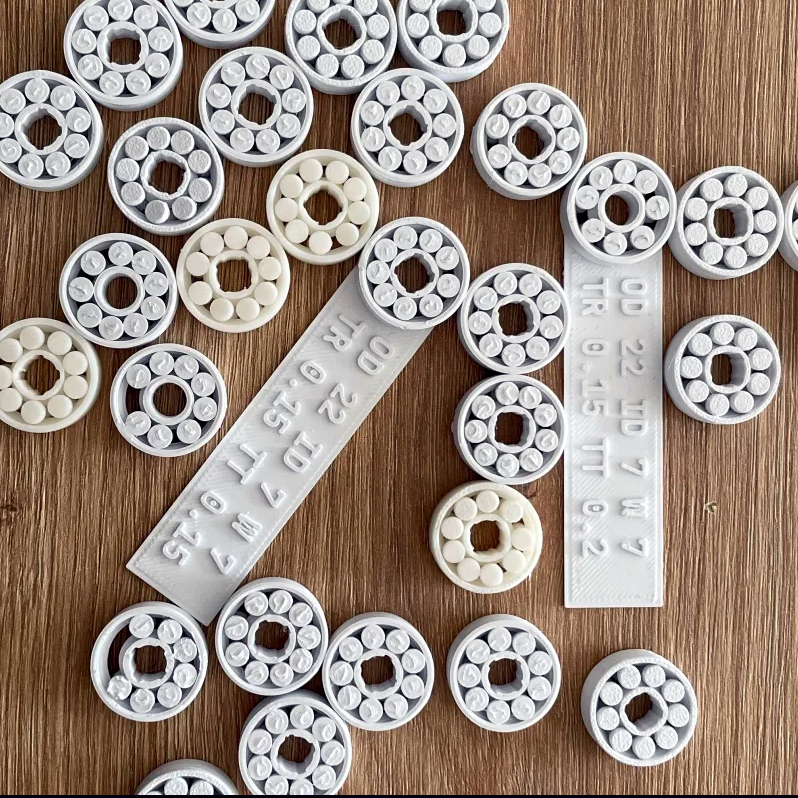
Calibration pieces have a handy label attached for identification.
[Matvey] found that there are two key tolerances to get right. And by “get right” he means “empirically determine which works best with your filament and printer”. But don’t worry, there’s no need to get into CAD work to make that happen. [Matvey] has exported a staggering 64 slightly different calibration models (and their matching production versions) along with a printable testing tool. With the help of a step-by-step process that resembles a sort of binary search, one can take the Goldilocks approach to find just the right model for one’s filament and printer in a minimum of steps.
There’s one more tip as well: [Matvey] says that once you determine the best model to use, don’t fill the print bed with copies, unless you want a bed full of possibly non-working bearings! Why is this? A 3D printer prints a bed full of objects slightly differently than it prints a single one, and since the margin for error on the perfectly-selected bearing is so small, that can be enough to keep it from working. To print more than one bearing at a time, position them far from each other and use something like PrusaSlicer’s sequential printing, which is an option to print each object completely before starting the next one.
[Matvey]’s own best results came from printing with PLA at a layer height of 0.16 mm. He also used grease in the bearing to improve performance and extend its life. He doesn’t specify what kind of grease he used, but we’d recommend a plastic-safe grease like PTFE-based Super Lube.
Have you used 3D printed bearings in a project? Would [Matvey]’s design be helpful to you? Let us know all about it in the comments.
PrusaSlicer has a new feature: the ability to import a CAD model for 3D printing. Starting in version 2.5.0-beta1, PrusaSlicer can import STEP format 3D models. An imported STEP file is converted to a triangle mesh on import (making it much like a typical .stl or .3mf file) which means that slicing all happens as one would normally expect. This is pretty exciting news, because one is not normally able to drop a CAD format 3D model directly into a slicer. With this change, one can now drag .stp or .step files directly into PrusaSlicer for printing.
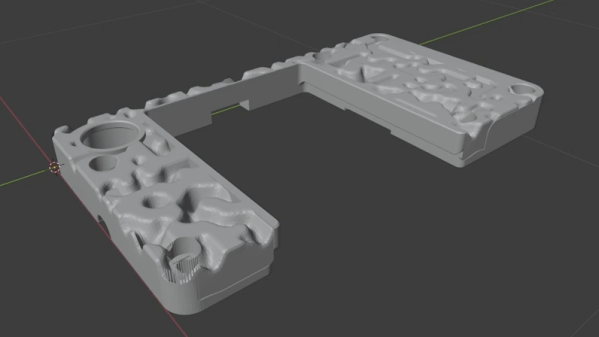
The script can give printed parts a more appealing finish.
The idea is to modify a 3D model with the results of the script, leaving one with something a bit more interesting than a boring, flat surface. [volzo] explains how to use OpenSCAD to do exactly that, but it’s also possible to import the STL file the script creates into the CAD program of one’s choice and make the modifications there with some boolean operations.
[volzo]’s method isn’t entirely plug and play, but it could still be a handy thing to keep in your back pocket when designing your next part. There are also other ways to modify the surfaces of prints for better aesthetics; we’ve previously covered velocity painting (also known as ‘tattooing’ in some slicers) and also fuzzy skin.
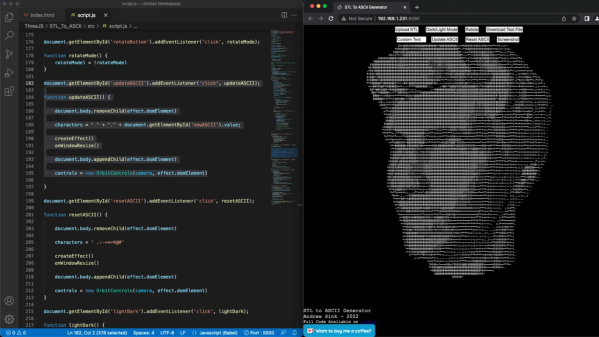
If you look hard enough, most of the projects we feature on these pages have some practical value. They may seem frivolous, but there’s usually something that compelled the hacker to commit time and effort to its doing. That doesn’t mean we don’t get our share of just-for-funsies projects, of course, which certainly describes this online 3D ASCII art generator.
But wait — maybe that’s not quite right. After all, [Andrew Sink] put a lot of time into the code for this, and for its predecessor, his automatic 3D low-poly generator. That project led to the current work, which like before takes an STL model as input, this time turning it into an ASCII art render. The character set used for shading the model is customizable; with the default set, the shading is surprisingly good, though. You can also swap to a black-on-white theme if you like, navigate around the model with the mouse, and even export the ASCII art as either a PNG or as a raw text file, no doubt suitable to send to your tractor-feed printer.
[Andrew]’s code, which is all up on GitHub, makes liberal use of the three.js library, so maybe stretching his 3D JavaScript skills is really the hidden practical aspect of this one. Not that it needs one — we think it’s cool just for the gee-whiz factor.
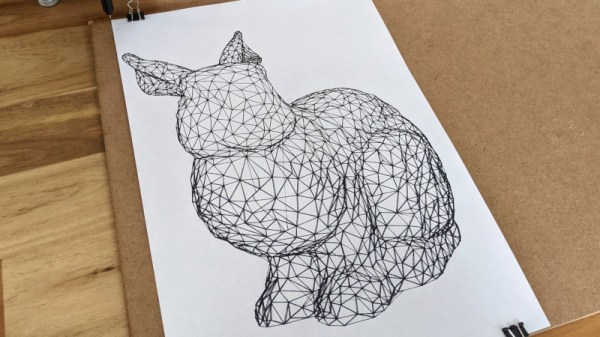
We’ve become used to finding models on websites such as Thingiverse and downloading them to print. After all, whose hackerspace doesn’t have a pile of novelty prints? How about printing them on paper? For the plotter enthusiast that can be particularly annoying. Never fear, [Trammell Hudson] is here with an online 3D to 2D converter just for plotters. [Trammell’s] creation makes a vector image suitable for a plotter while eliminating spurious behind-the-scenes lines.
Plotter drawings are the pen-and-paper equivalent of a vector CRT display, in which the graphics are printed as continuous strokes. Rendering a 3D model as a wireframe for a plotter requires the removal of any pen strokes that comes from the 3D space behind the surface in view. Loading various models into the web page seemed to do a pretty good job of this, though the ubiquitous Benchy 3d printer test model lived up to its billing as a torture test in taking several minutes to render.
As anyone who has followed the #PlotterTwitter social media hashtag will know, there is a considerable community of pen plotter enthusiasts who are pushing the boundaries of what their machines can do. [Trammell] has posted his plotter producing some of the work created with this tool, and we can see that it’s likely to work better with lower-poly models.
We’ve featured a lot of plotters over the years as they seem to be a popular project. If you’d like one then they can be made from the most available parts, including those scavenged from scrap DVD drives, or printers.
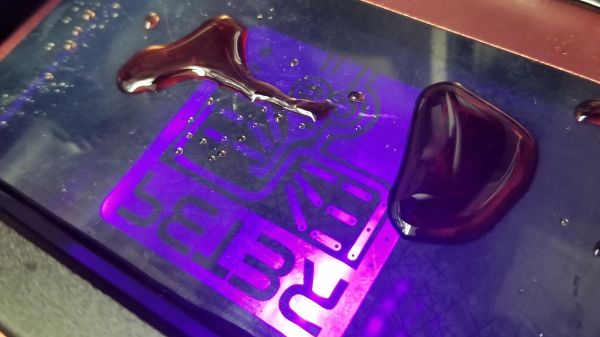
With all the cool and useful parts you can whip up (relatively) quickly on a 3D printer, it’s a shame you can’t just print a PCB. Sure, ordering a PCB is quick, easy, and cheap, but being able to print one-offs would peg the needle on the instant gratification meter.
[Peter Liwyj] may just have come up with a method to do exactly that. His Instructables post goes into great detail about his method, which uses an Elegoo Mars resin printer and a couple of neat tricks. First, a properly cleaned board is placed copper-side down onto a blob of SLA resin sitting on the print bed. He tricks the printer into thinking the platform is all the way down for the first layer by interrupting the photosensor used to detect home. He lets the printer go through one layer of an STL file that contains his design, which polymerizes a thin layer of plastic onto the copper. The excess resin is wiped gently away and the board goes straight into a ferric chloride etching bath. The video below shows the whole process.
As simple as it sounds, it looks like it works really well. And [Peter] didn’t just stumble onto this method; he approached it systematically and found what works best. His tips incude using electrical tape as a spacer to lift the copper off the print surface slightly, cleaning the board with Scotchbrite rather than sandpaper, and not curing the resin after printing. His toolchain is a bit uncoventional — he used SketchUp to create the traces and exported the STL. But there are ways to convert Gerbers to STLs, so your favorite EDA package can probably fit in to the process too.
The announcement of Autodesk’s changes to the Fusion 360 personal use license terms this week caused quite a dustup. Our article on the announcement garnered a lot of discussion and not a few heated comments. At the end of the day, though, Autodesk is going to do what it’s going to do, and the Fusion 360 user community is just going to have to figure out how to deal with the changes. One person who decided to do something other than complain is Justin Nesselrotte, who came up with a quick and easy bulk export tool for Fusion 360. This gets to the heart of the issue since the removal of export to STEP, IGES, and SAT files is perhaps the most painful change for our community. Justin’s script automatically opens every design and exports it to the file type of your choice. Since the license changes go into effect on October 1, you’d better get cracking if you want to export your designs.
Over on Twitter, Hackaday superfriend Timon gives us a valuable lesson in “you get what you pay for.” He found that a bunch of his header pin jumper cables weren’t even remotely assembled properly. The conductors of the jumper wire were only loosely inserted into the terminal’s crimp, where apparently no crimping pressure had been applied. The wires were just rattling around inside the crimp, rather than making sold contact. We’ve covered the art and science of crimping before, and it’s pretty safe to say that these jumpers are garbage. So if you’re seeing weird results with a circuit, you might want to take a good, close look at your jumpers. And as always, caveat emptor.
The GNU Radio Conference wrapped up this week, in virtual format as so many other conferences have been this year, and it generated a load of interesting talks. They’ve got each day’s proceedings over on their YouTube channel, so the videos are pretty long; luckily, each day’s stream is indexed on the playbar, so along with the full schedule you can quickly find the talks you’re interested in. One that caught our eye was a talk on the Radio Resilience Competition, a hardware challenge where participants compete head-to-head using SDRs to get signals through in an adversarial environment. It sounds like a fascinating challenge for the RF inclined. More details about registering for the competition can be had on the Radio Resilience website.
You know those recipe sites that give you a few choices on what to make for dinner based on the ingredients you have on hand? We always thought that was a clever idea, and now something like it has come to our world. It’s called DIY Hub, and it aims to guide makers toward projects they can build based on the parts they have on hand. Users create projects on the site, either hosting the project directly on the site or providing a link to projects on another site. Either way, the project’s BOM is cataloged so that users can find something to build based on parts stored in their “Garage”. Granted, most of us suffer from the exact opposite problem of not knowing what to build next, but this could be an interesting tool for stimulating the creative process, especially for teachers and parents. It’s currently in beta, and we’d love to see a few Hackaday.io projects added to the site.
And finally, we got a tip to an oldie but a goodie: How to Build a Castle. No, we don’t expect to see a rash of 13th-century castle builds gracing our pages anytime soon — although we certainly wouldn’t be opposed to the idea. Rather, this is a little something for your binge-watching pleasure. The BBC series, which was actually called Secrets of the Castle, was a five-part 2014 offering that went into great detail on the construction of Guédelon Castle, an experimental archaeology project in France that seeks to build a castle using only the materials and methods available in the 1200s. The series is hosted by historian Ruth Goodman and archaeologists Peter Ginn and Tom Pinfold, and it’s great fun for anyone interested in history and technology.