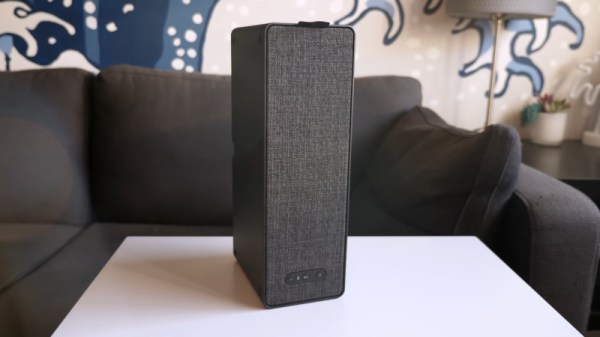
[Mr. Carlson] Fixes A Fridge

A dead refrigerator is an occurrence determined to frustrate any homeowner. First there’s the discovery of hundreds of dollars in spoiled food, and then the cost of a repair call and the delay of the inevitable wait for parts. It’s clear to see why a hacker like [Mr. Carlson] would seek another way.

Now, normally a fridge repair video would by unlikely fodder for a Hackaday article. After all, there’s generally not much to a fridge, and even with the newer microprocessor-controlled units, diagnosis and repair are usually at the board-level. But [Mr. Carlson] has had this fridge since 2007, and he’s got some history with it. An earlier failure was caused by the incandescent interior lights welding relay contacts closed thanks to huge inrush currents when starting the cold filaments. That left the light on all the time, heating the interior. His fix was a custom solid-state relay using zero-crossing opto-isolators to turn the bulbs on or off only when the AC power was at a minimum.

That repair kept things going for years, but when the latest issue occurred, [Mr. Carlson] took a different tack. He assumed that a board that has been powered 24-7 for the last twelve years is likely to have a bad capacitor or two. He replaced all the caps, threw in a few new relays to be on the safe side, and powered the fridge back up. It whirred back to life, ready for another decade or so of service.

Kudos to [Mr. Carlson] for his great repair tips and his refusal to surrender. The same thing happened when his solder sucker started to give up the ghost and he fixed it by adding a variable-frequency drive.

Continue reading “[Mr. Carlson] Fixes A Fridge”

Fail Of The Week: Taking Apart A Tesla Battery

It takes a lot of energy to push a car-sized object a few hundred miles. Either a few gallons of gasoline or several thousand lithium batteries will get the job done. That’s certainly a lot of batteries, and a lot more potential to be unlocked for their use than hurling chunks of metal around on wheels. If you have an idea for how to better use those batteries for something else, that’s certainly an option, although it’s not always quite as easy as it seems.

In this video, [Kerry] at [EVEngineering] has acquired a Tesla Model 3 battery pack and begins to take it apart. Unlike other Tesla batteries, and even more unlike Leaf or Prius packs, the Model 3 battery is extremely difficult to work with. As a manufacturing cost savings measure, it seems that Tesla found out that gluing the individual cells together would be less expensive compared to other methods where the cells are more modular and serviceable. That means that to remove the individual cells without damaging them, several layers of glue and plastic have to be removed before you can start hammering the cells out with a PEX wedge and a hammer. This method tends to be extremely time consuming.

If you just happen to have a Model 3 battery lying around, [Kerry] notes that it is possible to reuse the cells if you have the time, but doesn’t recommend it unless you really need the energy density found in these 21700 cells. Apparently they are not easy to find outside of Model 3 packs, and either way, it seems as though using a battery from a Nissan Leaf might be a whole lot easier anyway.

Continue reading “Fail Of The Week: Taking Apart A Tesla Battery”

Hackaday Podcast 029: Your Face In Silver Sand, Tires Of The Future, ESP32 All The CNC Things, And Sub In A Jug

Hackaday Editors Elliot Williams and Mike Szczys geek out over the latest hacks. This week we saw a couple of clever CNC builds that leverage a great ESP32 port of GRBL. The lemonade-pitcher-based submarine project is everything you thought couldn’t work in an underwater ROV. Amazon’s newest Dot has its warranty voided to show off what 22 pounds gets you these days. And there’s a great tutorial on debugging circuits that grew out of a Fail of the Week. Plus, we get the wind knocked out of us with an ambitious launch schedule for airless automotive tires, and commiserate over the confusing world of USB-C.

Take a look at the links below if you want to follow along, and as always tell us what you think about this episode in the comments!

Take a look at the links below if you want to follow along, and as always, tell us what you think about this episode in the comments!

Direct download (60 MB or so.)

Continue reading “Hackaday Podcast 029: Your Face In Silver Sand, Tires Of The Future, ESP32 All The CNC Things, And Sub In A Jug”

Hacking The Pocket Operator

The number of easily usable and programmable microcontrollers is small, so when selecting one for a project there are only a handful of very popular, well documented chips that most of us reach for. The same can be said for most small companies selling electronics as well, so if you reach for a consumer device that is powered by a microcontroller it’s likely to have one of these few in it. As a result, a lot of these off-the-shelf devices are easy to hack, reprogram, or otherwise improve, such as the Robot Pocket Operator.

The Pocket Operator is a handheld, fully-featured synthesizer complete with internal speaker. It runs on a Cortex M3, a very popular ARM processor which has been widely used for many different applications, and features everything you would need for a synthesizer in one tiny package, including a built-in speaker. It also supports a robust 24-bit DAC/ADC and all the knobs and buttons you would need. And now, thanks to [Frank Buss] there is a detailed teardown on exactly how this device operates.

Some of the highlights from the teardown include detailed drawings of how the display operates, all of the commands for controlling the device, and even an interesting note about how the system clock operates even when the device has been powered off for a substantial amount of time. For a pocket synthesizer this has a lot to offer, even if you plan on using it as something else entirely thanks to the versatility of the Cortex M3.

Continue reading “Hacking The Pocket Operator”

Lighting Tech Dives Into The Guts Of Laser Galvanometers

There’s something magical about a laser light show. Watching that intense beam of light flit back and forth to make shapes and patterns, some of them even animated, is pretty neat. It leaves those of us with a technical bent wondering just exactly how the beam is manipulated that fast.

Wonder no more as [Zenodilodon], a working concert laser tech with a deep junk bin, dives into the innards of closed-loop galvanometers, which lie at the heart of laser light shows. Galvos are closely related to moving-coil analog meters, which use the magnetic field of a coil to deflect a needle against spring force to measure current. Laser galvos, on the other hand, are optimized to move a lightweight mirror back and forth, by tiny amounts but very rapidly, to achieve the deflection needed to trace out shapes.

As [Zeno] explains in his teardown of some galvos that have seen better days, this means using a very low-mass permanent magnet armature surrounded by coils. The armature is connected to the mirror on one end, and a sensor on the other to provide positional feedback. We found this part fascinating; it hadn’t occurred to us that laser galvos would benefit from closed-loop control. And the fact that a tiny wiggling vane can modulate light from an IR LED enough to generate a control signal is pretty cool too.

The video below may be a bit long, but it’s an interesting glimpse into the day-to-day life of a lighting tech. It puts a little perspective on some of the laser projection projects we’ve seen, like this giant Asteroids game.

Continue reading “Lighting Tech Dives Into The Guts Of Laser Galvanometers”

Hackaday Links Column Banner

Hackaday Links: June 16th, 2019

OpenSCAD has been updated. The latest release of what is probably the best 3D modeling tool has been in the works for years now, and we’ve got some interesting features now. Of note, there’s a customizer, for allowing parametrizing designs with a GUI. There’s 3D mouse support, so drag out that weird ball mouse from the 90s. You can export in SVG, 3MF, and AMF. Update your install of OpenSCAD now.

New Hampshire is the home of BASIC, and now there’s a sign on the side of the road saying so. This is a New Hampshire state historical marker honoring BASIC, invented at Dartmouth College in 1964. Interestingly, there are 255 historical markers in New Hampshire, usually honoring bridges and historical figures, which means there’s an off-by-one error depending on implementation.

Because robots a great way to get kids into technology — someone has to repair the future robot workers of the world — DJI has release the RoboMaster S1. It’s a robot with four Mecanum wheels, something like a Nerf turret, a camera, and WiFi. The best part? It’s programmable, either through Scratch or Python. Yes, it’s drag-and-drop programming for line following robots.

If you have a C by GE Smart Light Bulb and connect a new router to your home network, you will need to disassociate your C By GE Smart Light Bulb with your old network. To do this, you first need to turn your bulb on for eight seconds, then turn off for two seconds, then turn on for eight seconds, then turn off for two seconds. Then turn the bulb on for eight seconds, and finally turn the bulb off for two seconds. Finally, turn the bulb on for eight seconds, then turn the bulb off for two seconds. Your bulb should blink three times, indicating it has dissociated with the WiFi network. If this procedure does not work, your light bulb is running an older version of firmware. This is why you put a physical reset button on your stuff, people.

Have a lot of Raspberry Pi hats but you want to play around with the ESP32? No problem, because here’s a Pi-compatible GPIO ESP32 board. It needs a catchier name, but this is an ESP32 that’s mostly compatible with the 40-pin connector found on all Pis. Here’s a Crowd Supply link.


Assessing Nozzle Wear In 3D-Printers

How worn are your nozzles? It’s a legitimate question, so [Stefan] set out to find out just how bad 3D-printer nozzle wear can get. The answer, as always, is “It depends,” but exploring the issue turns out to be an interesting trip.

Reasoning that the best place to start is knowing what nozzle wear looks like, [Stefan] began by printing a series of Benchies with brand-new brass nozzles of increasing diameter, to simulate wear. He found that stringing artifacts, interlayer holes, and softening of overhanging edges and details all worsened with increasing nozzle size. Armed with this information, [Stefan] began a torture test of some cheap nozzles with both carbon-fiber filament and a glow-in-the-dark filament, both of which have been reported as nozzle eaters. [Stefan] found that to be the case for at least the carbon-fiber filament, which wore the nozzle to a nub after extruding only 360 grams of material.

Finally, [Stefan] did some destructive testing by cutting used nozzles in half on the mill and looking at them in cross-section. The wear on the nozzle used for carbon-fiber is dramatic, as is the difference between brand-new cheap nozzles and the high-quality parts. Check out the video below and please sound off in the comments if you know how that peculiar spiral profile was machined into the cheap nozzles.

Hats off to [Stefan] for taking the time to explore nozzle wear and sharing his results. He certainly has an eye for analysis; we’ve covered his technique for breaking down 3D-printing costs in [Donald Papp]’s  “Life on Contract” series.

Continue reading “Assessing Nozzle Wear In 3D-Printers”