It’s tough times for 3D-printing. Stratasys got burned on Makerbot, trustful backers got burned on the Peachy Printer meltdown, I burned my finger on a brand new hotend just yesterday, and that’s only the more recent events. In recent years more than a few startups embarked on the challenge of developing a piece of 3D printing technology that would make a difference. More colors, more materials, more reliable, bigger, faster, cheaper, easier to use. There was even a metal 3D printing startup, MatterFab, which pulled off a functional prototype of a low-cost metal-powder-laser-melting 3D printer, securing $13M in funding, and disappearing silently, poof.
This is just the children’s corner of the mall, and the grown-ups have really just begun pulling out their titanium credit cards. General Electric is on track to introduce 3D printed, FAA-approved fuel nozzles into its aircraft jet engines, Airbus is heading for 3D-printed, lightweight components and interior, and SpaceX has already sent rockets with 3D printed Main Oxidizer Valves (MOV) into orbit, aiming to make the SuperDraco the first fully 3D printed rocket engine. Direct metal 3D printing is transitioning from the experimental research phase to production, and it’s interesting to see how and why large industries, well, disrupt themselves.

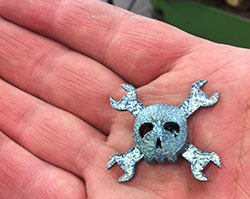 [Wilfred] was testing a titanium 3D printer at work and was looking for something to print. The skull ‘n wrenches was a suitable candidate, and the results are fantastic. From [Wilfred]: “Just out of the printer the logo looks amazing because it isn’t oxidized yet (inside the printer is an Argon atmosphere) Then the logo moves to an oven to anneal the stress made by the laser. But then it gets brown and ugly. After sandblasting we get a lovely bluish color as you can see in the last picture.”
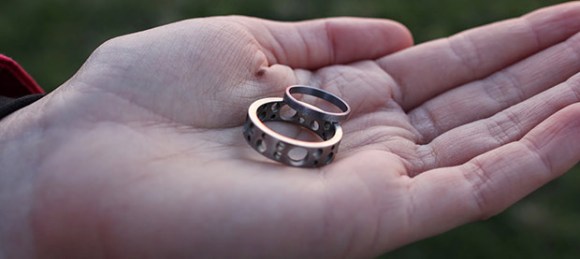
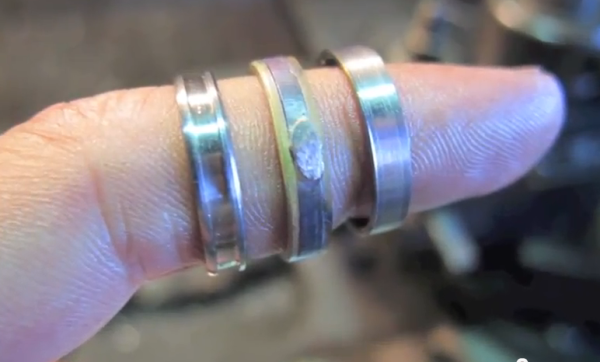
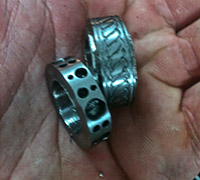 Making a ring on a lathe is a relatively simple ordeal, but the two larger rings [Patrick] made (one was for a friend) featured some interesting patterns that aren’t easy to make without a good CNC setup. Luckily, this friend has