Taking Mechanical Keyboard Sounds To The Next Level

When it comes to mechanical keyboards, there’s no end to the amount of customization that can be done. The size and layout of the keyboard is the first thing to figure out, and then switches, keycaps, and then a bunch of other customizations inside the keyboard like the mounting plate and whether or not to add foam strips and other sound- and vibration-deadening features. Of course some prefer to go the other direction with it as well, omitting the foam and installing keys with a more noticeable click, and still others go even further than that by building a separate machine to make their keyboard activity as disruptive as it could possibly be.

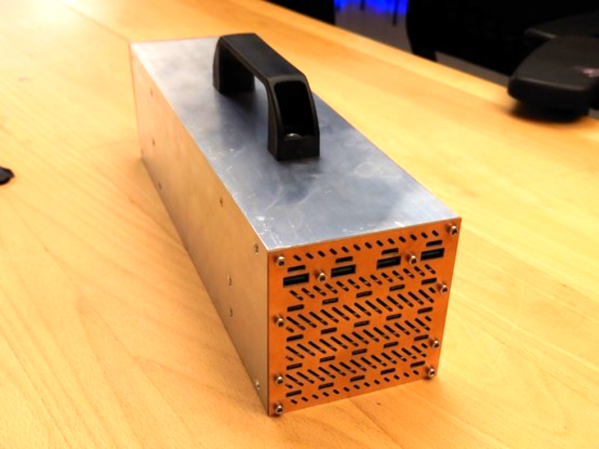
This started as a joke among [ac2ev] and some coworkers, who were already teasing about the distinct sound of the mechanical keyboard. This machine, based on a Teensy microcontroller, sits between any USB keyboard and its host computer, intercepting keystrokes and using a small solenoid to tap on a block of wood every time a keystroke is detected. There’s also a bell inside that rings when the enter key is pressed, similar to the return carriage notification for typewriters, and as an additional touch an audio amplifier with attached speaker plays the Mario power-up sound whenever the caps lock key is pressed.

[ac2ev] notes that this could be pushed to the extreme by running a much larger solenoid powered by mains electricity, but since this was more of a proof-of-concept demonstration for some coworkers the smaller solenoid was used instead. The source code for the build can be found on the project’s GitHub page and there’s also a video of this machine in action here as well. Be careful with noisy mechanical keyboards, though, as the sounds the keys produce can sometimes be decoded to determine what the user is typing.

Modular Keyboard And Custom Game Controller

Most video games, whether on console or PC, have standardized around either a keyboard and mouse or an analog controller of some sort, with very little differences between various offerings from the likes of Sony, Microsoft, Nintendo, or even Valve. This will get most of us through almost all video games, but for those looking to take their gameplay up a notch or who are playing much more complex games, certain specialized controllers are available, but they might not meet everyone’s specific needs. Thanks to this custom, modular keyboard anyone should be able to make exactly the controller they need.

The device features a grid of 15 interfaces where modules like buttons, potentiometers, encoders, and joysticks can be placed. Each module can be customized to a significant extent on their own, and they can be placed anywhere on the grid. The modules themselves can be assigned to trigger keyboard presses or gamepad motions depending on the needs of the user. A Raspberry Pi handles the inputs and translates them to the computer, so in that regard it functions no differently than a standard keyboard or gamepad would. Programming is done by sending commands via a USB serial port, with the ability to save various configurations as well.

The modular controller is open-source in terms of hardware and software, with easy assembly using through-hole components and a customizable 3D printed cover for anyone looking to make their own. The project’s creator [Daniel] had flight simulators in mind when designing the device, which often benefit from having more specialized controllers, but any game with lots of specific inputs from Starcraft to League of Legends could benefit from a custom controller or keyboard like this. Flight simulators are more often the targets of specialized and unique controls, though, like this custom yoke or this physical control panel.

Cheap USB Sniffer Has Wireshark Interface

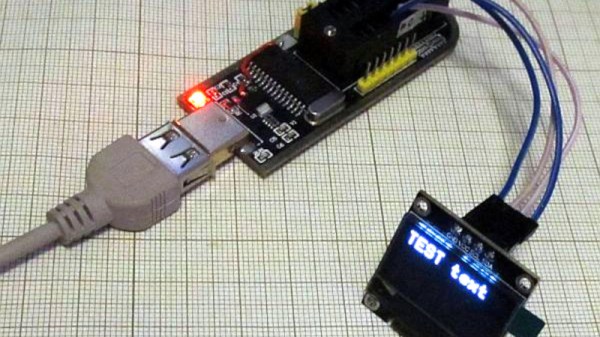
If you’ve done any development on USB hardware, you’ve probably wished you could peek at the bits and bytes as they pass through the data lines. Sometimes, it’s the only way to properly understand what’s going on. [ataradov]’s USB sniffer is built to do just that. 

To sniff high-speed USB communications, the device relies on a Lattice LCMXO2 FPGA and a Cypress CY7C68013A microcontroller, paired with a Microchip USB3343 USB PHY. This setup is capable of operating at data rates of up to 40-50 MB/s, more than enough to debug the vast majority of USB peripherals on the market.

The device is built specifically for use with Wireshark. Most commonly used for network packet sniffing, Wireshark can also be used with a wide variety of other capture hardware for other debugging tasks, as seen here. In addition to live sniffing, it also allows captured data to be saved for later analysis.

If you need this tool, spinning up your own is straightforward. Gerber files are available and the required components can be bought off the shelf. Once assembled, you can program the chips via USB, with no external hardware programmer required.

We’ve seen some other similar hardware before. Meanwhile, if you’re whipping up your own useful debug tools, don’t hesitate to drop us a line!

Transform An Original Xbox Controller To A 360 Controller

If you’re looking for a controller for your computer or mobile device, you could certainly do worse than one of the latest iterations of the Xbox pad. They might not be perfect, but they’re fairly well-made, not particularly expensive, use standard USB and Bluetooth interfaces, and even have decent support in the open-source community. So if you’re gaming on Linux or working on any other kind of retro gaming rig it’ll likely be plug-and-play.

This wasn’t the case with the first generation Xbox controller, though, and although its proprietary connector was actually using USB, the controller scheme wasn’t as open. This is [Tom]’s effort of upcycling his original Xbox controller to work indistinguishably from a stock Xbox 360 controller.

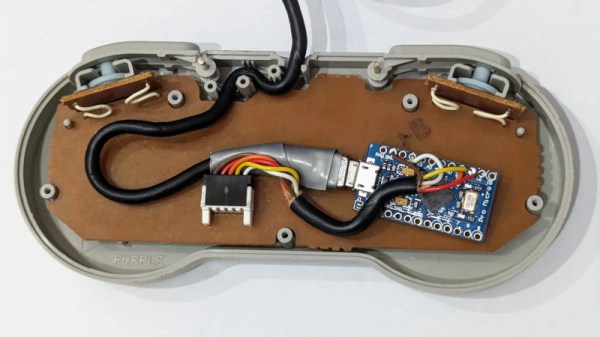
For those asking why anyone would want to do this, [Tom] is actually one of the few who enjoyed the original bulky Xbox “Duke” controller that released with the console in 2001. It wasn’t a popular choice in the larger gaming community and a year later Microsoft released a smaller version, but we all have our quirks. A Teensy 4.1 is attached to the end of the controller cable and acts as an intermediary to intercept the proprietary signalling coming from this controller and convert it into something usable. Since the controller doesn’t even show up as a standard USB HID device it took a little more sniffing of the protocol to decipher what was going on at all, but eventually some help was found within this other driver that gave [Tom] the clues he needed to get it working.

There were some other headaches to this project as well, especially since USB debugging USB connections while using USB isn’t exactly a streamlined process, but after a couple of breakthroughs the Teensy pass-through interface began working and [Tom] can use his controller of choice across multiple platforms now. If you’re looking to upgrade in other ways take a look at this build which seeks to recalibrate, rather than replace, an older Xbox controller experiencing drift on its analog control sticks.

Continue reading “Transform An Original Xbox Controller To A 360 Controller”

JITX Spits Out Handy USB Cable Tester

When USB first came on the scene, one of the benefits was that essentially any four conductors could get you to the point where you could send information at 12 Mbps. Of course everything is faster these days, and reaching today’s speeds requires a little bit more fidelity in the cables. This simple tester makes sure that your modern cables are actually up to the task.

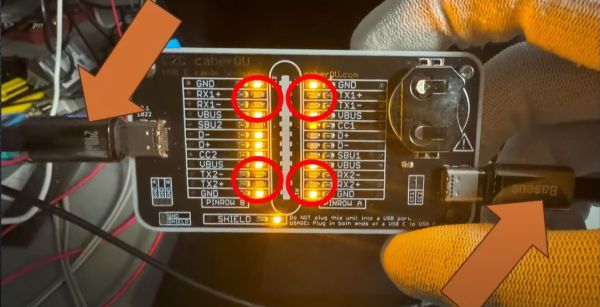
One of the design goals of this project is to automate away the task of testing cables or finding one that works, especially before thinking a problem with a device is somewhere in software, spending hours or days debugging, before realizing that it’s actually being caused by a hardware malfunction. The small PCB has two USB-C fittings to plug in both of the ends of a cable to, and between those connectors there is a number of LEDs. Each LED is paired to one the many conductors within the USB cable, and not only does it show continuity of these conductors but it can also show a high resistance connection via a dimly-lit or off-color display from an LED.

One of the other interesting facets of this build is the use of JITX, which is a software-defined electronics CAD tool which allows PCB design to be automated by writing out the requirements of the PCB into code, rather than drawing it manually. It’s worth a look, and a lot of the schematics of this particular project as well as some discussion on this software can be found on the project’s GitHub page. Incidentally, if this tester looks familiar, it’s probably because your’re thinking of the open source hardware USB tester created by [Álvaro Prieto].

Headset’s Poor Range Fixed By Replacing Antenna

[rafii6312]’s Corsair HS80 wireless headset had a big problem: short range. The sound quality was great, but the wireless range wasn’t winning any friends. Fortunately, the solution was just to swap the small SMT antenna on the USB transmitter for an external one.

Original SMT antenna (blue component) offers small size, but poor range.

This particular headset relies on a USB dongle to transmit audio from PC to headset over its own 2.4 GHz wireless connection. By popping open the USB dongle, [rafii6312] was able to identify an SMT antenna and easily desolder it, replacing it with a wired connection to a spare 2.4 GHz external antenna. That’s all it took to boost the headset’s range from barely one room to easily three rooms, which is a success by any measure.

Sadly, the USB transmitter dongle doesn’t have any intention of being opened and puts up a fight, so the process was a bit destructive. No problem, [rafii6312] simply fired up Fusion360 to design a new 3D-printed enclosure that accommodated the new antenna. Pictures, instructions, and 3D model files are all available on the project page, if you want to improve your headset, too.

This kind of antenna upgrade is reasonably straightforward, but if one is armed with the right knowledge, antenna upgrades from scratch using scrap wire and dollar store hardware are entirely possible. Just be sure to pick an antenna that doesn’t weigh down your headset.

MIDI Interface For NeXTcube Plugs Into The Past

[Joren] recently did some work as part of an electronic music heritage project, and restored an 80s-era NeXTcube workstation complete with vintage sound card, setting it up with a copy of MAX, a graphical music programming environment. But there was one piece missing: MIDI. [Joren] didn’t let that stop him, and successfully created hardware to allow MIDI input and output.

The new panel provides all the connectors necessary to interface with either classic MIDI devices, or MIDI over USB (where it appears as a USB MIDI device to any modern OS.)

Interestingly, the soundcard for the NeXTcube has an RS-422 serial port and some 8-pin mini DIN connectors. They are not compatible with standard MIDI signals, but they’re not far off, either.

To solve this, [Joren] used a Teensy developer board to act as an interface between classic MIDI devices like keyboards or synthesizers (or even not-so-common ones like this strange instrument) while also being able to accommodate modern MIDI over USB connections thanks to the Teensy’s USB MIDI functionality.

A metal enclosure with a 3D-printed panel rounds out the device, restoring a critical piece of functionality to the electronic music-oriented workstation.

MIDI as a protocol isn’t technically limited to musical applications, though that’s one place it shines. And just in case it comes in handy someday, you can send MIDI over I2C if you really need to.