Overall view of Alta's Projects cyberdeck

Cyberdeck Running On Apple Silicon, Though An A12 Not An M1

[Alta’s Projects] built a two-in-one cyberdeck that not only contains the requisite Raspberry Pi (a zero in this case) but also eschews a dumb LCD and uses an iPad mini 5 for a display.

We need to address the donor case right away. Some likely see this as heresy, and while we love to see vintage equipment lovingly restored, upcycling warms our hearts and keeps mass-produced plastic out of landfills too. The 1991 AST 386SX/20 notebook in question went for $45 on an online auction and likely was never destined for a computer museum.

Why is Cupertino’s iOS anywhere near a cyberdeck? If a touch screen is better than an LCD panel, a tablet with a full OS behind it must be even better. You might even see this as the natural outgrowth of tablet cases first gaining keyboards and then trackpads. We weren’t aware that either was possible without jailbreaking, but [Alta’s Projects] simply used a lighting-to-USB dongle and a mini USB hub to connect the custom split keyboard to the iPad and splurged on an Apple Magic Trackpad for seamless and wireless multi-touch input.
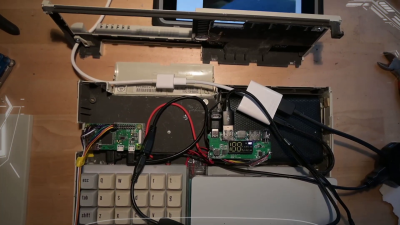
Alta's Projects Cyberdeck Internal USB Wiring
Internal USB Wiring, Charging Circuit, and Pi Zero

The video build (after the break) is light on details, but a quick fun watch with a parts list in the description. It has a charming casual feel that mirrors the refreshingly improvisational approach that [Altair’s Projects] takes to the build. We appreciate the nod to this cyberdeck from [Tinfoil_Haberdashery] who’s split keyboard and offset display immediately sprang to mind for us too. The references to an imagined “dystopian future” excuse the rough finish of some of the Dremel cuts and epoxy assembly. That said, apocalypse or not, the magnets mounted at both ends of the linear slide certainly are a nice touch.

Continue reading “Cyberdeck Running On Apple Silicon, Though An A12 Not An M1”

MouSTer Brings USB To Retro Computers

Folks who like the take the old Amiga out for the occasional Sunday drive usually do it because they have wistful memories of the simpler times. Back when you could edit documents or view spreadsheets on a machine that had RAM measured in kilobytes instead of gigabytes. But even the most ardent retro computer aficionado usually allows for a bit of modern convenience.

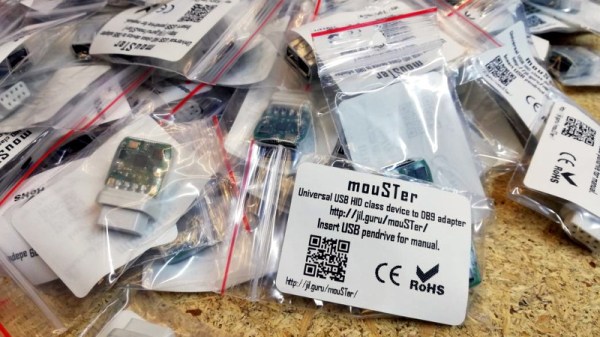
Enter the mouSTer. This tiny device converts a common USB HID mouse into something older computers can understand. It even supports using Sony’s PlayStation 4 controller as a generic game pad. While the firmware is still getting tweaked, the team has confirmed its working on several classic machines and believe it should work on many more. Considering the prices that some of these old peripherals command on the second hand market, using a USB mouse or controller on your vintage computer isn’t just more convenient, but will likely be a lot cheaper.

Confirmed retrocomputing superfan [Drygol] is a member of the team working on mouSTer, and in a recent post to his retrohax blog, he talks a bit about what’s happened since his last update over the summer. He also talks a bit about the challenges they’ve faced to get it into production. Even if you’re not into poking around on vintage computers, there are lessons to be learned here about what it takes to move from a handful of prototypes to something you can actually sell to the public.

We especially liked the details about the mouSTer enclosure, or lack thereof. Originally [Drygol] says they were going to have the cases injection molded, but despite initial interest from a few companies they talked to, nobody ended up biting because it needed to be done with relatively uncommon low pressure injection. While 3D printing is still an option, the team ended up using clear heatshrink tubing to create a simple conformal protective shell over the electronics. Personally we think it looks great like this, but it sounds like this is only a temporary solution until something a bit more robust can be implemented.

As you might imagine we’ve seen DIY projects that aimed to bring modern input devices to vintage computers like the Atari ST, but the diminutive proportions of the mouSTer and the fact that it’s a turn-key product is sure to appeal to those who want to minimize headaches when working with their classic gear.

Continue reading “MouSTer Brings USB To Retro Computers”

The Case Of The Vintage Computer, The Blown Fuse, And The Diode

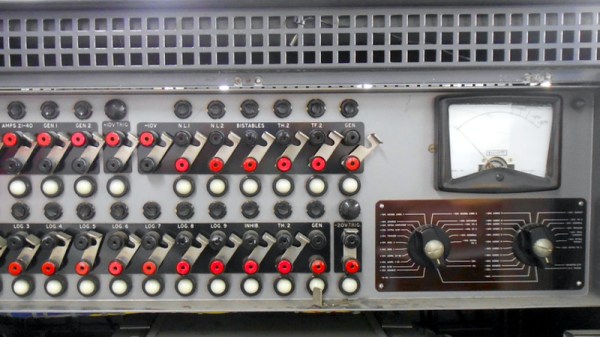
If you are the operator of a vintage computer, probably the only one of its type remaining in service, probably the worst thing you can hear is a loud pop followed by your machine abruptly powering down. That’s what happened to the Elliott 803B in the UK’s National Museum Of Computing, and its maintainer [Peter Onion] has written an account of his getting it back online.

The Elliott is a large machine from the early 1960s, and because mains supplies in those days could be unreliable it has a rudimentary UPS to keep it going during a brownout. A hefty Ni-Cd battery is permanently hooked up to a charger that also serves as the power supply for the machine, ensuring that it can continue to operate for a short while as the voltage drops. A spate of fuses had blown in this power supply, so we’re taken through the process of fault-finding. Eventually the failure is found in a rectifier diode, the closest modern equivalent is substituted, and after testing the machine comes back to life.

We’re used to reading these stories from the other side of the Atlantic, so we welcome TNMOC saying that this is the first of a series of technical posts on their work. We visited the museum back in 2016, and also featured its famous recreated Colossus.

Hackaday Links Column Banner

Hackaday Links: May 26, 2019

Thinkpads are great, especially the old ones. You find a T420, and you can have a battery hanging off the back, a battery in the optical drive bay, and for some old Thinkpads, there’s a gigantic ‘slice’ battery that doubles the thickness of your laptop. Here’s the most batteries in a Thinkpad ever, with the requisite reddit post. It’s 27 cells, with an all-up capacity of 212 Watt-hours. There are two interesting takeaways from the discussion here. First, this may, technically, be allowed on a commercial flight. The FAA limit is 100 Watt-hours per battery, and the Ultrabay is a second battery. You’re allowed two additional, removable batteries on a carry on, and this is removable and reconfigurable into some form that the TSA should allow it on a plane. Of course no TSA agent is going to allow this on a plane so that really doesn’t matter. Secondly, the creator of this Frankenpad had an argument if Hatsune Miku is anime or not. Because, yeah, of course the guy with a Thinkpad covered in Monster energy drink stickers and two dozen batteries glued on is going to have an opinion of Miku being anime or not. That’s just the way the world works.

Prices for vintage computers are now absurd. The best example I can call upon is expansion cards for the Macintosh SE/30, and for this computer you have a few choice cards that have historically commanded a few hundred dollars on eBay. The Micron XCEED Color 30 Video Card, particularly, is a special bit of computer paraphernalia that allows for grayscale on the internal monitor. One of these just sold for two grand. That’s not all, either: a CPU accelerator just sold for $1200. These prices are double what they were just a few years ago. We’re getting to the point where a project to reverse engineer and produce clones of these special cards may make financial sense.

The biggest news in consumer electronics this week is the Playdate. It’s a pocket game console that has a crank. Does the crank do anything? No, except that it has a rotary encoder, so this can nominally be used for games. It will cost $150, and there are zero details on the hardware other than the industrial design was done by Teenage Engineering. There’s WiFi, and games will be delivered wireless on a weekly basis. A hundred thousand people are on the wait list to buy this.

If you want a pick and place in your garage workshop, there aren’t many options. There’s a Neoden for about ten grand, but nothing cheaper or smaller. The Boarditto is a two thousand dollar pick and place machine that fits comfortably on your desk. It has automatic tape feeders, a vision system, and for the most part it looks like what you’d expect a small, desktop pick and place machine to be. That’s all the information for now, with the pre-order units shipping in December 2019.

The Repair And Refurbishment Of Silicone Keyboards

There are a lot of retrocomputers out there sitting in garages and attics, and most of them need work. After thirty or forty years, you’re looking at a lot of corrosion, leaking caps, and general wear and tear. When it comes to extreme refurbishment, we haven’t seen anyone better than [Drygol], and this time he’s back with an exceptional example of how far repair and refurbishment can go. He’s repairing the silicone keyboard of a Commodore 116 using some very interesting techniques, and something that opens up the door to anyone building their own silicone keypad.

This project comes from from a member of a demoscene group that found an old C116 that needed a lot of work. The C116 shipped with a silicone membrane keyboard instead of the mechanical keyswitches of the C64 and other, higher-end computers. Unfortunately, this silicone keypad had a few keys ripped out of it. No one, as far as we can tell, has ever figured out how to make these silicone keypads from scratch, but [Drygol] did come up with a way to replace the ripped and missing keys. The process starts with making a silicone mold of the existing keyboard, then casting silicone into the negative of that mold. After a few attempts , [Drygol] had a custom silicone button that matched the shape and color of the original C116 keyboard. The only thing left to do was to attach tiny conductive carbon pads to the bottom of the newly cast buttons and fit them into the existing keyboard.

This is an interesting refurbishment, because there are a lot of vintage computers that used silicone keyboards in the place of mechanical keyswitches. The Speccy, The Commodore TED machines, and a lot of vintage calculators all used silicone keyboards. Until now, no one has figured out how to make DIY silicone keypads, and repairing silicone was out of the question. [Drygol]’s attempt isn’t perfect — it needs key labels, but screen or pad printing will take care of that — but it’s the best we’ve seen yet and opens the doors to a lot of interesting projects in the world of vintage computer repair.

Faster Computers Lead To Slower Experiences?

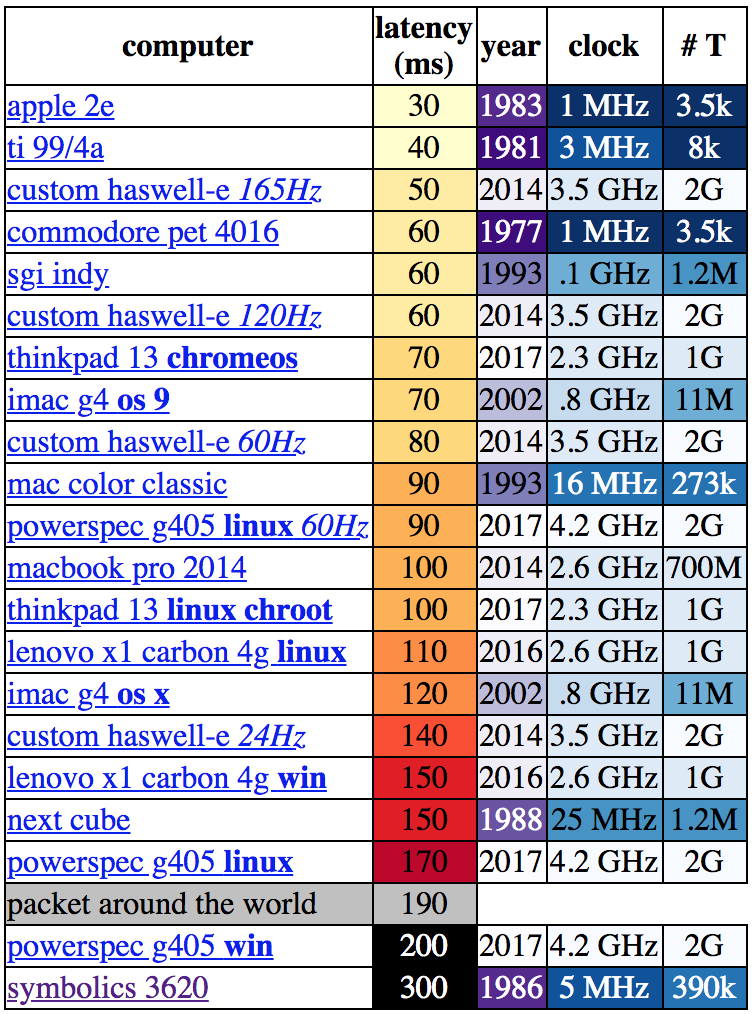
Ever get that funny feeling that things aren’t quite what they used to be? Not in the way that a new washing machine has more plastic parts than one 40 years its senior. More like “my laptop can churn through hundreds of gigaflops, but when I scroll it doesn’t feel great.” That perception of smoothness might be based on a couple factors, including system latency. A couple years ago [danluu] had that feeling too and measured the latency of “devices I’ve run into in the past few months” (based on this list, he lives a more interesting life than we do). It turns out his hunch was objectively correct. What he wrote was a wonderful deep dive into how and why a wide variety of devices work and the hardware and software contributors to latency.

Let’s be clear about what “latency” means in this context. [danluu] was checking the time between a user input and some response on screen. For desktop systems he measured a keystroke, for mobile devices scrolling a browser. If you’re here on Hackaday (or maybe at a Vintage Computer Festival) the cause of the apparent contradiction at the top of the charts might be obvious.
Q: Why are some older systems faster than devices built decades later? A: The older systems just didn’t do much! Instead of complex multi-tasking operating systems doing hundreds of things at once, the CPU’s entire attention was bent on whatever user process was running. There are obvious practical drawbacks here but it certainly reduces context switching!

In some sense this complexity that [danluu] describes is at the core of how we solve problems with programming. Writing code is all about abstraction. While it’s true that any program could be written directly in machine code and customized to an individual machine’s hardware configuration, it would be pretty inconvenient for both developer and user. So over time layers of sugar have been added on top to hide raw hardware behind nicer interfaces written in higher-level programming languages.

And instead of writing every program to target exact hardware configurations there is a kernel to handle the lowest layers, then layers adding hotplug systems, power management, pluggable module and driver infrastructure, and more. When considering solutions to a programming problem the approach is always recursive: you can solve the problem, or add a layer of abstraction and reframe it. Enough layers of the latter makes the former trivial. But it’s abstractions all the way down.

[danluu]’s observation is that we’re just now starting to curve back around and hit low latency again, but this time by brute force! Modern solutions to latency largely look like increasingly exotic display technologies and complex optimizations which reach from UI draw functions all the way down to the silicon, not removing software and system infrastructure. It turns out the benefits of software complexity in terms of user experience and ease of development are worth it most of the time.

For a very tangible illustration of latency as applied to touchscreen devices, check out the Microsoft Research video after the break (linked to in [danluu]’s piece).

Continue reading “Faster Computers Lead To Slower Experiences?”

VCF West: Adding A Front Panel To The 6502

When you think about vintage computers from the 1970s, the first thing that should spring to mind are front panels loaded up with switches, LEDs, and if you’re really lucky, a lock with a key. Across all families of CPUs from the ’70s, you’ll find front panel setups for Z80s and 8080s, but strangely not the 6502. That’s not to say blinkenlights and panel switches for 6502-based computers didn’t exist, but they were astonishingly rare.

If something hasn’t been done, that means someone has to do it. [Alexander Pierson] built The Cactus, a  6502-based computer that can be controlled entirely through toggle switches and LEDs.

If you’re wondering why something like this hasn’t been built before, you only have to look at the circuitry of the 6502 CPU. The first versions of this chip were built with an NMOS process, and these first chips included bugs, undefined behavior, and could not be run with a stopped clock signal. These problems were fixed with the next chip spin using a CMOS process (which introduced new bugs), but the CMOS version of the 6502 would retain the contents of its registers with a stopped clock signal.

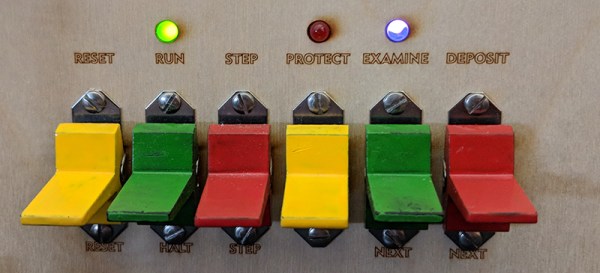
The specs for the Cactus computer are what you would expect from a homebrew 6502 system. The chip is a WDC 65C02S running at 1MHz, there’s 32k of RAM and a 16k EPROM, dual 6551s give serial access at various baud rates, and there are 16 bits of parallel I/O from a 65C22 VIA. The ROM is loaded up with OSI Basic. The real trick here is the front panel, though. Sixteen toggle switches allow the front panel operator to toggle through the entire address space, and eight flip switches can set any bit in the computer. Other controls include Run, Halt, Step, Examine, and Deposit, as you would expect with any front panel computer.

It’s a fantastic piece of work which I missed seeing at VCF East so I’m really glad [Alexander] made the trip between coasts. Cactus is truly something that hasn’t been done before. Not because it’s impossible, but simply because the state of the art technology from when the 6502 was new didn’t allow it. Now we have the chips, and the only limitation is finding someone willing to put in the work.