Solar Weather Station Listens For Lightning

Custom weather stations are a common enough project these days, especially based around the ESP8266. Wire a sensor up to the MCU, power it up with an old phone charger, and you’re half way there. But if you want something that’s going to operate remotely on the long term, you’ve got to put a little more thought into it.

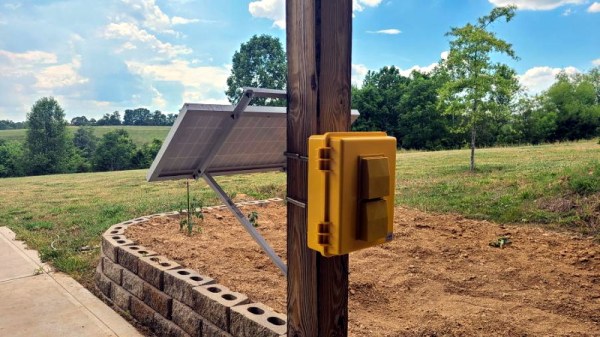
Which is exactly what [BuckarewBanzai] did for his solar powered Raspberry Pi weather station. With an industrial NEMA-rated enclosure, a beefy 35 watt photovoltaic panel, and enough lead-acid battery capacity to keep the show going for days, this build is certainly more robust than most. Some might call it overkill, but we think anyone who’s ever deployed hardware outdoors for more than a few days knows you can never be too careful when Mother Nature is involved.

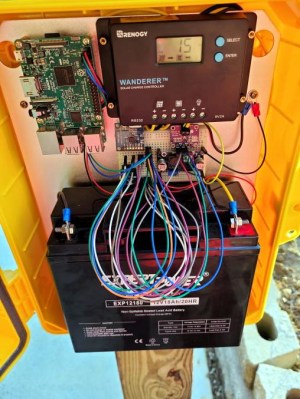
To keep the 18 Ah battery topped off, [BuckarewBanzai] is using a 10 amp Wanderer charge controller. It sounds as though he burned through a few lesser models before settling on this one; something to consider for your own off-grid projects. An LM2596 regulator is then used to provide a stable 5 V for the Raspberry Pi.

In addition to the BME280 environmental sensor that picks up on temperature, humidity, and pressure, there’s also a AS3935 lightning sensor onboard which [BuckarewBanzai] says can pick up strikes up to 40 kilometers away. All of this environmental data is collected and stored in a local SQLite database, and gets pushed offsite every five minutes with a REST API so it can be visualized with Grafana.

Critics in the audience will no doubt pick up on the solderless breadboard located in the center of the weather station, but [BuckarewBanzai] says he’s already on the case. He’s working on a custom PCB that will accept the various modular components. Not only should this make the station more reliable, but he says it will cut down on the “spaghetti” wiring. Though for the record, this is hardly the worst offender we’ve seen in that department.

Weather Display Is Cloudy With A Chance Of ESP8266

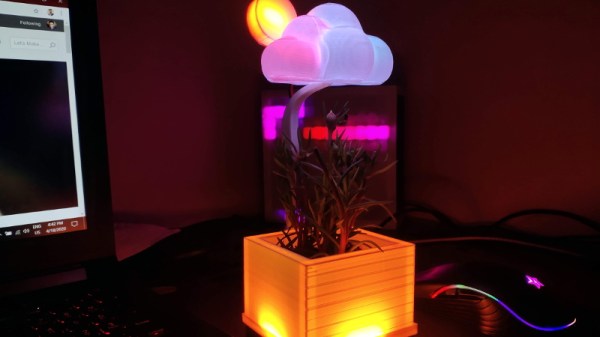
[Mukesh Sankhla] writes in to share this unique weather display that looks to be equal parts art and science. Rather than show the current conditions with something as pedestrian as numbers, this device communicates various weather conditions to the user with 25 WS2812B LEDs embedded into the 3D printed structure. It also doubles as a functional planter for your desk.

So how does this potted plant tell you if it’s time to get your umbrella? Using a NodeMCU ESP8266 development board, it connects to openweathermap.org and gets the current conditions for your location. Relative temperature is conveyed by changing the color of the pot itself; going from blue to red as things heat up. If there’s rain, the cloud over the plant will change color and flash to indicate thunder.

[Mukesh] has made all of the STL files for the printed components available, as well as the source code for the ESP8266. You’ll need to provide your own soil and plant though, there’s only so much you can send over the Internet. Incidentally, if the clever way he soldered these WS2812B modules together in the video catches your eye, you’ll really love his “RGB Goggles” project that we covered earlier.

Continue reading “Weather Display Is Cloudy With A Chance Of ESP8266”

Weather Station Gets Much-Needed Upgrades

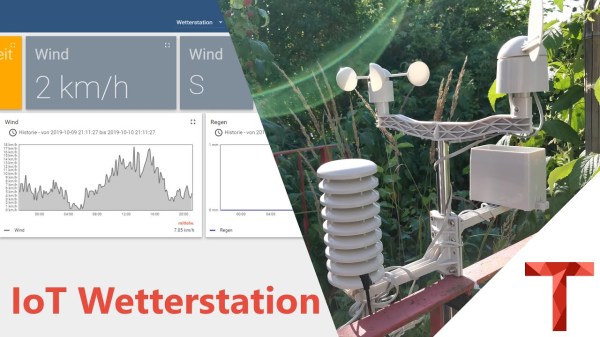
Weather stations are a popular project, partly because it’s helpful (and interesting) to know about the weather at your exact location rather than a forecast that might be vaguely in your zip code. They’re also popular because they’re a good way to get experience with microcontrollers, sensors, I/O, and communications protocols. Your own build may also be easily upgradeable as the years go by, and [Tysonpower] shows us some of the upgrades he’s made to the popular Sparkfun weather station from a few years ago.

The Sparkfun station is a good basis for a build though, it just needs some updates. The first was that the sensor package isn’t readily available though, but some hunting on Aliexpress netted a similar set of sensors from China. A Wemos D1 Mini was used as a replacement controller, and with it all buttoned up and programmed it turns out to be slightly cheaper (and more up-to-date) than the original Sparkfun station.

All of the parts and code for this new station are available on [Tysonpower]’s Github page, and if you want to take a look at a similar station that we’ve featured here before, there’s one from three years ago that’s also solar-powered.

Continue reading “Weather Station Gets Much-Needed Upgrades”

24 Hours Of Temperature Data At A Glance

In an era where we can see the current temperature with just a glance at our smartphones, the classic “Time and Temp” gadget sitting on the desk doesn’t have quite the same appeal. The modern weather fanatic demands more data, which is where this gorgeous full-day temperature display from [Richard] comes in.

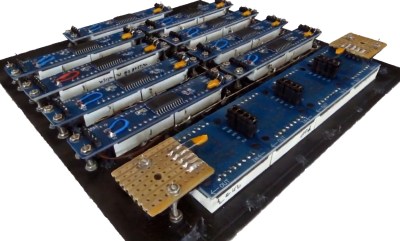
The display, built inside of a picture frame, shows the temperature recorded for every hour of the day. If the LED next to the corresponding hour is lit that means the value displayed is from the current day, otherwise it’s a holdover from the previous day’s recordings. This not only makes sure all 24 LED displays have something to show, but gives you an idea of where the temperature might be trending for the rest of the day. Naturally there’s also a display of the instantaneous temperature (indoor and outdoor), plus [Richard] even threw in the current wind speed for good measure.

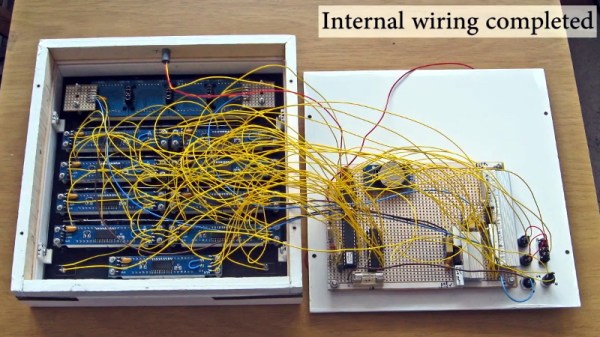
In the video after the break, [Richard] briefly walks us through the construction of his “Thermo Logger”, which reveals among other things that the beautiful panel art is nothing more exotic than a printed piece of A4 paper. The video also features a 3D model of the inside of the device which appears to have been created through photogrammetry; perhaps one of the coolest pieces of project documentation we’ve ever seen. We’ll just throw this out there: if you want to ensure that your latest build makes the front page of Hackaday, pop off that back panel and make some decent quality 3D scans.

Given the final result, it should come as no surprise to find that this isn’t the first incredible weather display that [Richard] has built. We previously covered another weather monitoring creation of his that needed two seperate display devices to adequately display all the data it was collecting.

Continue reading “24 Hours Of Temperature Data At A Glance”

Stack Of Plant Saucers, Transformed Into Low Cost Solar Shield

For serious data collection with weather sensors, a solar shield is crucial. The shield protects temperature and humidity sensors from direct sunlight, as well as rain and other inclement weather, without interfering with their operation. [Mare] managed to create an economical and effective shield for under three euros in materials.

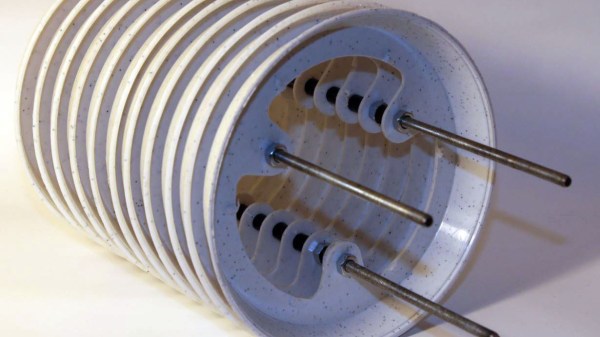
It began with a stack of plastic saucers intended for the bottom of plant pots. Each of these is a lot like a small plate, but with high sides that made them perfect for this application. [Mare] cut the bottom of each saucer out with a small CNC machine, but the cut isn’t critical and a hand tool could also be used.

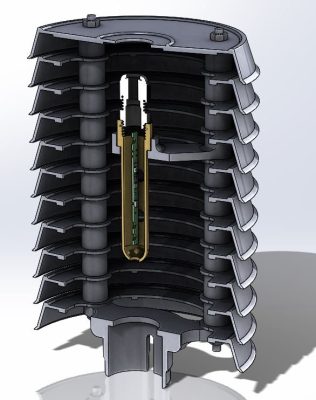
Three threaded rods, nuts, and some plastic spacers between each saucer yields the assembly you see here. When mounted correctly, the sensors on the inside are protected from direct exposure to the elements while still allowing airflow. As a result, the readings are more accurate and stable, and the sensors last longer.

The top of the shield is the perfect place to mount a UV and ambient light sensor board, and [Mare] has a low-cost DIY solution for that too. The sensor board is covered by a clear glass dish on top that protects the board without interfering with readings, and an o-ring seals the gap.

3D printing is fantastic for creating useful components, and has been instrumental in past weather station builds, but projects like these show not everything needs to be (nor should be) 3D printed.

Familiar Parts Make Interfacing Weather Station Easy

Hackers love to measure things, and enjoy monitoring the world around them. Weather stations are a big part of this, and many tinkerers have tried to interface such hardware with varying levels of success. [Ray] is one such individual, and was pleasantly surprised when working on a recent project.

Unlike more old-school models, the model [Ray] found himself working on was a modern unit with a significant number of sensors, a WiFi interface, and even a color screen. Reading the manual, [Ray] noted the device used the IP 192.168.4.1, which is commonly used by the ESP8266 when running in AP mode. The hunch proved to be correct, and opening the device revealed an ESP-WROOM-2 running the show.

Now working with familiar parts, it was simple to hook up to the onboard serial port to scope for data. To [Ray]’s delight, the device was outputting all the weather data out over the connection, and in plaintext to boot. The station also featured the ability to connect to Weather Underground, and watching the debug messages during this process helped [Ray] to understand the format of the information.

It’s rare that manufacturers make it so easy, but debug ports can often be a treasure trove of information to the budding hacker. We’ve seen others cracked before, too.

Weather Station Can Rock You Like A Hurricane

People love to talk about the weather. It’s the perfect small talk, whether you’re trying to start a conversation or keep one going by avoiding an awkward silence. In the same fashion, weather stations are an ideal starting point for any sort of sensor-related project ideas. You get to familiarizing yourself with communication buses, ADCs, general data acquisition, and you learn a lot in figuring out how to visualize it all.

What if your weather station didn’t visualize anything? [OttoNL] is answering that question with a MIDI-generating Weather Station that uses the mood of the music to convey the condition of the elements outside.

Using an ESP8266 programmed via the Arduino IDE, [OttoNL] hooked up a light dependent resistor, a rain sensor, and the all-round workhorse BME280 for temperature, barometric pressure, and humidity to it. Reading the sensors, the ESP will generate MIDI notes that are sent to a connected synthesizer, with each sensor influencing a different aspect of the generated MIDI signals. A sadder, slow tune will play during rain and a fast upbeat one during sunshine. While it doesn’t use the ESP’s WiFi functionality at all at this point, a future version could easily retrieve some weather forecast data from the internet and add it into the mix as well.

Connect this to your alarm clock, and you can start your day off in the appropriate mood. You can even customize your breakfast toast to really immerse your morning routine in abstract weather cues.

Continue reading “Weather Station Can Rock You Like A Hurricane”