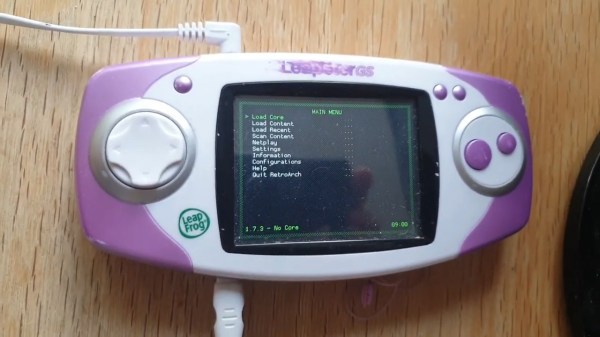
A pink and white Leapster GS handheld console sits on a wooden table. It has a white D-pad and two large pink action buttons. A power cord extends from the bottom and a headphone cable comes out the top.

RetroArch On A LeapFrog Leapster GS

Retro games are a blast, and even more so when you can bring the fun on the go. [mac2612] has developed a custom retroarch-based firmware for the Leapster GS and LeapPad2. (via Bringus Studios on YouTube)

We covered Linux on the Leapster before, but Retroleap seems better documented (and still up on the internet). Installation is done over the command line with sshflash, also by [mac2612], after booting the Leapster or LeapPad2 into “Surgeon Mode.” Since the stock bootloader remains intact, you can always return the LeapFrog to its default state if anything gets wiggy by reflashing the device via the LeapFrog Connect App.

The default system includes emulators for NES, SNES, GBA, Genesis, Atari 800, and MAME. Performance varies, but some PS1 games have even run successfully on the device.

If you’d like to see some other LeapFrog hacks, checkout this LeapFrog TV Running DOOM or Composite Video Out on the DIDJ.

Continue reading “RetroArch On A LeapFrog Leapster GS”

A handheld game console made from bare PCBs

Minimalist Homebrew Hardware Recreates Arcade Classics

Classic video games might look primitive by today’s standards, but the addictive gameplay of Breakout or Pac-Man remains fun no matter what decade you were born in. Keeping the relevant hardware running becomes harder as the years pile up however, so when [Michal Zalewski] decided to introduce his kids to classic video games, he didn’t dig up his old game consoles. Instead, he decided to recreate several games from scratch using the bare minimum amount of hardware needed.

The first project is a copy of Snake, the arcade classic that millennials will recognize from their Nokia phones. [Michal] made an initial version using an ATmega328P with an 8×8 LED matrix as a display, but quickly upgraded the hardware to a 16×16 display powered by an ATmega644, and added an LED seven-segment display to show the score. All parts are simply soldered onto a piece of prototyping board, with no need for any custom PCBs or enclosures.
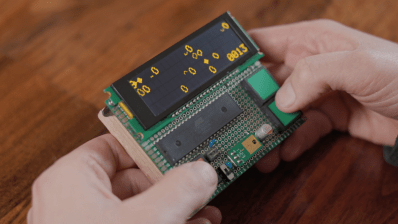
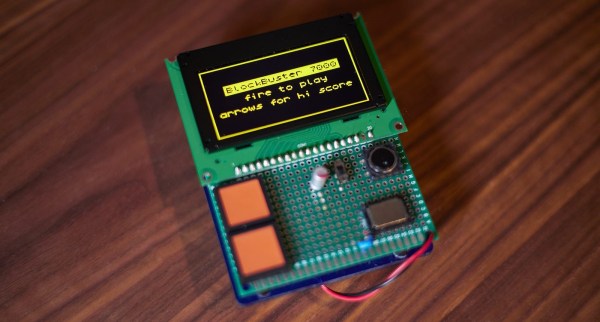
Game #2 is a side-scrolling space shooter called Dino in Space. This game runs on an ATmega1284 and uses a 4×20 character text display, allowing simple graphics as well as an on-screen score counter. Similar hardware, although with a 128×64 graphic OLED screen, powered game #3, a Breakout/Arkanoid clone called Blockbuster 7000.

[Michal]’s blog post is filled with interesting tips for real-life game programming. For example, a true random number generator creates a rather odd-looking bunch of asteroids in space – tweaking the distribution to make it a bit more uniform greatly enhances the game’s playability. Source files for all games are available on [Michal]’s website, and include a description of the exact hardware setup needed for each game.

Recreating Snake on custom hardware is sort of a rite of passage for microcontroller hackers, as you can see inĀ  many impressive projects. Breakout-style games can also be implemented on various hardware platforms, including analog oscilloscopes.

A Number Maze For Younger Hackers

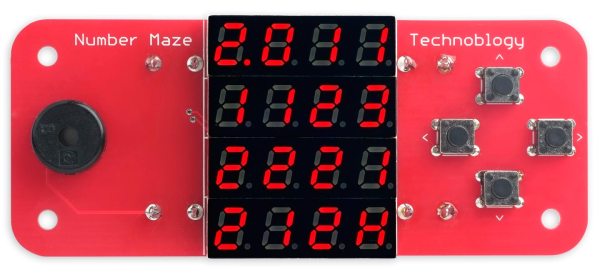
[David Johnson-Davies] has a lofty goal of building a small device to give to younger hackers on a semi-yearly basis. So this last year, he designed and created The Number Maze Game, a small handheld logic puzzle maze.

It’s based on several 4-digit seven-segment displays controlled by an AVR128DA32. Navigation is just a few push buttons and a buzzer to let you know when you’ve won. The game is simple: you jump the amount listed on the space you’re currently on, trying to get to the space labeled “H.” [David] lays out how he built it in great detail, discussing the process of designing and assembly. He also expounds on many decisions, such as using a TQFP microcontroller instead of the through-hole ATmega328P due to the I/O pin count.

The instructions and design process are so detailed we’re confident most people could easily reproduce it, especially with the code and board files. But the value of this project is not in blindly copying it. Instead, we love how something so simple can be wonderfully entertaining and valuable to younger hackers. Programming headers are included so they can add new mazes. We suspect there are many out there who would love to get something so tactile, simple, and modifiable.

Of course, we’ve seen other minimal maze games, so there’s no lack of inspiration for making some different.

New And Improved Arduboy Mini Smashes Funding Goal

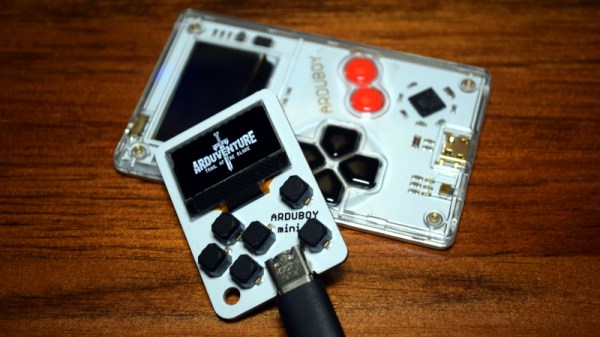
Just before the holidays, we brought you word of the Arduboy Mini — the latest in the line of open source 8-bit handheld gaming systems designed by [Kevin Bates]. He was good enough to send along a prototype version ahead of the system’s Kickstarter campaign, and we came away impressed with the possibilities it offered for customization.

Today, we’re pleased to tell you that not only did the Arduboy Mini Kickstarter cross the finish line with more than six times its original funding goal, but [Kevin] has made some pretty major changes to the design from the last time it graced these pages. The final Mini offers even more opportunities for modification and expansion, while still keeping the $29 USD price tag which made it so appealing in the first place. Continue reading “New And Improved Arduboy Mini Smashes Funding Goal”

See The ATARI GEM Desktop Running On A Portable Word Processor… Thing

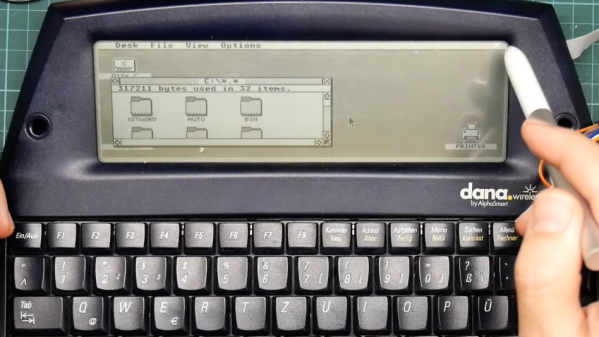
Get ready for vintage computing aplenty in [David Given]’s project to port EmuTOS to the AlphaSmart Dana. He’s got it all on video, too. All 38 hours of it over 13 episodes!

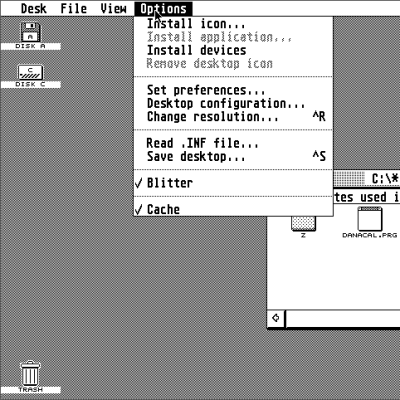
The GEM desktop, as seen on the Atari ST line of computers.

[David]’s fork of EmuTOS is an open source version of the Atari TOS, which is itself the 68000-based OS for the Atari ST line of computers.

As for the AlphaSmart Dana, it is a roughly twenty-year-old portable word processor thing with pen input which runs a version of PalmOS. It’s a slightly oddball piece of hardware, but quite capable in its own way. A match obviously made in heaven? It is if you have [David]’s skill and drive!

To get EmuTOS working on the Dana, the first step was figuring out how to find and work with the Dana’s debug port, using it to get direct access to the CPU while bypassing the boot ROM. Turns out that the Dana’s 68000-compatible processor has a handy feature: by manipulating the right pin, one can remote-control the CPU (to a certain extent) via the UARTs. That’s the entry point for a whole lot of hacking that ultimately results in firing up the GEM desktop on the Dana, and being able to run (some) original Atari ST software. Probably the biggest issue is that the screen size isn’t a great match for what the OS expects, but it works.

Continue reading “See The ATARI GEM Desktop Running On A Portable Word Processor… Thing”

Flipper Zero Hacker Tool Gets UI Editor For Custom Apps

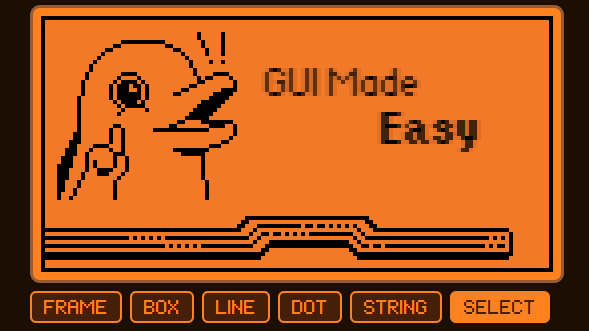
[Mikhail] released a handy GUI editor/generator tool for the Flipper Zero multipurpose hacker tool, making layouts and UI elements much easier and more intuitive to craft up.

Those who decide to delve into rolling their own applications or add-ons will find this a handy resource, especially as it generates the necessary code for the visual elements. It’s not limited to placing icons, either. Boxes, lines, dots, text, and more can be freely laid out to get things looking just right.

To use it, simply drag and drop icons of various sizes into the screen area. Non-icon UI elements like frames, lines, text, and others can be placed with a click using the buttons. To move elements around, click the SELECT button first, then drag things as needed. To fine-tune positioning (or change the text of a string) a selected element’s properties can be accessed and modified to the right of the simulated screen. When things look good, switch to the CODE tab and copy away to use it in your Flipper application.

Unfamiliar with the Flipper Zero? It’s a kind of wireless multitool; a deeply interesting device intended to make wireless exploration and experimentation as accessible as its dolphin mascot is adorable.

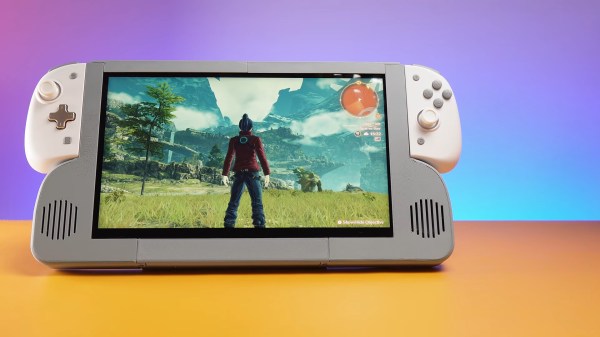
A 12" LCD screen sits between speakers (on lower half of bezel) and joycon controllers are attached on the upper half of the bezel.

Portable Monitor Extension For Nintendo Switch

Handheld consoles are always a tradeoff between portability and screen real estate. [Pavlo Khmel] felt that the Nintendo Switch erred too much on the side of portability, and built an extension to embiggen his Switch. (YouTube)

[Khmel] repurposed a Dell XPS 12 LCD panel for the heart of this hack and attached it to an LCD controller board to serve as an external monitor for the Switch. A 3D printed enclosure envelops the screen and also contains a battery, speakers, and a dock for the console. Along the top edges, metal rails let you slide in the official Joy-Cons or any number of third party controllers, even those that require a power connection from the Switch.

Since the Switch sees this as being docked, it allows the console to run faster and at higher resolution than if it were in handheld mode. The extension lasts about 5 hours on battery power, and the Switch inside will still be fully charged if you don’t mind being constrained to its small screen while you charge it’s bigger-screened exoskeleton.

Need more portable goodness? Be sure to check out our other handheld and Nintendo Switch hacks.

Continue reading “Portable Monitor Extension For Nintendo Switch”