Exploring The Cutting Edge Of Desktop ARM Hardware

While the x86 architecture certainly isn’t going away anytime soon, it seems that each year more and more of our computing is done on ARM processors. It started with our smartphones, spread into low-cost Chromebooks, and now Apple’s gone all-in with their M1/M2 chips. But so far we haven’t seen too much movement in the desktop space, a fact which has arguably slowed the development of ARM-compatible software and operating systems.

But that doesn’t mean there aren’t options out there, and no, we don’t mean using a Raspberry Pi. [Wooty-B] has been documenting their efforts to switch over to a ARM desktop, which makes for fascinating reading even if you’re currently comfortable with your architecture choices. The key is the HoneyComb LX2K, a Mini-ITX ARM development board that offers enough expansion and raw power to meet most daily computing needs…assuming you’re willing to put in the effort. Continue reading “Exploring The Cutting Edge Of Desktop ARM Hardware”

CortexProg Is A Real ARM-Twister

We’ve got a small box of microcontroller programmers on our desktop. AVR, PIC, and ARM, or at least the STMicro version of ARM. Why? Some program faster, some debug better, some have nicer cables, and others, well, we’re just sentimental about. Don’t judge.

[Dmitry Grinberg], on the other hand, is searching for the One Ring. Or at least the One Ring for ARM microcontrollers. You see, while all ARM chips have the same core, and thus the same SWD debugging interface, they all write to flash differently. So if you do ARM development with offerings from different chip vendors, you need to have a box full of programmers or shell out for an expensive J-Link. Until now.

[Dmitry] keeps his options open by loading up the flash-specific portion of the code as a plugin, which lets the programmer figure out what chip it’s dealing with and then lookup the appropriate block size and flash memory procedures. One Ring. He also implements a fast printf-style debugging aid that he calls “ZeroWire Trace” that we’d like to hear more about. Programming and debugging are scriptable in Lua, and it can do batch programming based on reading chip IDs.

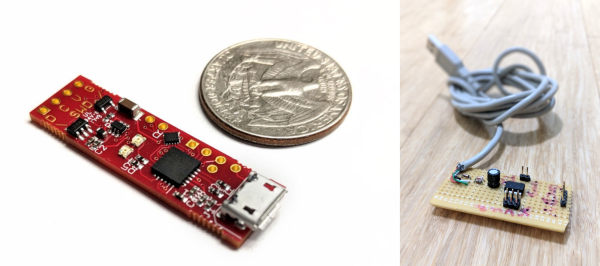
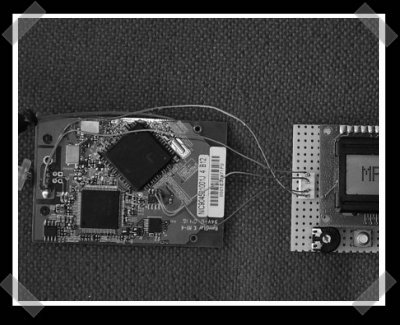
You can build your own CortexProg from an ATtiny85, two diodes, and two current-limiting resistors: the standard V-USB setup. The downside of the DIY? Slow upload speed, but at least it’ll get you going. He’s also developed a number of fancier versions that improve on this. Version four of the hardware is just now up on Kickstarter, if you’re interested.

If you’re just using one vendor’s chips or don’t mind having a drawer full of programmers, you might also look into the Black Magic Probe. It embeds a GDB server in the debugger itself, which is both a cool trick and the reason that you have to re-flash the programmer to work with a different vendor’s chips. Since the BMP firmware is open, you can make your own for the cost of a sacrificial ST-Link clone, about $4.

On the other hand, if you want a programmer that works across chip families, is scriptable, and can do batch uploads, CortexProg looks like a caviar programmer on a fish-bait budget. We’re going to try one out soon.

Oh and if you think [Dmitry Grinberg] sounds familiar, you might like his sweet Dreamcast VRU hack, his investigations into the Cypress PSOCs, or his epic AVR-based Linux machine.

A Well-Chronicled Adventure In Tiny Robotics

Some of us get into robotics dreaming of big heavy metal, some of us go in the opposite direction to build tiny robots scurrying around our tabletops. Our Hackaday.io community has no shortage of robots both big and small, each an expression of its maker’s ideals. For 2018 Hackaday Prize, [Bill Weiler] entered his vision in the form of Project Johnson Tiny Robot.

[Bill] is well aware of the challenges presented by working at a scale this small. (If he wasn’t before, he certainly is now…) Forging ahead with his ideas on how to build a tiny robot, and it’ll be interesting to see how they pan out. Though no matter the results, he has already earned our praise for setting aside the time to document his progress in detail and share his experience with the community. We can all follow along with his discoveries, disappointments, and triumphs. Learning about durometer scale in the context of rubber-band tires. Exploring features and limitations of Bluetooth hardware and writing code for said hardware. Debugging problems in the circuit board. And of course the best part – seeing prototypes assembled and running around!

As of this writing, [Bill] had just completed assembly of his V2 prototype which highlighted some issues for further development. Given his trend of documenting and sharing, soon we’ll be able to read about diagnosing the problems and how they’ll be addressed. It’s great to have a thoroughly documented project and we warmly welcome his robot to the ranks of cool tiny robots of Hackaday.io.

Learning ARM Without Dev Board

There’s a tremendous amount of value in using pre-built, known-good development environments. It saves you hours of potential headaches when things aren’t working. Is the bug in the hardware or the software? If you bought a dev kit, you can be pretty sure it’s your software. But sometimes using a dev kit also feels like there’s a black box in the system. [Kevin] wanted to peer inside the black box, so he ordered a tray of cheap STM32F103 chips on eBay, and did the rest himself.

“The rest” isn’t all that much, but figuring that out is half the battle. [Kevin] soldered the TQFP chip onto a breakout board, added some decoupling capacitors, and connected four pins up to a dirt-cheap ST-Link programmer clone. The rest of the article describes the toolchain he used to compile for and program the chip. The end result is, natch, a blinking LED.

If you’re a bit experienced with microcontrollers and want to dive head-first into an ARM chip, [Kevin]’s writeup is just the ticket. In a single (long) blog post, he walks you through all the steps. If this is your first rodeo, you might be tempted to cheese out and buy a pre-built board on eBay (search “STM32F103” and you’ll find many options to choose from) and we don’t think that’s a bad idea either. Still, there’s just something to be said for the confidence that you’ll have once you’ve built the whole system from scratch.

How To Build A Pocket-Sized MBed Signal Generator

Last month, I talked about how to get started with mBed and ARM processors using a very inexpensive development board. I wanted to revisit mBed, though, and show something with a little more substance. In particular, I often have a need for a simple and portable waveform generator. It doesn’t have to be too fancy or meet the same specs as some of the lab gear I have, but it should be easy to carry, power off USB, and work by itself when required.

My requirements mean I needed a slightly more capable board. In particular, I picked up a K64F board. This is very similar to the KL25Z board but has a bit more of everything–speed, memory, etc. What I really wanted, though, was the SD card slot. I did, however, do my early testing on a KL25Z, so if you have one, you can still work through the code, although standalone operation won’t be possible. The price jumps from $13 to $35, but you get a lot more capability for the price.

Continue reading “How To Build A Pocket-Sized MBed Signal Generator”

Ask Hackaday: Arduino In Consumer Products

Speak with those who consider themselves hardcore engineers and you might hear “Arduinos are for noobs” or some other similar nonsense. These naysayers see the platform as a simplified, overpriced, and over-hyped tool that lets you blink a few LEDs or maybe even read a sensor or two. They might say that Arduino is great for high school projects and EE wannabes tinkering in their garage, but REAL engineering is done with ARM, x86 or PICs. Guess what? There are Arduino compatible boards built around all three of those architectures. Below you can see but three examples in the DUE, Galileo, and Fubarino SD boards.

This attitude towards Arduino exists mainly out of ignorance. So let’s break down a few myths and preconceived biases that might still be lurking amongst some EEs and then talk about Arduino’s ability to move past the makers.

Arduino is NOT the Uno

When some hear “Arduino”, they think of that little blue board that you can plug a 9v battery into and start making stuff. While this is technically true, there’s a lot more to it than that.

  1. An Arduino Uno is just an AVR development board. AVRs are similar to PICs. When someones says “I used a PIC as the main processor”, does that mean they stuck the entire PIC development board into their project? Of course not. It’s the same with Arduino (in most cases), and design is done the same way as with any other microcontroller –
    • Use the development board to make, create and debug.
    • When ready, move the processor to your dedicated board.
  2. What makes an Arduino an “Arduino” and not just an AVR is the bootloader. Thus:
    • An Atmega328P is an AVR processor.
    • An Atmega328P with the Arduino bootloader is an Arduino.
  3. The bootloader allows you to program the AVR with the Arduino IDE. If you remove the bootloader from the AVR, you now have an AVR development board that can be programmed with AVR Studio using your preferred language.

There Is No Special Arduino Language

Arduino "blink" sketch should run on any Arduino compatible board.
Arduino “blink” sketch should run on any Arduino compatible board.

Yes, I know they call them sketches, which is silly. But the fact is it’s just c++. The same c++ you’d use to program your PIC. The bootloader allows the IDE to call functions, making it easy to code and giving Arduino its reputation of being easy to work with. But don’t let the “easy” fool you. They’re real c/c++ functions that get passed to a real c/c++ compiler. In fact, any c/c++ construct will work in the Arduino IDE. With that said – if there is any negative attribute to Arduino, it is the IDE. It’s simple and there is no debugger.

The strength comes in the standardization of the platform. You can adapt the Arduino standard to a board you have made and that adaptation should allow the myriad of libraries for Arduino to work with your new piece of hardware. This is a powerful benefit of the ecosystem. At the same time, this easy of getting things up and running has resulted in a lot of the negative associations discussed previously.

So there you have it. Arduino is no different from any other microcontroller, and is fully capable of being used in consumer products along side PICs, ARMs etc. To say otherwise is foolish.

What is the Virtue of Arduino in Consumer Products?

This is Ask Hackaday so you know there’s a question in the works. What is the virtue of Arduino in consumer products? Most electronics these days have a Device Firmware Upgrade (DFU) mode that allows the end user to upgrade the code, so Arduino doesn’t have a leg up there. One might argue that using Arduino means the code is Open Source and therefore ripe for community improvements but closed-source binaries can still be distributed for the platform. Yet there are many products out there that have managed to unlock the “community multiplier” that comes from releasing the code and inviting improvements.

What do you think the benefits of building consumer goods around Arduino are, what will the future look like, and how will we get there? Leave your thoughts below!

Wireless Card = ARM Development Platform


[Archantos] sent us this one. The mustumbler project is actually trying to use some external hardware to make a miniature wireless stumbler. [Archantos] points out that it’s could be a cheap way to get your hands on an ARM development platform. He’s right. Just a few connections gets access to the I2C bus, a GPIO expander for I2C runs the LCD and an EEPROM is there for program storage. The software is still being sorted out, but the hardware itself is functional. If they can manage to reverse engineer the Conexant chipset, they should have a very promising platform.