Soda Can Lamp Pinpoints Your Interests

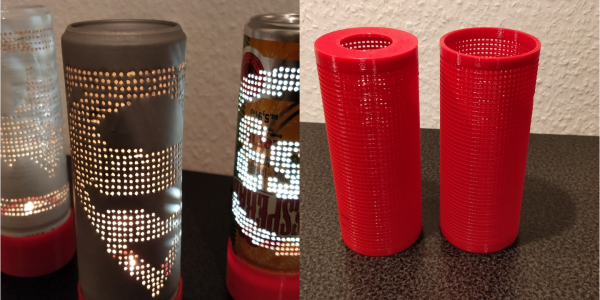
We’ve said it a million times before: 3D printing will expand your horizons. The more you print, the more you think about things you could print and new ways to use printing in the process of building projects. [AHNT] knows all about this phenomenon, because he thought of a way to use soda cans as canvases for customizable pixel art lamp shades.

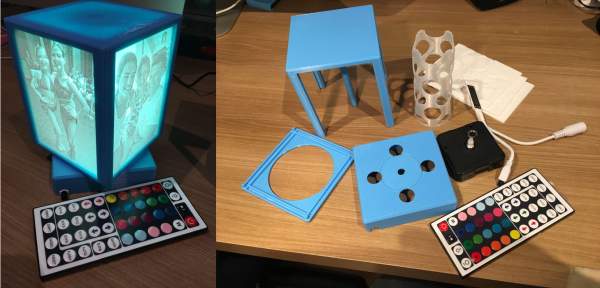
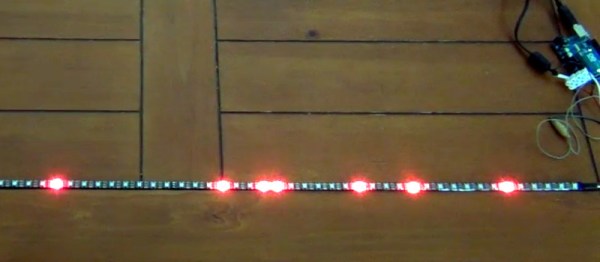
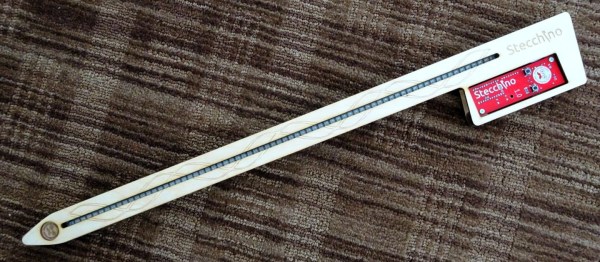
[AHNT] designed a printable sleeve that fits perfectly over 250mL cans. It provides a sturdy grid for poking tiny holes with a medical needle, and can be reused indefinitely with any pattern imaginable. He created two different printable bases to illuminate the lamp: one is sized to hold a votive candle, and the other is made for an LED strip circuit with a rocker switch and 12 VDC barrel jack. We suppose it wouldn’t take much to use an RGB LED instead—a Trinket or a Gemma would surely fit in the base.

In the video after the break, [AHNT] talks about prepping the can by cleanly removing the lid, which he does by filing the top edge until the layers separate. He also discusses a few methods for removing the paint, and notes that sandblasting worked the best.

Don’t need another lamp? There’s a million things you can do with that empty soda can. You could make a theremin, or a battery, or even a treasure box. Cut it open and make a solder stencil. Or do something else entirely, and send us a tip.

Continue reading “Soda Can Lamp Pinpoints Your Interests”

Workbench Light Arch On The Cheap

A light arch is exactly what it sounds like: an arch fitted with LED strips that can evenly illuminate the area below. They are becoming very popular in the miniature and model making communities as they put a lot of light where you need it without the shadows that you can get with purely overhead lighting. Those same characteristics make it excellent for electronics work as well, so while we haven’t seen many light arches come our way yet, we expect it won’t be long before they start tricking in.

[Spencer Owen] recently wrote in to tell us about his LED light arch that’s exceptionally easy and cheap to build. Whatever excuse you had before about not trying a light arch over your bench is probably out the window once you check this build out.

The heart of the arch is a length of plastic tile edging, which you can pick up from any big box home improvement store. LED strips are then attached to the inside face of the tile edging, and a suitable power supply wired into one end. [Spencer] mentions he’s strategically wrapped some sections of the arch with a diffuser, which may or may not be necessary for your particular application.

At this point the astute reader may have realized that this doesn’t make an arch, and would just give you a floppy light stick thing. Right you are. The real magic of this design are the 3D printed anchors. All you need to do is bend the tile edging, insert the ends in the anchors, and you’ve got a perfectly formed arch.

The hole in the anchor matches the profile of the tile edging closely, though might need to be adjusted to match a different brand of edging from what [Spencer] has. The tension of the plastic will be enough to hold the arch up without the need for glue or fasteners. As an added bonus, the arch can be taken down by just pulling the edging out and letting it return to its original shape.

Using your newly arisen arch to light up the bench is all well and good, but why stop there? Why not use it as clock, or to play a dungeon crawler?

Continue reading “Workbench Light Arch On The Cheap”

Rotating Lithophane Box Turns With Time

If you wanted to make a rotating display box, what would you use to make it spin? A servo? A stepper motor? [ChrisN219] didn’t need his to move quickly by any means, and this opened up his options to something we probably wouldn’t have thought to use: a clock movement. Specifically, the hour minute part of the shaft.

Rotating lithophanes of your loved ones makes for a pretty cool project, and there isn’t a whole lot to this build to make it difficult. Much of it is 3D printed, including the tube in the center that the LED strip is wrapped around. The base is just big enough to hold the clock movement and the LED strip controller, so it would fit nicely on a desk or a mantel.

This is version two of [Chris]’ lithophane box, which gave him a chance to perfect the frame and design a thicker center post to withstand the heat from the LED strip. All the files are available if you want to print your own panels and take them for a spin. Since it’s so easy to change them out, you may end up with a big pile to choose from.

An LED Effect For Every Occasion

Quality software development examples can be hard to come by. Sure, it’s easy to pop over to Google and find a <code> block with all the right keywords, but having everything correctly explained can be hit or miss. And the more niche the subject, the thinner the forum posts get. Bucking the downward trend [HansLuijten] provides an astoundingly thorough set of LED strip patterns in his comprehensive post titled Arduino LED strip effects.

Don’t let the unassuming title lead you astray from the content, because what’s on offer goes beyond your average beginner tutorial on how to setup a strand of NeoPixels. [HansLuijten] is thorough to a fault; providing examples for everything from simple single color fades and classic Cylon eyes to effects that look like meteors falling from the sky. Seriously! Check out the videos on their webpage. Those chasing lights you see around theater signs? Check. Color twinkle and sparkle? Check. Color wipes and rainbow fades? Check, and check. Continue reading “An LED Effect For Every Occasion”

Great Emergency Lights From Not-So-Great UPS

We know your shame. Like you, we wanted to save some scratch and bought the bottom-of-the-range UPS, only to discover that it is no use to man or beast as it lacks the power to perform any reasonable task. It’s now sitting in a corner, to gather dust as its batteries deteriorate.

Not so fast with the UPS abandonment! [rue_mohr] came up with a modification for a small APC UPS that turned it into something a little more useful. Removing the mains inverter from the picture with a few displaced wires and PCB mod, the UPS is now a 12V battery with a mains charger and power outage detection built-in. In this state it’s the perfect power pack for some 12V LED strips used for emergency lighting. There is a handy 3D print that fits the rear socket cut-outs on the US version of the device and provides apertures  for a pair of DC power jacks.

This is a relatively simple hack, but we like it for taking the focus away from the obvious part of the UPS, its mains inverter, and turning to the batteries as the main event. It’s a relatively tiny device, but in the past we’ve featured a UPS at the other end of the scale being used for power back-up to a whole house. Meanwhile we’d like to take a leaf from the [BOFH]’s book, and recommend that the most important piece of infrastructure requiring a UPS is the sysadmin’s coffee machine.

Stecchino Game Is All About Balancing A Big Toothpick

Stecchino demo by the creator

Self-described “Inventor Dad” [pepelepoisson]’s project is called Stecchino (English translation link here) and it’s an Arduino-based physical balancing game that aims to be intuitive to use and play for all ages. Using the Stecchino (‘toothpick’ in Italian) consists of balancing the device on your hand and trying to keep it upright for as long as possible. The LED strip fills up as time passes, and it keeps records of high scores. It was specifically designed to be instantly understood and simple to use by people of all ages, and we think it has succeeded in this brilliantly.

To sense orientation and movement, Stecchino uses an MPU-6050 gyro and accelerometer board. An RGB LED strip gives feedback, and it includes a small li-po cell and charger board for easy recharging via USB. The enclosure is made from a few layers of laser-cut and laser-engraved material that also holds the components in place. The WS2828B WS2812B LED strip used is technically a 5 V unit, but [pepelepoisson] found that feeding them direct from the 3.7 V cell works just fine; it’s not until the cell drops to about three volts that things start to glitch out. All source code and design files are on GitHub.

Games are great, and the wonderful options available to people today allow for all kinds of interesting experimentation like a blind version of tag, or putting new twists on old classics like testing speed instead of strength.

Curved Wood LED Lamp Needs No Fancy Tools

Those of us who aren’t familiar with woodworking might not expect that this curved wood and acrylic LED lamp by [Marija] isn’t the product of fancy carving, just some thoughtful design and assembly work. The base is a few inches of concrete in a plastic bowl, then sanded and given a clear coat. The wood is four layers of beech hardwood cut on an inverted jigsaw with the middle two layers having an extra recess for two LED strips. After the rough-cut layers were glued together, the imperfections were rasped and sanded out. Since the layers of wood give a consistent width to the recess for the LEDs, it was easy to cut a long strip of acrylic that would match. Saw cutting acrylic can be dicey because it can crack or melt, but a table saw with a crosscut blade did the trick. Forming the acrylic to match the curves of the wood was a matter of gentle heating and easing the softened acrylic into place bit by bit.

Giving the clear acrylic a frosted finish was done with a few coats of satin finish clear coat from a spray can, which is a technique we haven’t really seen before. Handy, because it provides a smooth and unbroken coating along the entire length of the acrylic. This worked well and is a clever idea, but [Marija] could still see the LEDs and wires inside the lamp, so she covered them with some white tape. A video of the entire process is embedded below.

Continue reading “Curved Wood LED Lamp Needs No Fancy Tools”