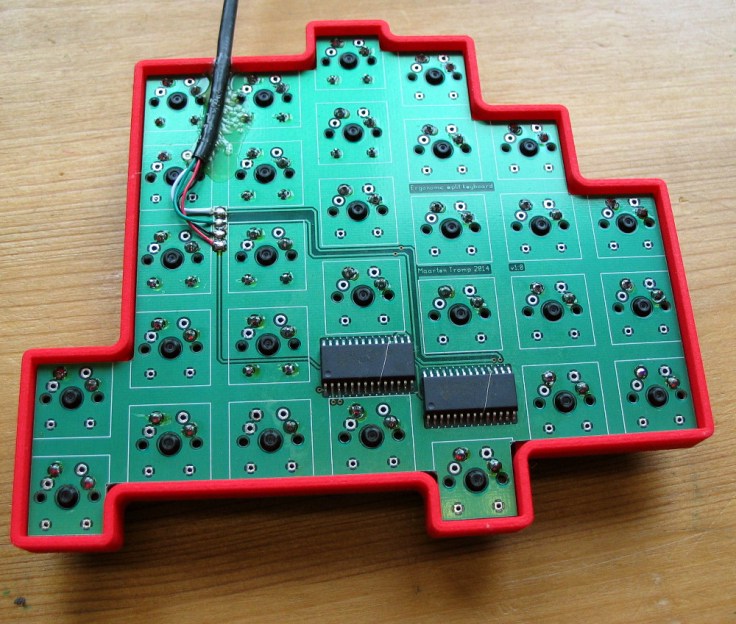
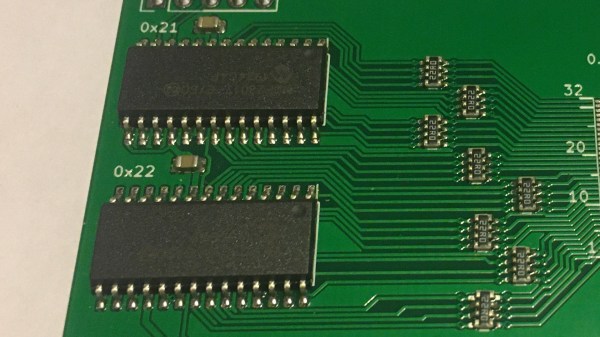
Showing two MCP23017 expanders soldered onto a PCB

MCP23017 Went Through Shortage Hell, Lost Two Inputs

The MCP23017, a 16-bit I2C GPIO expander, has always been a tasty chip. With 16 GPIOs addressable over I2C, proper push/pull outputs, software-enabled pull-ups, eight addresses, maskable interrupts for all pins, and reasonably low price, there’s a reason it’s so popular. No doubt due in part to that popularity, it’s been consistently out of stock during the past year and a half, as those of us unlucky enough to rely on it in our projects will testify.

Now, the chip is back in stock, with 23,000 of them to go around on Mouser alone, but there’s a catch. Apparently, the lengthy out-of-stock period has taken a heavy toll on the IC. Whether it’s the recession or perhaps the gas shortages, the gist is — the MCP23017 now a 14/16-bit expander, with two of the pins (GPA7 and GPB7) losing their input capabilities. The chips look the same, are called the same, and act mostly the same — if you don’t download the latest version of the datasheet (Revision D), you’d never know that there’s been a change. This kind of update is bound to cause a special kind of a debugging evening for a hobbyist, and makes the chip way less suitable for quite a few applications.

It’s baffling to think about such a change happening nearly 20 years after the chip was initially released, and we wonder what could have caused it. This applies to the I2C version specifically — the SPI counterpart, MCP23S17, stays unaffected. Perhaps, using a microcontroller or shift registers for your GPIO expansion isn’t as unattractive of an option after all. Microcontroller GPIO errata are at least expected to happen, and shift registers seem to have stayed the same since the dawn of time.

The reasons for MCP23017 silicon getting cut in such a way, we might never know. At least now, hopefully, this change will be less of a bitter surprise to those of us happy to just see the chip back in stock — and for hackers who have already restocked their MCP23017 hoards, may your shelved boards magically turn out to have a compatible pinout.

Tune Into The Bonnaroo That No One Gets To Go To

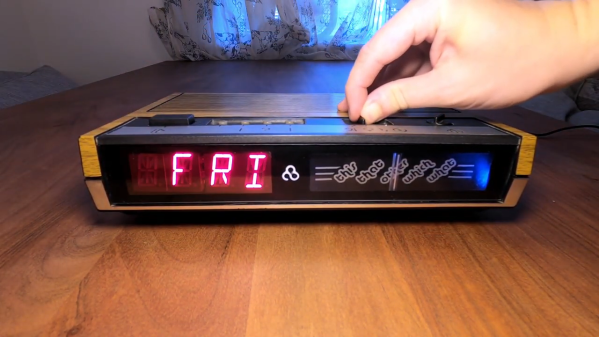
Just like everything else in 2020, the four-day, multi-stage festival of music and art known as Bonnaroo has been cancelled. This would have been [Guy Dupont]’s fifth year making the journey to Tennessee with his friend. Since they couldn’t go, [Guy] decided to build an interactive Bonnaroo mix tape into an 80s clock radio as a birthday present.

[Guy] was able to re-purpose all the original buttons and dials to navigate through the schedule of acts that would have performed across four days and five stages. The conveniently four-way function slider is used to choose the day, and the radio tuning dial selects the stage, complete with delightful static between the positions. The rest of the buttons move back and forth through the scheduled set times, and one will scroll the track and artist name across the 16-segment displays. The snooze button has the honor of being the play/pause button.

All the inputs are controlled with a Feather M4 express, and the music comes through a DFPlayer Mini. We love that [Guy] was able to repurpose the analog tuning dial by coupling it to a slide potentiometer that fit perfectly in a slot on the underside of the plastic. Stay tuned for a great video that starts with an explanation and demo and then goes into the build.

Though the utility of the clock radio may have been supplanted by cell phone alarms and doomscrolling, that just means that there are theoretically more of them to gut and turn into other things, like this Fallout-inspired luggable Pip-Boy.

Continue reading “Tune Into The Bonnaroo That No One Gets To Go To”

Perfecting The Open Source RC Controller

Over the last few months we’ve seen an influx of homebrew RC controllers come our way, and we’re certainly not complaining. While the prices of commercial RC transmitters are at an all-time low, and many of them can even run an open source firmware, there’s still nothing quite like building the thing yourself. How else are you going to get exactly what you want?

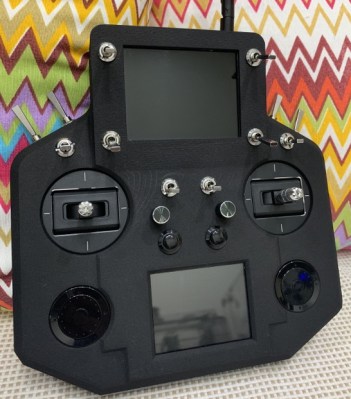
For this entry into the 2019 Hackaday Prize, [Vitor de Miranda Henrique] is working on his own version of the ultimate open source remote control. His design follows some of the trends we’ve already seen in terms of outward design and hardware expandability, but also branches off into some new territory with features such as dual integrated displays.

Why does your controller need two displays? The top 4.3 inch TFT is linked up to a 5.2 GHz video receiver, which makes it perfect for controlling vehicles in “first-person” view, such as drones. The lower screen is a 2.8 inch touch screen from Adafruit, which is intended to be used for navigating through menus and options once the firmware is fully fleshed out.

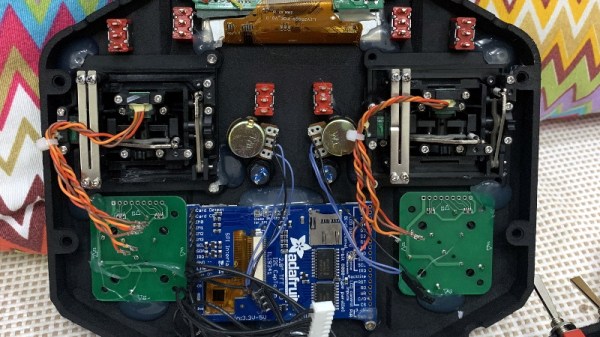
Powering the controller is a ESP32 and dual MCP23017 GPIO expanders to connect up to the array of input devices available to the user. The current iteration of the controller has ten switches, two encoders, some buttons, and a pair of scroll wheels for good measure. Oh, and of course there are a couple of joysticks in the mix as well. All the devices terminate at a custom PCB in the back of the controller which looks to make modifying and adding input devices simple and neat.

We’ve previously seen the Alpha V1, an open source controller with a fairly similar setup, albeit without the dual displays. If even that one is a bit more complex than you’d like, you can always just do it with an Arduino.

Two Joysticks Talk To FPGA Arcade Game Over A VGA Cable

We really love when hacks of previous hacks show up in the tip line. It shows how the hardware hacking community can be a feedback loop, where one hack begets the next, and so on until great things are everywhere. This hacked joystick port for an FPGA Pac Man game is a perfect example of that creative churn.

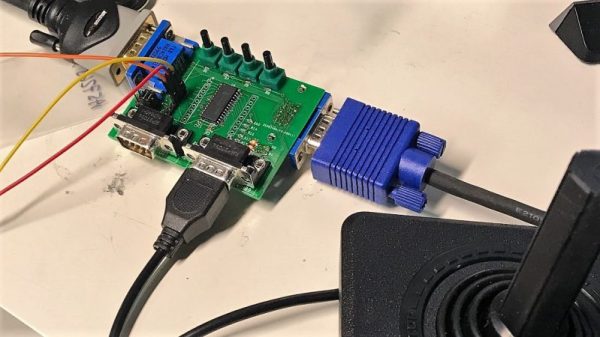
The story starts with Pano Man, a version of the venerable arcade game ported to a Pano Logic FPGA thin client by [Skip]. We covered that story when it first came out, and it caught the attention of [Tom Verbeure], particularly the bit in the GitHub readme file which suggested there might be a better way to handle the joystick connections. So [Tom] took up the challenge of using the Extended Display Identification Data (EDID) circuit in the VGA connector to support an Atari 2600 joystick. The EDID system is an I²C bus, so the job needed the right port expander. [Tom] chose the MCP23017, a 16-bit device that would have enough GPIO for dual joysticks and a few extra buttons. Having never designed a PCB before, [Tom] fell down that rabbit hole for a bit, but quickly came up with a working design, and then a better one, and then the final version. The video below shows it in action with Pano Man.

We think the creative loop between [Skip] and [Tom] was great here, and we can’t wait to see who escalates next. And it’s pretty amazing how much IO can be stuffed over two wires if you have the right tools. Check out this VGA sniffing effort to learn more about EDID and I²C.

Continue reading “Two Joysticks Talk To FPGA Arcade Game Over A VGA Cable”

The A To Z Of Building Your Own Keyboard

We’ve featured a number of people who’ve taken the plunge and created their own customized keyboard; at this point it’s safe to say that there’s enough information and source code out there that anyone who’s looking to build their own board won’t have much trouble figuring out how to do so. That being said, it’s nice to have a comprehensive at a process from start to finish. Why sift through forum posts and image galleries looking for crumbs if you don’t have to?

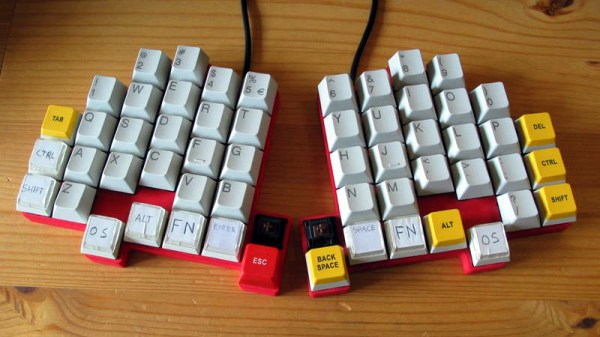
That’s precisely what makes this write-up by [Maarten Tromp] so interesting. He walks the reader through every step of the design and creation of his customized keyboard, from coming up with the rather unique layout to writing the firmware for its AVR microcontroller. It’s a long read, filled with plenty of tips and tricks from a multitude of disciplines.

After looking at other custom boards for inspiration, [Maarten] used OpenSCAD to create a 3D model of his proposed design, and had it printed at Shapeways. His electronics are based around an Atmel ATMega328P using vUSB, and Microchip MCP23017 I/O expanders to connect all the keys. He wrapped it all up by designing a PCB in gEDA PCB and having it sent off for production. As a testament to his attention to detail, everything mated up on the first try.

[Maarten] is happy with the final product, but mentions that in a future revision he would like to add RGB lighting and use a microcontroller that has native USB support. He’d also like to drop the I/O expanders and switch over to Charlieplexing for the key matrix.

From uncommon layouts to diminutive technicolor beauties, it seems there’s no end of custom keyboards in sight. We aren’t complaining.

A Hacker’s Epic Quest To Keep His Son Entertained

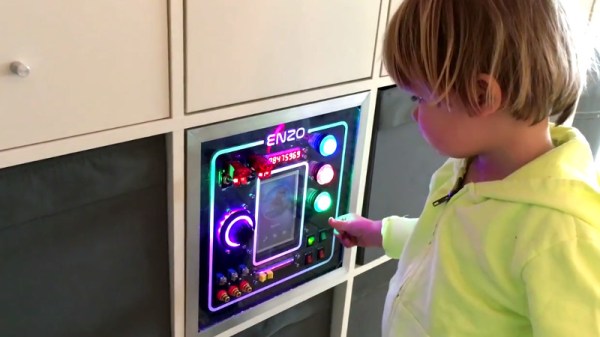
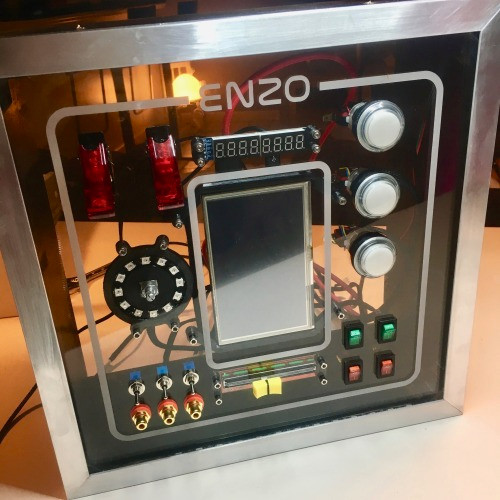
Little humans have a knack for throwing a wrench in the priorities of their parents. As anyone who’s ever had children will tell you, there’s nothing you wouldn’t do for them. If you ever needed evidence to this effect, just take a gander at the nearly year-long saga that chronicles the construction of an activity board [Michael Teeuw] built for his son, Enzo.

Whether you start at the beginning or skip to the end to see the final product, the documentation [Michael] has done for this project is really something to behold. From the early days of the project where he was still deciding on the overall look and feel, to the final programming of the Raspberry Pi powered user interface, every step of the process has been meticulously detailed and photographed.

The construction methods utilized in this project run the gamut from basic woodworking tools for the outside wooden frame, to a laser cutter to create the graphical overlay on the device’s clear acrylic face. [Michael] even went as far as having a custom PCB made to connect up all the LEDs, switches, and buttons to the Arduino Nano by way of an MCP23017 I2C I/O expander.

Even if you aren’t looking to build an elaborate child’s toy that would make some adults jealous, there’s a wealth of first-hand information about turning an idea into a final physical device. It isn’t always easy, and things don’t necessarily go as planned, but as [Michael] clearly demonstrates: the final product is absolutely worth putting the effort in.

Seeing how many hackers are building mock spacecraft control panels for their children, we can’t help but wonder if any of them will adopt us.

Continue reading “A Hacker’s Epic Quest To Keep His Son Entertained”