Cheating At Bowling, The Hacker Way

Anyone who has ever gone to a bowling alley will know the preferred (but ineffective) technique to telepathically control a bowling ball. [Mark Rober] and [James Bruton] decided to change that and hacked a bowling ball that can be steered remotely (and discreetly), simply by leaning your body.

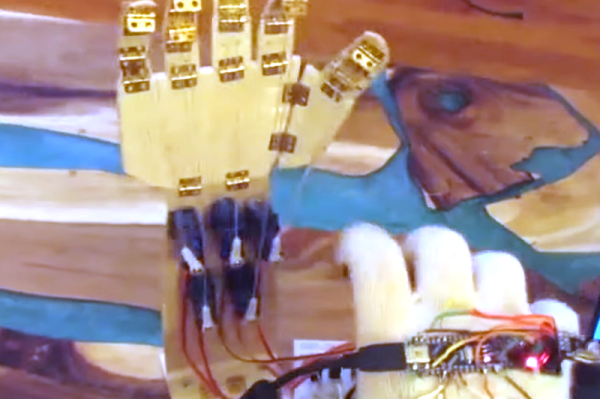
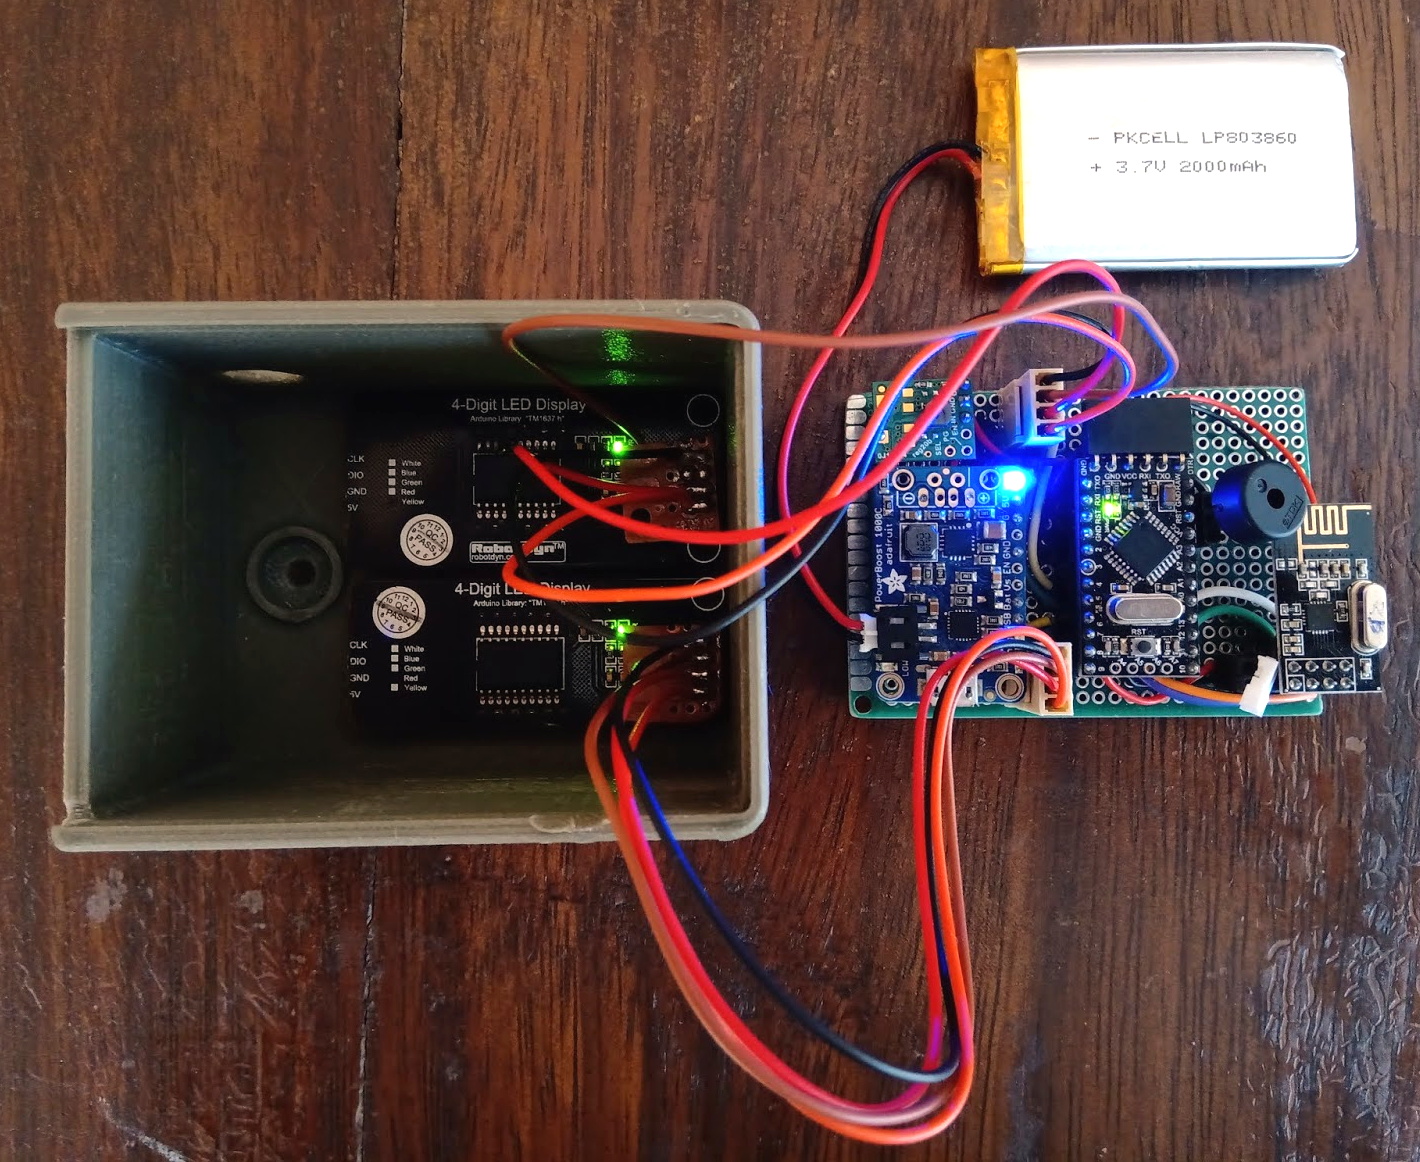
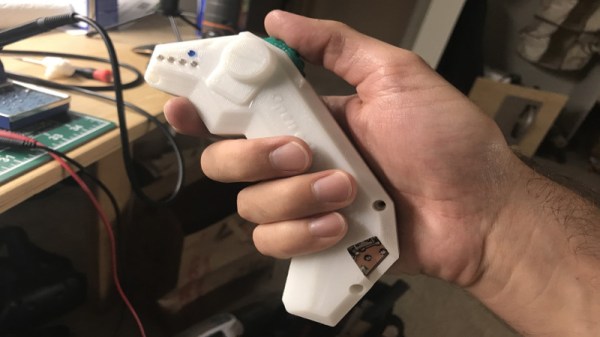
They started with a standard bowling ball, that was cut in half and hollowed out on a lathe. A beam sits on the centre line of the ball, mounted on a bearing in each half to allow the ball to spin around it. Steering done by shifting the centre of mass, by moving a steel pendulum that hangs below the beam side to side with heavy-duty servo. The servo is controlled with an Arduino, and an IMU to detects the balls orientation. Power is provided by and RC Lipo battery. The wireless controller is a sneaky little device that is taped to [Mark]’s back and covered with clothing, and steers the ball by detecting how far he leans with an IMU module. The brain is an Arduino Mini and an NRF24L01 provides the RF link.

While it’s not an easy build, it’s a fairly simple system electronically, with off the shelf electronics modules and perfboard. The genius is in the implementation and its entertainment value. The look on the kids faces when [Mark] “telepathically” controls the ball, after showing off the fact that he has zero natural ability, is absolutely priceless. [Mark Rober], a former NASA engineer, has made a name for himself with viral Youtube videos on cool projects like a glitter booby trap for package thieves and a liquid sand hot tub. [James Bruton], a former toy designer is known for his robotics prowess that he has put on display with OpenDog and functional Star Wars robots.

For us this hack is a perfect example of one that entertains and inspires, a powerful combination for young and old alike. Check out the awesome video after the break. Continue reading “Cheating At Bowling, The Hacker Way”

Haptic Glove Controls Robot Hand Wirelessly

[Miller] wanted to practice a bit with some wireless modules and wound up creating a robotic hand he could teleoperate with the help of a haptic glove. It lookes highly reproducible, as you can see the video, below the break.

The glove uses an Arduino’s analog to digital converter to read some flex sensors. Commercial flex sensors are pretty expensive, so he experimented with some homemade sensors. The ones with tin foil and graphite didn’t work well, but using some bent can metal worked better despite not having good resolution.

Continue reading “Haptic Glove Controls Robot Hand Wirelessly”

Game On With These Open Source Arduino Buzzers

Planning a game of Hacker Jeopardy at your next meetup? You’re going to want some proper buzzers to complete the experience, but why buy when you can build? [Flute Systems] has released an open source DIY game buzzer system based on the Arduino that will help instantly elevate your game. Certainly beats just yelling across the room.

The design has been made to be as easily replicable as possible: as long as you’ve got access to a 3D printer to run off the enclosures for the buzzers and base station, you’ll be able to follow along no problem. The rest of the project consists of modular components put together with jumper wires and scraps of perfboard. Granted it might not be the most elegant solution, but there’s something to be said for projects that beginners and old salts alike can complete.

Each buzzer consists of an Arduino Pro Mini 3.3 V, a nRF24L01, and of course a big pushbutton on the top. Each one is powered by a 110 mAh 3.7 V LiPo battery, though [Flute Systems] notes that the current version of the buzzer can’t actually recharge it. You’ll need to pull the pack out and charge it manually once and awhile. Thankfully, the printed enclosure features a very clever twist-lock mechanism which makes it easy to open anytime you need to poke at the internals.

The base station uses the 5 V version of the Pro Mini, with a Adafruit PowerBoost 1000C to step up the voltage from its 2,000 mAh battery. Of course it also has a nRF24L01, and also adds a buzzer and twin four digit seven-segment LED displays. [Flute Systems] says you can expect about five hours of runtime for the base station.

An especially nice feature of this setup is that the eight digit display allows the base station to show the number of each button in the order it was received. So rather than just getting a display of who buzzed in first, you can see the chronological order in which all eight buttons were pressed. Coming up with clever applications for this capability is left as an exercise for the reader.

Of course, there’s more than one way to build a buzzer. If you don’t like the way [Flute Systems] did it, then check out this version that uses 900 MHz radios and an OLED to show the results.

Samy Kamkar’s LED Balloon Network

Writing this in the frigid darkness of a Northern Hemisphere January evening, I have to admit to more than a little envy of Samy Kamkar and his friends. One of their summer events is a private party at a secluded campground somewhere that looks quite warm, which from here seems mighty attractive.

Samy wanted to provide a spectacle for his friends. What he came up with is glowing orbs; LED balloons that would float above the campsite and wow his friends with their pretty synchronised illumination. Thus an adventure in wireless communications, lighter-than-air flammable gasses versus electronics weight calculations, and code optimization began, the details of which were shared in Samy Kamkar’s 2018 Hackaday Superconference talk embedded below.

Continue reading “Samy Kamkar’s LED Balloon Network”

Arduino RC Transmitter For Homebrew Projects

The field of radio control has benefited much from the onward march of technology. Where a basic 2-channel setup would once have cost hundreds of dollars, it’s now possible to get a high-end 2.4GHz 9-channel rig for well under $100, shipped to your door. However, the vast majority of these systems are closed-source and built for purpose. Sometimes, there are benefits to doing things your own way, and that’s precisely what this project does.

At its heart, it’s a simple combination. An Arduino Pro Mini talks to a NRF24L01 which handles the wireless communication. At that point, it’s up to you – throw in as few or as many controls as you like. For this build, [HowToMechatronics] has gone with a twin-stick setup, with a pair of potentiometers and twin toggle switches to round out the options.

The build comes in handy, as it’s possible to program in whatever features you may need for a given project. [HowToMechatronics] has used it to control a hexapod robot, among other projects. It’s a build that shows that with cheap and readily available parts, it’s possible to whip up a custom solution to suit your needs.

If this topic interests you.it’s worth saying that even those closed source radio control products can sometimes be hacked.

[Thanks to Baldpower for the tip!]

Use Your Game Boy As A Wireless Controller

Like many retro favourites, the Game Boy is in no way dead — development continues apace through its many fans.But what about the hardware side? This is a particularly interesting one: [Alex] wondered if a Game Boy could be readily used as a wireless controller. Set out to make it happen, the final product is a game cartridge that makes the classic handheld a wireless controller.

It’s achieved quite elegantly, with a custom cartridge used to turn the Game Boy into a controller while requiring no modification to the handheld. The cartridge contains a flash chip to store the ROM, along with an ATmega48PA microcontroller and an NRF24L01 to do the talking. Upon powerup, the Game Boy runs code from the ROM, and the microcontroller is in charge of reading button states and sending them to the NRF24L01 for transmission. The program stored on the ROM also allows configuration changes to be made from the Game Boy itself, such as choosing the appropriate wireless channel.

The cartridge transmitter can be used with a variety of receivers. [Andy] has developed a USB HID joystick emulator to allow the Game Boy to be used with PCs, as well as a receiver for the GameCube, too. Yes, that’s right — you can now play Super Smash Bros. with a weirder controller than all your friends. A Super Nintendo version is also in the works. Perhaps the coolest feature, however, is that the cart can use its radio link to communicate with another Game Boy running the same cartridge. [Andy] demonstrates this with a basic game of Pong being played between two Game Boy Advances.

Working on retro hardware can be great fun — things are well documented, parts are cheap, and there’ll be plenty of fans cheering you on, too. [Andy] has even made the hardware available for purchase on Tindie and his website if you’re not quite comfortable rolling your own.

The Game Boy platform remains ripe for hacking – you can even take screenshots with a logic analyzer these days. Video after the break.

Continue reading “Use Your Game Boy As A Wireless Controller”

Improved Controller For E-Skateboards

[Timo] recently purchased himself a Acton Blink Qu4tro electric skateboard. Performance-wise, the board was great, but the controller left a lot to be desired. There were issues with pairing, battery displays, and just general rideability. Like any good hacker, he decided some reverse engineering was in order, and got to work.

Initial results were disheartening – the skateboard relies on various chips of Chinese origin for which documentation proved impossible to come by. However, as it turned out, the board and controller communicated using the common NRF24L01+ transceiver.

Initial work focused on understanding the pairing process and message protocol. With that done, [Timo] decided the best course of action was to redevelop a controller from scratch, using an Arduino Nano and NRF24L01+ to do the job. [Timo]’s Open esk8 controller improves driveability by removing delays in message transfer, as well as improving on the feel of the controller with a 3D printed chassis redesign.

[Timo] now has a much more usable skateboard, and has racked up over 200 miles in testing since the build. However, if you fancy converting your existing board to electric, check out this project.