Hackaday Links Column Banner

Hackaday Links: October 31, 2021

Global supply chain issues are beginning to hit closer to home for the hacker community, as Raspberry Pi has announced their first-ever price increase on their flagship Pi 4. The move essentially undoes the price drop on the 2GB version of the Pi 4 that was announced in February, and sets the price back up from $35 to $45. Also rolled back is the discontinuation of the 1GB version, which will now be available at the $35 price point. The announcements come from Eben Upton himself, who insists the price increase is only temporary. We applaud his optimism, but take it with a grain of salt since he also said that 2021 production across the board will stay at the seven million-unit level, which is what they produced in 2020. That seems to speak to deeper issues within the supply chain, but more immediately, it’s likely that the supply of Pi products will be pinched enough that you’ll end up paying above sticker price just to get the boards you need. Hope everyone is stocked up.

On the topic of supply chain issues and their threat to Christmas gift-giving, here’s one product we hope is stranded in a container off Long Beach or better still, bobbing along in the Strait of Juan De Fuca: a toddler’s toy telephone that actually makes and receives calls. Anyone born in the last 60 years probably had one of the Fisher-Price Chatter telephone, a toy that in its original form looked like a desk telephone on wheels that was dragged behind the child, popping along and providing endless hours of clicky amusement as kids twisted the dial and lifted the receiver. Come to think of it, the Chatter telephone may be as close to a dial phone as anyone born since 1990 may have come. Anyway, some genius stuck a Bluetooth module into the classic phone to let it hook up to an app on an actual phone, allowing kids (or more likely their nostalgia-soaked parents) to make and receive calls. It’s actually priced at a reasonable $60, so there might be some hacking potential here.

Also tangential to supply chains, we stumbled across a video guide to buying steel that might interest readers. Anyone who has seen the displays of steel and other metals at the usual big-box retailers might wonder what the fuss is, but buying steel that way or ordering online is a great way to bust a project’s budget. Fabricator and artist Doug Boyd insists that finding a local steel supplier is the best bang for your buck, and has a bunch of helpful tips for not sounding like a casual when you’re ordering. It’s all good advice, and would have helped us from looking foolish a time or two at the metal yard; just knowing that pipe is measured by inside diameter while tubing is measured by outside dimensions is worth the price of admission alone.

With all the money you save on steel and by not buying Raspberry Pis, perhaps you’ll have a couple of hundred thousand Euros lying around to bid on this authentic 1957 Sputnik I satellite. The full-scale model of Earth’s first artificial satellite — manhole covers excluded — was a non-flown test article, but externally faithful to the flown hardware that kicked off the first Space Race. The prospectus says that it has a transmitter and a “modern power supply”; it’s not clear if the transmitter was originally part of the test article or added later. The opening bid is €85,000 and is expected to climb considerably.

And finally, there’s something fascinating about “spy radios,” especially those from the Cold War era and before, when being caught with one in your possession was probably going to turn out to be a very bad day. One such radio is the Radio Orange “Acorn” receiver, which is in the collection of the Crypto Museum. The radio was used by the Dutch government to transmit news and information into the occupied Netherlands from their exile in London. Built to pass for a jewelry box, the case for the radio was made from an old cigar box and is a marvel of 1940s miniaturization. The radio used three acorn-style vacuum tubes and was powered by mains current; another version of the Radio Orange receiver was powered by a bike dynamo or even a water-powered turbine, which could be run from a tap or garden hose. The video below shows the water-powered version in action, but the racket it made must have been problematic for its users, especially given the stakes.

Continue reading “Hackaday Links: October 31, 2021”

Big homemade lathe

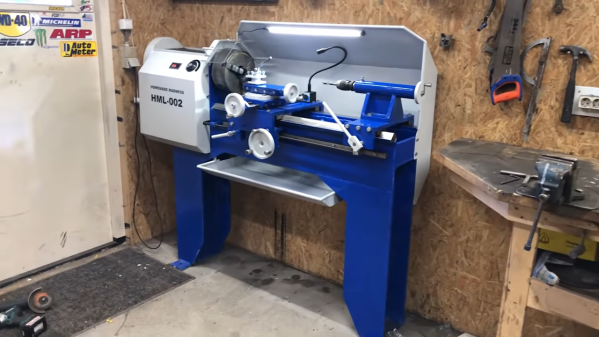
Heavy Metal Lathe Build Doesn’t Spare The Steel

It’s common wisdom that the lathe is the essential machine tool, and the only one that can make copies of itself. While we won’t argue the primacy of the lathe in the machine shop, this scratch-built, heavy-duty lathe gives the lie to the latter argument — almost.

We’re used to seeing homebrew lathes, of course, and we’ve featured more than a few of them before. But two things make [Jornt]’s build stand out: how few specialized tools were needed to build it, and the sheer size and bulk of the finished product. Where most homebrew lathes tend to be the bench top variety and feature cast aluminum parts, [Jornt] went with steel for his build, and a lot of it. The base and bed of the machine are welded from scrap steel I-beams, and the ways are made from angle iron that has been ground flat with a clever jig to hold an angle grinder. The angle grinder plays a prominent role in the build, as do simple tools like a hand drill, files, and a welder — and yes, the unfinished lathe itself, which was used to bore out the bearing blocks for the headstock.

The completed lathe, powered by a treadmill motor in a way that [Jeremy Fielding] would no doubt endorse, comes in at a beefy 450 kg. It honestly looks like something you could buy from a catalog, and has most of the features of commercial machines. One thing we’d love to see on this lathe is the electronic lead screw that [James Clough] developed for his off-the-shelf lathe.

Continue reading “Heavy Metal Lathe Build Doesn’t Spare The Steel”

parser drill

Machining Wood Inlays, No CNC Required

It’s almost hard to remember a time when the obvious answer to most questions about manufacturing wasn’t “Throw it on the CNC.” CNC machines have become so entrenched that the acronym has become a verb; few people would misunderstand a statement like “Let’s just CNC that.”

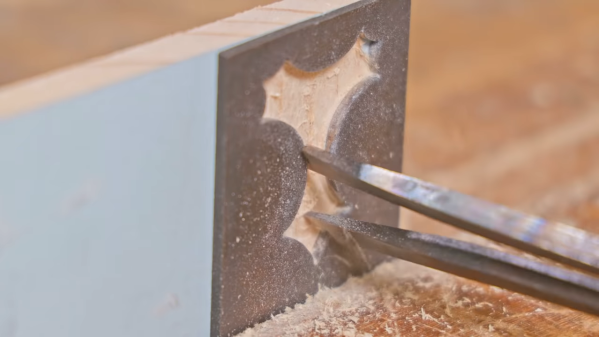
But before CNC machines became so ubiquitous, there were plenty of clever tricks for cutting material in a controlled fashion, as [Pask] shows us with this tool to machine wood for inlays. The tool is called a parser (or passer) drill, and is designed for use in conjunction with a steel template. [Pask]’s version seems pretty easy to make; a pair of mild steel bars are forged flat into spade shapes before having a cutting surface ground into them. The two halves of the drill are welded together and ground down to fit in the chuck of a hand drill, a modern nod to the fact that few people will want to use the traditional bow and breastplate that drove the original parser drills.

In use, a steel template that determines the shape of the inlay is affixed to the workpiece. The cutting edges of the bits are plunged into the template cutout to machine out the wood; the overhangs of the bits act as depth stop and guide. It only takes a few seconds to make a neat, CNC-free inlay. The video below shows the tool being made and in action.

It’s nice to see what can be accomplished without the need for fancy CNC machines. Not that we have anything against them, of course, but when the same results can be had with some scraps of steel and a little ingenuity, it’s pretty impressive. Looking for something between manual tools and CNC for woodworking? The pantorouter might be just your speed.

Continue reading “Machining Wood Inlays, No CNC Required”

Robert Murray Smith Discusses Rivets and Riveting

Old School Fastener Tutorial Is Riveting

Whether you’re making, repairing, or hacking something together, we all need fastners. Screws, nuts and bolts, and pop rivets are handy sometimes. Various resins and even hot glue are equally useful. In some cases however the right fastener for the job eludes us, and we need another trick up our sleeve.

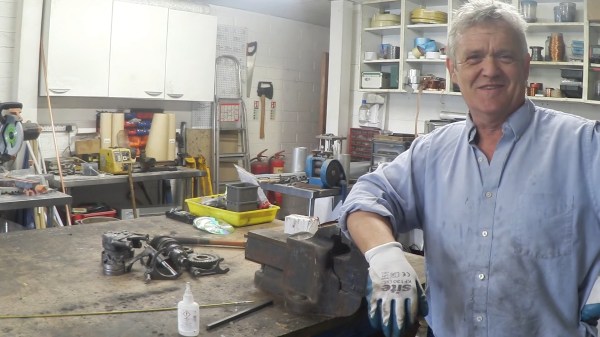
[Robert Murray Smith] found himself in such a position. His goal was to join two pieces of aluminum that need a nice finish on both sides. Neither glue, pop rivets, screws, nuts or bolts would have been appropriate.  [Robert] is always flush with ideas both new and old, and he resorted to using an old school fastener as explained as explained in his video “How To Make And Use Rivets“.

In the video below the break, [Robert] goes into great detail about making a simple rivet die from a 5mm (3/16”) piece of flat steel, creating the rivet from a brass rod, and then using the flush rivet to join two pieces of aluminum. The simple tooling he uses makes the technique available to anybody with a propane torch, a vise, some basic tools, and a simple claw hammer. We also appreciate [Robert]’s discussion of cold riveting, hot riveting, and annealing the rivets as needed.

Not only is riveting a technique thousands of years old, its advancement and application during the Industrial Revolution enabled technologies that couldn’t have existed otherwise. Hackaday’s own [Jenny List] did a wonderful write up about rivets in 2018 that you won’t want to miss!

Continue reading “Old School Fastener Tutorial Is Riveting”

A Giant Engine Needs A Giant Engine Stand

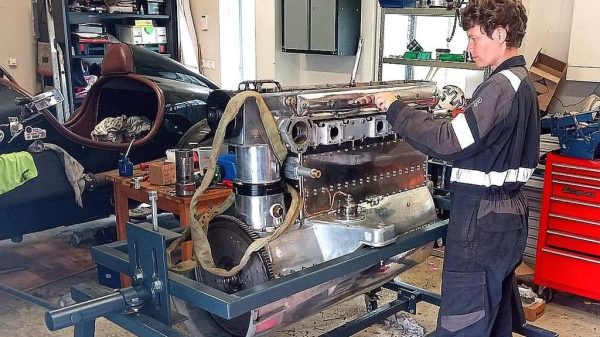
Engine stands are great to have on hand for when you need to work on an engine outside a vehicle. However, if your engine is particularly large, you might find off-the-shelf solutions difficult to find. [Liebregts] was recently contacted by someone in just such a pickle, who had an 8-litre Bentley engine from 1928 and nothing to put it on. Thus, constructing a custom engine stand was in order.

The original home of the hefty 8-liter engine.

The stand is built out of stout 50x50x4mm steel tubing in order to handle the weight of the gigantic vintage engine. It’s designed with an eye to ground clearance, such that an engine crane can easily slide under the stand when it’s time to lift the engine back in the car. It also allows the whole engine to be turned upside down, and even raised and lowered. This makes it easier to get to different parts of the engine, while keeping the center of gravity where it needs to be to avoid the whole assembly falling over.

It’s not a hugely complicated build, but it goes to show just how much of a difference it can make when you have the right tools for the job. With the engine out and on its stand, it’s much easier to work on and handle the many complicated tasks in its restoration. It also benefits from being custom built to suit the dimensions of the Bentley engine. Everything fits and it just works!

While few of us have rare 1928 Bentleys in need of an engine-out service, it’s a build that should serve as great inspiration for those working on similar tasks. Meanwhile, consider building yourself a custom engine crane to help out around the garage.

3D Printing Steel Parts At Home Via Special Filaments

Rocket engines are great for producing thrust from fire and fury, but they’re also difficult to make. They require high-strength materials that can withstand the high temperatures involved. [Integza], however, has tried for a long time to 3D print himself a working rocket engine. His latest attempt involves printing an aerospike design out of metal.

Even steel couldn’t hold up to the fury of the rocket exhaust!

The project relies on special metal-impregnated 3D printer filaments. The part can be printed with a regular 3D printer and then fired to leave just the metal behind. The filament can be harsh, so [Integza] uses a ruby nozzle to handle the metal-impregnated material. Processing the material requires a medium-temperature “debinding” stage in a kiln which removes the plastic, before a high-temperature sintering process that bonds the remaining metal particles into a hopefully-contiguous whole. The process worked well for bronze, though was a little trickier for steel.

Armed with a steel aerospike rocket nozzle, [Integza] attempts using the parts with his 3D printed rocket fuel we’ve seen before. The configuration does generate some thrust, and lasts longer than most of [Integza]’s previous efforts, though still succumbs to the intense heat of the rocket exhaust.

Overall, though, it’s a great example of what it takes to print steel parts at home. You’ll need a quality 3D printer, ruby nozzles and a controllable kiln, but it can be done. If you manage to print something awesome, be sure to drop us a line. Video after the break.

Continue reading “3D Printing Steel Parts At Home Via Special Filaments”

Industrial-Grade Storage Built With Laser-Cut Steel

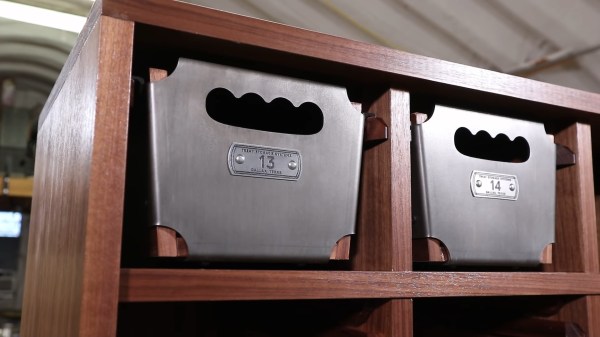
A tidy workshop is much more likely to be a happy workshop, and one that better supports the practice of making. Organisation is key to maintaining tidiness over time, and for that, you need storage. [Wesley Treat] needed some more space recently, and set about building a serious storage unit using laser-cut parts.

The key to the build lies in the elegant steel flanges used to make the drawers. These were designed in CAD, with a DXF cutting file exported and sent off to OSH Cut for laser cutting and bending, in much the same way one would send 3D printed parts off to Shapeways or PCB files to JLCPCB. The drawer flanges are then joined with steel angle and fitted with plywood bases and sides. The drawers are then given CNC-engraved nameplates for a nice aesthetic touch. Once finished, the heavy duty drawers slide on wooden rails built into the walnut frame.

It’s a great example of how farming out a single piece of a larger project can lead to a quicker build and better final results. Producing 12 flanges by hand in the home shop would take longer and likely have far more variability. For those that only have a 3D printer at home, farming out production for metal parts is a good way to do heavy-duty projects without having to invest in an entire machine shop.

[Wesley] has graced these pages before, too – with a great guide on reproducing knobs for vintage hardware. Video after the break.

Continue reading “Industrial-Grade Storage Built With Laser-Cut Steel”