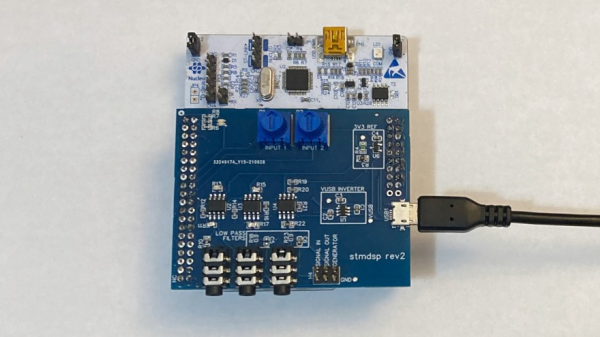
DSP PAW Hardware Platform

Hackaday Prize 2023: Learn DSP With The Portable All-in-One Workstation

Learning Digital Signal Processing (DSP) techniques traditionally involves working through a good bit of mathematics and signal theory. To promote a hands-on approach, [Clyne] developed the DSP PAW (Portable All-in-one Workstation). DSP PAW hardware and software provide a complete learning environment for any computer where DSP algorithms can be entered as C++ code through an Arduino-like IDE.

Continue reading “Hackaday Prize 2023: Learn DSP With The Portable All-in-One Workstation”

The New Hotness

If there’s one good thing to be said about the chip shortage of 2020-2023 (and counting!) it’s that a number of us were forced out of our ruts, and pushed to explore parts that we never would have otherwise. Or maybe it’s just me.

Back in the old times, I used to be a die-hard Atmel AVR fan for small projects, and an STM32 fan for anything larger. And I’ll freely admit, I got stuck in my ways. The incredible abundance of dev boards in the $2 range also helped keep me lazy. I had my thing, and I was fine sticking with it, admittedly due to the low price of those little blue pills.
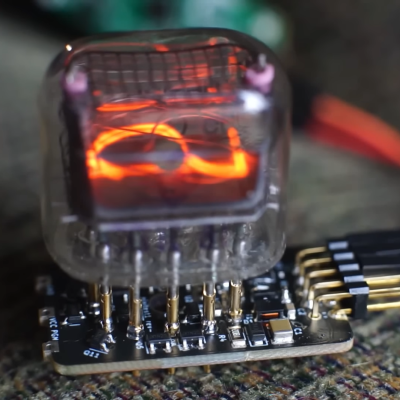
An IN-12B Nixie tube on a compact driver PCBAnd then came the drought, and like everyone else, my stockpile of microcontrollers started to dwindle. Replacements at $9 just weren’t an option, so I started looking around. And it’s with no small bit of shame that I’ll admit that I hadn’t been keeping up with the changes as much as I should have. Nowadays, it’s all ESP32s and RP2040s over here, and granted there’s a bit of a price bump, but the performance is there in abundance. But I can’t help feeling like I’m a few years back of the cutting edge.

So when I see work like what [CNLohr] and [Bitluni] are doing with the ultra-cheap CH32V003 microcontrollers, it makes me think that I need to start filling in gaps in my comfortable working-set of chips again. But how the heck am I supposed to keep up? And how do you? It took a global pandemic and silicon drought to force me out of my comfort zone last time. Can the simple allure of dirt-cheap chips get me out? We’ll see!

Hackaday Links Column Banner

Hackaday Links: April 9, 2023

When it comes to cryptocurrency security, what’s the best way to secure the private key? Obviously, the correct answer is to write it on a sticky note and put it on the bezel of your monitor; nobody’ll ever think of looking there. But, if you’re slightly more paranoid, and you have access to a Falcon 9, you might just choose to send it to the Moon. That’s what is supposed to happen in a few months’ time, as private firm Lunar Outpost’s MAPP, or Mobile Autonomous Prospecting Platform, heads to the Moon. The goal is to etch the private key of a wallet, cheekily named “Nakamoto_1,” on the rover and fund it with 62 Bitcoins, worth about $1.5 million now. The wallet will be funded by an NFT sale of space-themed electronic art, because apparently the project didn’t have enough Web3.0 buzzwords yet. So whoever visits the lunar rover first gets to claim the contents of the wallet, whatever they happen to be worth at the time. Of course, it doesn’t have to be a human who visits.

Continue reading “Hackaday Links: April 9, 2023”

Sound Sculpture Uses Daisy Seed To Generate Audio

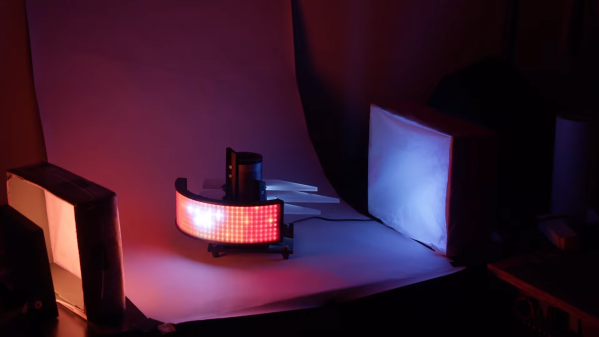
Here at Hackaday, we love a good art piece, whether that involves light or sound. Combining both is a sure-fire way to get our attention, and [Eirik Brandal] did just that with his Void Extrusion piece.

The project is built around the Daisy Seed from Electrosmith. It’s an embedded platform designed for musical purposes, which made it perfect for [Eirik]’s project. Based on an STM32 chip, it’s very capable when it comes to DSP tasks. In this role, it’s charged with algorithmic music composition, providing the captivating soundtrack that emanates from the sculpture.

The sculpture itself looks almost like a fancy mid-century home from the Hollywood Hills, but it’s fundamentally a little more abstract than that. [Eirik] built it as an opportunity to experiment with using 3D printed forms in his work. To that end, it features a beautiful diffused LED wall and a speaker enclosure as an integral part of the build. The LEDs are run from an Arduino Nano Every.

[Eirik’s] work shows us that “generative” music can be intoxicating and compelling with a real sense of feeling and mood. The sculpture is a visually-capable pairing that works with the soundscape. It recalls us of some other great artworks we’ve featured from [Eirik] before, too.

Continue reading “Sound Sculpture Uses Daisy Seed To Generate Audio”

Magic 8 Ball Provides Tech Support

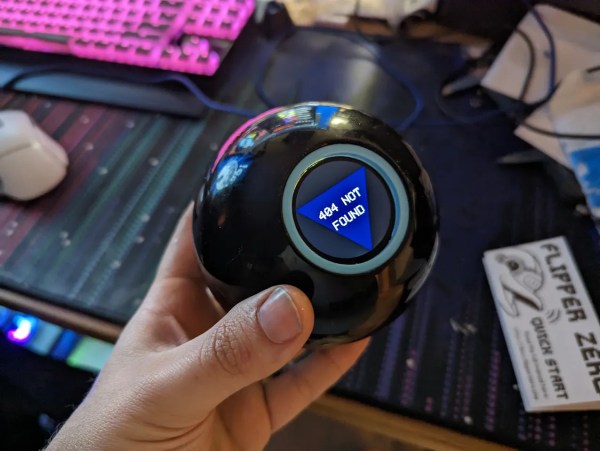
ChatGPT might be making the news these days for being able to answer basically any question it’s asked, those of us who are a little older remember a much simpler technology that did about the same thing. The humble “Magic 8 Ball” could take nearly the same inputs, provided they were parsed in simple yes/no form, and provide marginal help similar to the AI tools of today. For a toy with no battery or screen, this was quite an accomplishment. But the small toy couldn’t give specific technical support help, so [kodi] made one that can.

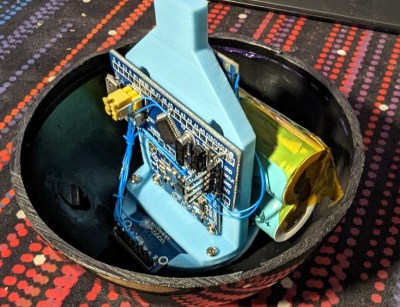
The new 8 Ball foregoes the central fluid-filled chamber for an STM32 Blue Pill board with a few lithium batteries to power it. The original plastic shell was split in two with a hacksaw and fitted with a 3D printed ring which allows the two halves to be reconnected and separated again when it needs to charge. It uses a circular OLED to display the various messages of tech support, which are displayed when an accelerometer detects that the toy has been shaken.

Granted, most of the messages are about as helpful to solving a tech support issue as the original magic 8 Ball’s would have been, but we appreciate the ingenuity and carefree nature of a project like this. It also did an excellent job at operating in a low-power state as well, to avoid needing to charge it often. There have been a few other digital conversions of these analog fortune tellers as well, like this one which adds GIFs to each of the original answers.

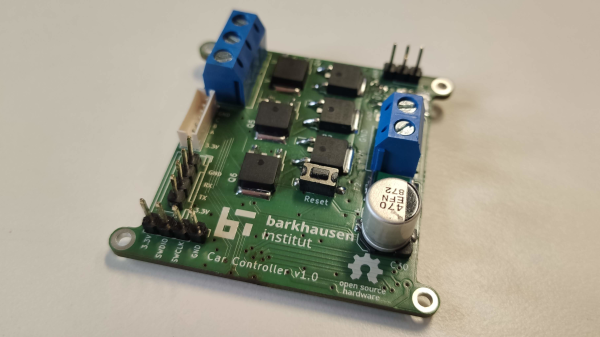
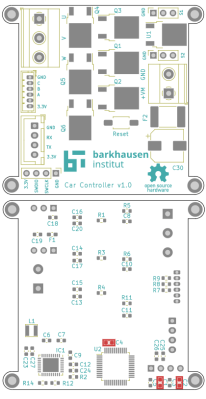
Photograph of a BLDC motor controller circuit board

Take A Ride Through The Development Of A Custom BLDC Motor Controller

The folks over at the [Barkhausen Institut] are doing research into controlling autonomous fleets of RC cars and had been using off the shelf electronic speed controllers (ESCs) to control the car motors. Unfortunately they required more reliable feedback for closed loop control of the motors, so they created their own open source hardware brushless DC (BLDC) controller.

The motor controller they developed uses an STM32 microcontroller that talks to a TMC6140 3 phase MOSFET driver to drive 6 IRLR 2905 MOSFETs. The [Barkhausen Institut] researchers went with the SimpleFOC library as the basis to program the STM32, with installed hall effect sensors indicating motor orientation for their closed loop control.

Designing a functioning BLDC and ESC controllers can be subtle, and their post goes into details about the problems and solutions they came up with to deal with with what was ultimately improper isolation of the MOSFETs interfering with the power rail for the STM32. The source for their BLDC motor controller is available through their GitLab page. For more information on the parent project that uses the BLDC driver, be sure to check out their work on a connected convoy of RC cars.

There’s now a wealth of open source BLDC drivers and projects, many of which we’ve featured in the past, like the Moteus and haptic smart knob, and it’s nice to see other projects explore different options.

Pocket-Sized Thermal Imager

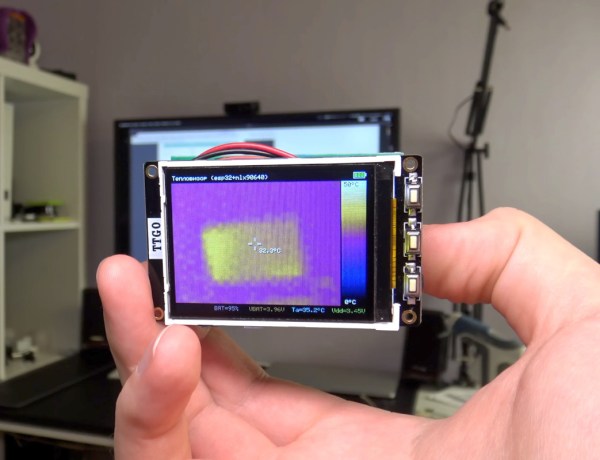
Just as the gold standard for multimeters and other instrumentation likely comes in a yellow package of some sort, there is a similar household name for thermal imaging. But, if they’re known for anything other than the highest quality thermal cameras, it’s excessively high price. There are other options around but if you want to make sure that the finished product has some sort of quality control you might want to consider building your own thermal imaging device like [Ruslan] has done here.

The pocket-sized thermal camera is built around a MLX90640 sensor from Melexis which can be obtained on its own, but can also be paired with an STM32F446 board with a USB connection in order to easily connect it to a computer. For that, [Ruslan] paired it with an ESP32 board with a companion screen, so that the entire package could be assembled together with a battery and still maintain its sleek shape. The data coming from the thermal imagining sensor does need some post-processing in order to display useful images, but this is well within the capabilities of the STM32 and ESP32.

With an operating time on battery of over eight hours and a weight under 100 grams, this could be just the thing for someone looking for a thermal camera who doesn’t want to give up an arm and a leg to one of the industry giants. If you’re looking for something even simpler, we’ve seen a thermal camera based on a Raspberry Pi that delivers its images over the network instead of on its own screen.