The 128 Button, 6 Axis, 17 Slider, 4 POV Hat Switch Joystick Controller

stick

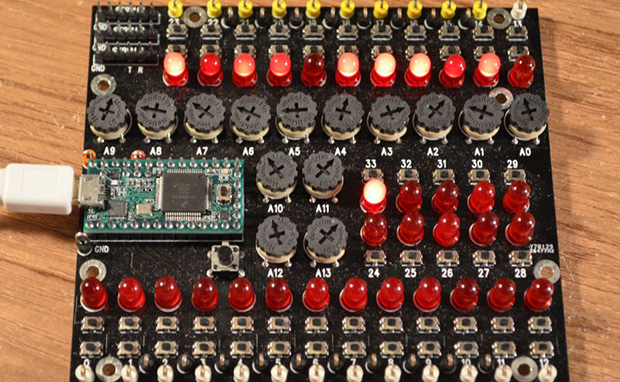
[Paul Stoffregen], creator of the Teensy series of dev boards, previously implemented a six-axis joystick for Teensyduino, the Arduino library for the Teensy. He had originally tried 8 axes, but a few problems cropped up, deadlines approached, and he left it as is. A few recent projects gave him some insight into how to implement a joystick with more than six axes as a USB HID device, so he started looking at how to read an improbable amount of pots and buttons for a USB joystick.

So far, the biggest problem is figuring out what software can actually use an HID joystick with this many controls. The answer to that question is none. The Linux-based jstest-gtk is able to read 6+17 pots, the four hat switches, but only 64 of the 128 buttons. A user on the Teensy forums, [Pointy], has been working on his own joystick test app that works on Linux Windows, but testing the joystick on Windows is an exercise in futility for reasons no one can figure out.

As for why anyone would want a six-axis, 17-slider, 128-button joystick, think about this: with this much control, it would be relatively simple to build the MIDI controller to end all MIDI controllers, or a cockpit simulator for everything from a C172, 737, to a Kerbal interplanetary cruiser. That’s an impressive amount of control, and all from a $20 Teensy dev board.

Further testing of this Teensy joystick is desperately needed, so if you’re able to help out drop a note in the forum thread.

Gotta Catch ‘Em All, With An Arduino

PKMN

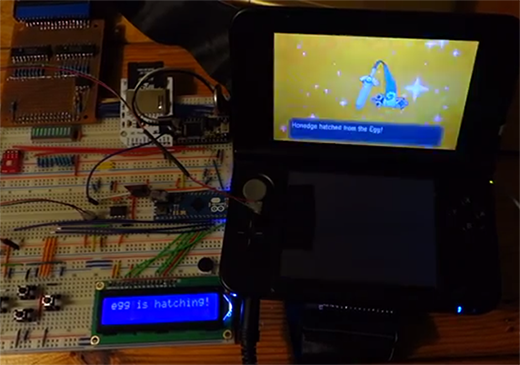
For every pokemon you encounter on your adventure to become the world’s greatest trainer, you have about a 1 in 8000 chance of that pokemon being ‘shiny’, or a different color than normal. Put an uncommon event in any video game, and of course a few people will take that feature to the limits of practicality: [dekuNukem] created the Poke-O-Matic, a microcontroller-powered device that breeds and captures shiny pokemon.

We’ve seen [dekuNukem]’s setup for automatically catching shiny pokemon before, but the previous version was extremely limited. It only worked with a fishing rod, so unless you want a ton of shiny Magikarp the earlier setup wasn’t extremely useful.

This version uses two microcontrollers – an Arduino Micro and a Teensy 3.0 – to greatly expand upon the previous build. Now, instead of just fishing, [dekuNukem]’s project can automatically hatch eggs, search patches of grass for shiny pokemon, and also automatically naming these new shiny pokemon and depositing them in the in-game pokemon storage system.

The new and improved version works a lot like the older fishing-only automated pokemon finder; a few wires soldered on to the button contacts control the game. The Teensy 3.0 handles the data logging of all the captured pokemon with an SD card and RTC.

What did [dekuNukem] end up with for all his effort? A lot of shiny pokemon. More than enough to build a great team made entirely out of shinies.

Video below, with all the code available through a link in the description.

Continue reading “Gotta Catch ‘Em All, With An Arduino”

Meet The Teensy 3.1

[Paul Stoffregen] just released an updated version of his Teensy 3.0, meet the oddly named Teensy 3.1. For our readers that don’t recall, the Teensy 3.0 is a 32 bit ARM Cortex-M4 based development platform supported by the Arduino IDE (using the Teensyduino add-on). The newest version has the same size, shape & pinout, is compatible with code written for the Teensy 3.0 and provides several new features as well.

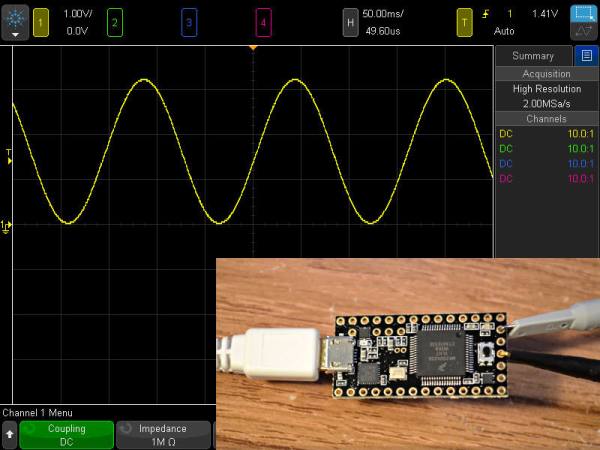
The Flash has doubled, the RAM has quadrupled (from 16K to 64K) allowing much more advanced applications. The Cortex-M4 core frequency is 72MHz (48MHz on the Teensy 3.0) and the digital inputs are 5V volts compatible. Pins 3 and 4 gained CAN bus functions. The new microcontroller used even has a 12 bits Digital to Analog Converter (DAC) so you could create a simple signal generator like the one shown in the picture above. Programming is done through the USB port, which can later behave as host or slave once your application is launched. Finally, the price tag ($19.80) is in our opinion very reasonable.

Embedded below is an interview with its creator [Paul Stroffregen].

Continue reading “Meet The Teensy 3.1”

Freeside’s Infinity Portal

sidebyside

If infinity mirrors aren’t cool enough, the 10-foot-tall infinity portal should blow you away. Strictly speaking, the mirror itself is only 7’x4′, but you’ll still find yourself engulfed in the archway. The portal began as a simple prototype that we covered earlier this summer, which was just a frame of 2×4’s, some acrylic and LED strips. It works by putting lights between a two-way mirror and another mirror, reflecting most light internally and creating the illusion of depth.

The giant archway also began as a small-scale prototype, its shape and engravings carved out by a laser cutter. Once they were satisfied with its design, it was time to scale things up. The full-sized portal needed a a tremendous amount of stability, so the guys at Freeside built the base from wooden palettes. They needed the portal to travel to a few different venues, so the rest of the frame breaks down into components, including a removable wooden frame from which the acrylic hangs. A Teensy 3.0 runs all the WS2812 LED strips, which were chosen because each of their LEDs is individually addressable.

Check out the video below for an extremely detailed build log, which should give you a better idea of how massive and impressive this portal really is!

Continue reading “Freeside’s Infinity Portal”

Make Your Own Electronic Children’s Toys

diy-childrens-toys

[Miria Grunick’s] son nephew is two years old. If you’ve ever looked at that age range in the toy aisle we sure you’ve noticed that there’s a mountain of cheap electronic stuff for sale. Manufactures are cramming LEDs and noise makers into just about all kids stuff these days. But [Miria] thought why not just make him something myself? She calls this the Blinky Box. It’s an acrylic enclosure stuffed with pretty LEDs that is controlled with a few buttons.

It’s driven by a Teensy 3 board which monitors a half dozen colorful buttons, a mode selector on the side, and an on/off switch. The device is powered by a Lithium battery that recharges via USB. And of course there’s a strip of individually addressable RGB LEDs inside.

The demo shows that one mode allows you to press a button color and have the LEDs change to it. But there are other features like fade and scroll. She also mentions that since it can be reprogrammed the toy can grow with hime. Maybe it’ll be a Simon Says game. But eventually she hopes he’ll use it to learn the basics of programming for himself.

Continue reading “Make Your Own Electronic Children’s Toys”

IOS Keyboard Exploit Allows Brute Force IPad Lock Screen Attack

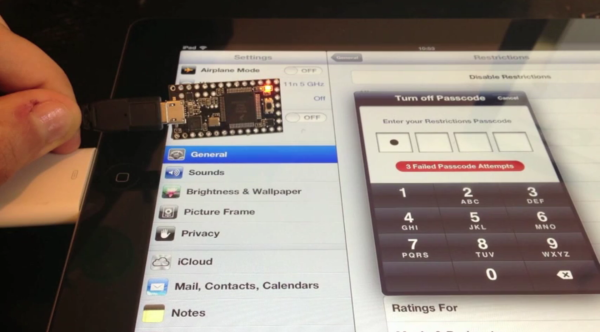
It’s quite common to have a timed lockout after entering several bad passwords. This simple form of security makes automated brute force attacks unfeasible by ballooning the time it would take to try every possible permutation. The lock screen on iOS devices like iPad and iPhone have this built in. Enter your code incorrectly several times and the system will make you wait 1, 5, 15, and 60 minutes between entries as you keep inputting the wrong code. But there is an exploit that gets around this. [Pierre Dandumont] is showing off his hardware-based iPad lock screen attack in the image above.

He was inspired to try this out after reading about some Mac EFI attacks using the Teensy 3. That approach used the microcontroller to spoof a keyboard to try every PIN combination possible. By using the camera kit for iPad [Pierre] was able to do the same. This technique lets you connect wired keyboards to the iPad, but apparently not the iPhone. A bluetooth keyboard can also be used. These external keyboards get around the timing lockout associated with the virtual lockscreen keyboard.

We’re of the opinion that this is indeed a security vulnerability. If you forget your passcode you can simply restore the device to remove it. That wipes all of your personal data which can then be loaded from an iTunes backup. Lockscreens are paramount if a device is stolen. They will give you the time you need to change any online credentials which might be remembered by the device.

Continue reading “IOS Keyboard Exploit Allows Brute Force IPad Lock Screen Attack”

Benchmarking USB Transfer Speeds

boards

[Paul Stoffregen], creator of the Teensy series of microcontroller dev boards, noticed a lot of project driving huge LED arrays recently and decided to look into how fast microcontroller dev boards can receive data from a computer. More bits per second means more glowey LEDs, of course, so his benchmarking efforts are sure to be a hit with anyone planning some large-scale microcontroller projects.

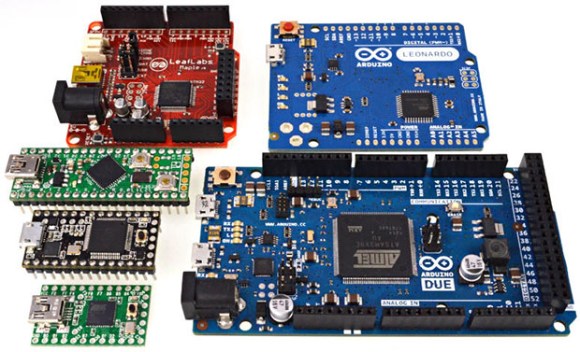
The microcontrollers [Paul] tested included the Teensy 2.0, Teensy 3.0, the Leonardo and Due Arduinos, and the Fubarino Mini and Leaflabs Maple. These were tested in Linux ( Ubuntu 12.04 live CD ), OSX Lion, and Windows 7, all running on a 2012 MacBook Pro. When not considering the Teensy 2.0 and 3.0, the results of the tests were what you would expect: faster devices were able to receive more bytes per second.  When the Teensys were thrown into the mix, though, the results changed drastically. The Teensy 2.0, with the same microcontroller as the Arduino Leonardo, was able to outperform every board except for the Teensy 3.0.

[Paul] also took the effort to benchmark the different operating systems he used. Bottom line, if you’re transferring a lot of bytes at once, it really doesn’t matter which OS you’re using. For transferring small amounts of data, you may want to go with OS X. Windows is terrible for transferring single bytes; at one byte per transfer, Windows only manages 4kBps. With the same task, Linux and OS X manage about 53 and 860 (!) kBps, respectively.

So there you go. If you’re building a huge LED array, use a Teensy 3.0 with a MacBook. Of course [Paul] made all the code for his benchmarks open source, so feel free to replicate this experiment.