A Luggable Computer For The Raspberry Pi Era

Today, computers are separated into basically two categories: desktops and laptops. But back in the early 1980s, when this ideological line in the sand was still a bit blurry, consumer’s had a third choice. Known as “portable computers” at the time, and often lovingly referred to as luggables by modern collectors, these machines were technically small enough to take with you on a plane or in the car.

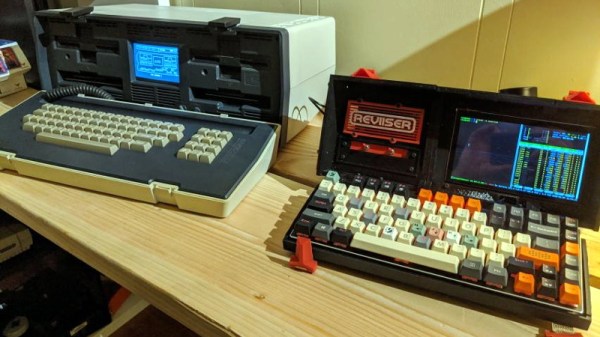
Improvements in miniaturization ultimately made the portable computer obsolete, but that doesn’t mean some people still don’t want one. [Dave Estes] has been working on his own modern take on idea that he calls Reviiser, and so far it looks like it checks off all the boxes. With the addition of a rather hefty battery pack, it even manages to be more practical than the vintage beasts that inspired it.

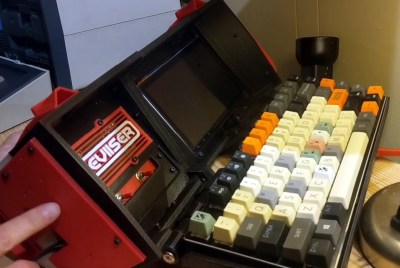
In the video after the break, [Dave] walks us through some of the highlights of his luggable build, such as the fold-down mechanical keyboard, gloriously clunky mechanical power switches, and the integrated touch screen. We also really like the side-mounted touch pad, which actually looks perfectly usable given the largely keyboard driven software environment [Dave] has going on the internal Raspberry Pi 4. With a removable 30,000 mAh battery pack slotted into the back of the machine, he’ll have plenty of juice for his faux-retro adventures.

[Dave] mentions that eventually he’s looking to add support for “cartridges” which will allow the user to easily slot in new hardware that connects to the Pi’s GPIO pins. This would allow for a lot of interesting expansion possibilities, and fits in perfectly with the Reviiser’s vintage aesthetic. It would also go a long way towards justifying the considerable bulk of the machine; perhaps even ushering in a revival of sorts for the luggable computer thanks to hardware hackers who want a mobile workstation with all the bells and whistles.

Right now there isn’t a lot of detail on how you can build your own Reviiser, but [Dave] says more info will be added to his site soon. In the meantime, you can check out some of the similar projects we’ve seen recently to get some inspiration for your own Luggable Pi.

Continue reading “A Luggable Computer For The Raspberry Pi Era”

2D-Platform Seeks Balance With A Touch Screen

It’s the [Bruce Land]-iest season of all, when the Cornell professor submits the projects his microcontroller class students have been working on all semester. Imagination does not seem to be in short supply with these students, and we always look forward to these tips this time of year.

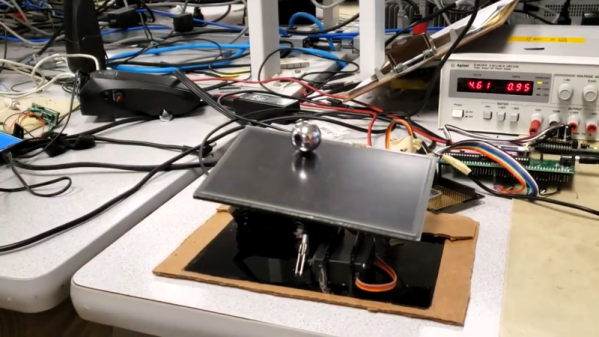
[Greg] and [Sam]’s touch-screen two-dimensional ball balancer is a good example of what [Land]’s students turn out. The resistive touch screen is supported by a 3D-printed gimballed platform and tilted in two axes by hobby servos. [Greg] and [Sam] chose to read the voltage outputs from the touch screen directly using the ADC on a PIC32, toggling between the two axes at 2 kHz. Two PID control loops were implemented to keep the ball as centered as possible on the platform, and the video below shows that there’s still some loop tuning to do. But given the positional inaccuracies of hobby servos and the compliance in the gimbal, we’re impressed that they were able to keep the system under control at all.

Of course we’ve seen ball-balancers before, but most of them have closed the loop using either cameras or microphones. Seeing direct sensing on the platform like this is a nice change of pace. Continue reading “2D-Platform Seeks Balance With A Touch Screen”

Homebrew Laptop Makes A Statement With A Steampunk Theme

Some may argue, but your choice of computing hardware says exactly zero about you, at least when you buy off the shelf. Your laptop or PC is only one of millions, and the chances of seeing someone with the exact same machine are pretty good. If you want to be different, you really need to build something yourself.

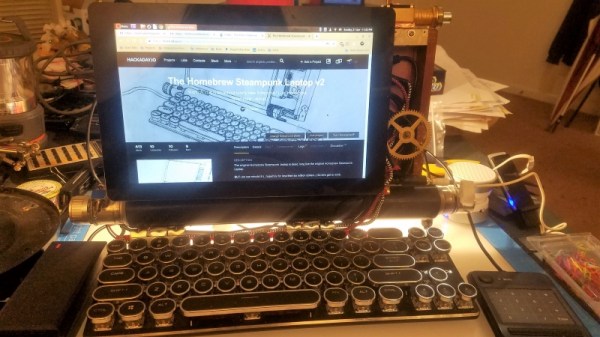
This homebrew steampunk laptop does a great job at standing out from the crowd. [Starhawk]’s build is an homage to the Steampunk genre, in a wooden case with brass bits and bobs adorning. The guts are based on an Intel motherboard, a bit dated but serviceable enough for the job. There’s a touch-capable LCD in the lid, and we absolutely love the look of the keyboard with its retro-style chrome and phenolic keycaps. Exposed USB cables run to and fro, and the braided jackets contribute to the old-timey look. The copier roller as a lid hinge is a nice touch too.

[Starhawk]’s build log is long and detailed, and covers the entire build. We’ve seen interesting builds from him before, like this junk-bin PC build for a friend in need. Looks like this one is for personal use, though, and we can’t blame him.

Put An Arduino Enigma In Your Pocket

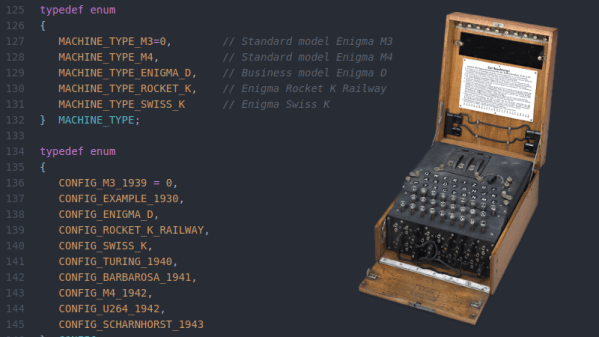
The German Enigma device has always been a fascinating gadget for hackers. We’ve seen various replicas and emulators created over the years, and it was recently even the subject of our weekly Hack Chat. But if you think about it it’s not really a surprise; the Enigma has the perfect blend of historical significance and engineering wizardry, with a healthy dash of mystery thrown in. Why do the bad guys always have the coolest toys?

If you’ve ever wanted your own little Enigma replica to explore, [Mark Culross] has put together a project which makes it easier than ever. In fact, it’s so straightforward that some of you reading this post will probably be able to put one together as soon as you’ve read this post from stuff you already have lying around in the parts bin. All you need is an Arduino Uno, an Adafruit 2.8″ TFT Touch Shield, and a penchant for World War II technology.

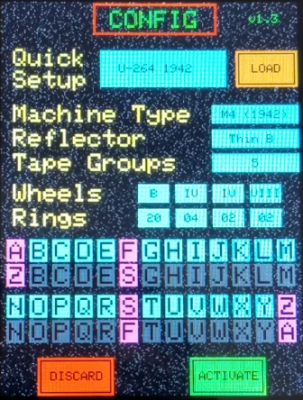
Thanks to the relatively high-resolution touch screen, [Mark] was able to develop a user interface for his Enigma that really gives you a feel for how the original machine worked. Obviously it’s considerably simplified from the real-world version, but using a stylus to tap the rotors you want to spin or the wires you want plugged in makes for a more immersive experience than many of the previous attempts we’ve seen. With a tap you’re even able to load historical machine configurations, such as how the Enigma aboard the submarine U-262 was configured when the Allies intercepted its encoded messages in 1942.

[Mark] says this project was always about developing the software, and he leaves the actual hardware implementation as an exercise for the user. Just to play around with the software it’s enough to hook up an Arduino and the touch screen, but we’d love to see somebody really take the idea and run with it. Add some batteries, a charging circuit, and put it all in a little wooden box for that authentic Enigma look. Can’t forget that iconic wrinkle finish paint, either.

Over the years, we’ve seen replica Enigma machines in all shapes and sizes. From ones you could mount on your wrist, to full size replicas using modern components. We’ve even seen one variation that you can print out on a couple of sheets of paper. The parade of recreations shows no sign of stopping, and we wouldn’t have it any other way.

Continue reading “Put An Arduino Enigma In Your Pocket”

Print Physical Buttons For Your Touch Screen

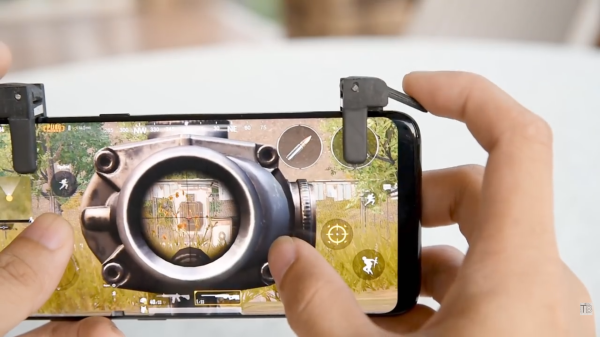
Modern handheld gaming hardware is great. The units are ergonomic powerhouses, yet many of us do all our portable gaming on a painfully rectangular smartphone. Their primary method of interaction is the index finger or thumbs, not a D-pad and buttons. Shoulder triggers have only existed on a few phones. Bluetooth gaming pads are affordable but they are either bulky or you have to find another way to hold your phone. Detachable shoulder buttons are a perfect compromise since they can fit in a coin purse and they’re cheap because you can make your own.

[ASCAS] explains how his levers work to translate a physical lever press into a capacitive touch response. The basic premise is that the contact point is always touching the screen, but until you pull the lever, which is covered in aluminum tape, the screen won’t sense anything there. It’s pretty clever, and the whole kit can be built with consumables usually stocked in hardware stores and hacker basements and it should work on any capacitive touch screen.

Physical buttons and phones don’t have to be estranged and full-fledged keyswitches aren’t exempt. Or maybe many capacitive touch switches are your forte.

Continue reading “Print Physical Buttons For Your Touch Screen”

1960’s Console Stereo Gets Raspberry Pi Touch Screen

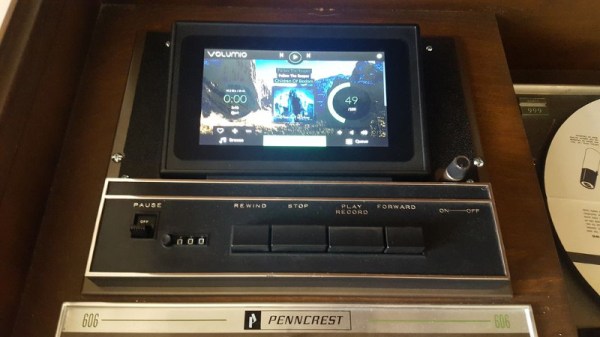
When he was but a wee hacker, [WhiskeyDrinker] loved to play with the big console stereo his grandparents had. The idea of a functional piece of furniture always appealed to him, and he decided that when he grew up and had a place of his own he’d get a similar stereo. Fast forward to the present, and a Craigslist ad for a working Penncrest stereo seemed to be a dream come true. Until it wasn’t.

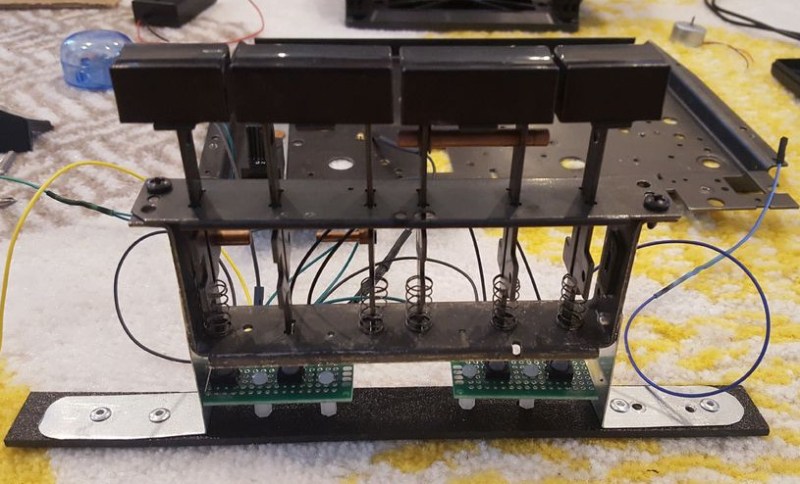
The original physical controls are connected to the Pi’s GPIO

As difficult as it might be to believe, sometimes things we read on the Internet are not true. The “working” Penncrest radio turned out to be a dud. But realizing that the look of the cabinet was more important to him than historical accuracy, [WhiskeyDrinker] decided to outfit it with a Raspberry Pi powered touch screen that would look as close to stock hardware as possible.

The final result really does look like some kind of alternate timeline piece of consumer electronics: where chunky physical buttons and touch screens coexisted in perfect harmony. The vintage stereo aficionados will probably cry foul, but let them. [WhiskeyDrinker] did a fantastic job of blending old and new, being respectful to the original hardware and aesthetic where it made sense, and clearing house where only nostalgia had lease.

A HiFiBerry DAC+ Pro is used to get some decent audio out of the Raspberry Pi, and the touch screen interface is provided by Volumio. [WhiskeyDrinker] mentions that it even has a GPIO plugin which he successfully used to handle getting the physical buttons to play nice with their digital counterparts.

Updating old audio gear is always a sensitive subject around these parts. Sometimes they go so far that the original hardware is almost an afterthought. On the other side of the spectrum are the projects which try to take modern gear and mimic the look of the classics. In any event, one thing is clear: they don’t make ’em like they used to.

Continue reading “1960’s Console Stereo Gets Raspberry Pi Touch Screen”

A Low Cost, Dead Tree Touch Screen

Remember the “paperless office”? Neither do we, because despite the hype of end-to-end digital documents, it never really happened. The workplace is still a death-trap for trees, and with good reason: paper is cheap, literally growing on trees, and it’s the quickest and easiest medium for universal communication and collaboration. Trouble is, once you’re done scribbling your notes on a legal pad or designing the Next Big Thing on a napkin, what do you do with it?

If you’re anything like us, the answer to that question is misplacing or destroying the paper before getting a chance to procrastinate transcribing it into some useful digital form. Wouldn’t paper that automatically digitizes what you draw or write on it be so much better? That’s where this low-cost touch-sensitive paper (PDF link) is headed, and it looks like it has a lot of promise. Carnegie-Mellon researchers [Chris Harrison] and [Yang Zhang] have come up with cheap and easy methods of applying conductive elements to sheets of ordinary paper, and importantly, the methods can scale well to the paper mill to take advantage of economies of scale at the point of production. Based on silk-screened conductive paints, the digitizer uses electrical field tomography to locate touches and quantify their pressure through a connected microcontroller. The video below shows a prototype in action.

Current cost is 30 cents a sheet, and if it can be made even cheaper, the potential applications range from interactive educational worksheets to IoT newspapers. And maybe if it gets really cheap, you can make a touch-sensitive paper airplane when you’re done with it.

Continue reading “A Low Cost, Dead Tree Touch Screen”