NES Controller

Turning A Classic NES Controller Into A Bluetooth Controller

[Pietronet] is like many of us in that he enjoys playing some classic console video games from time to time. He usually plays them on his PC using a Wiimote as a controller. The Wiimote has most of the classic buttons in a comfortable configuration. Plus, it’s got Bluetooth built-in, which makes it easy to pair up to your PC. [Pietronet] decided to take it a step further, though. He managed to cram all of the guts from a Wiimote inside of the original NES controller for a more authentic feel.

The first step was to crack open the Wiimote and locate pads for each button. Once they were located, [Pietronet] used a Dremel to cut the board into a smaller size. He cut off part of the circuit board that contained the directional pad as well as the connector for the nunchuck. Next he had to solder very thin wires to each of the button pads he located earlier.

The original NES controller has a very limited number of buttons, and [Pietronet] wanted to modify the original controller as little as possible. Therefore, he attached a magnetic reed switch to the Wiimote’s sync button. This way if he ever needs to sync the Wiimote to a new console, he can do it by holding a magnet in the right place. This is a function that isn’t often used, so the inconvenience should be negligible.

The next step was to connect the buttons from the original NES controller up to the wires that were added to the Wiimote. [Pietronet] left the original circuit board mostly intact. He did have to cut a small chunk of it away in order to make room for two AAA batteries, but this didn’t affect the functionality of the controller.

The inside of the NES controller had to be cleaned out of various standoffs and plastic bits to make room for all of the extra components. The Wiimote has an LED to indicate that the controller is connected properly. [Pietronet] soldered a red SMD LED in its place on the end of two thin wires. This LED was then placed on the bottom left side of the directional pad. It’s visible through a translucent filter. This allows [Pietronet] to see when the NES controller is synced up properly.

The case fits back together and everything is held in place. The result is what looks and feels like a classic NES controller, only this one has Bluetooth connectivity and a vibration motor. Check out the video demonstration below to get an idea of what it looks like in use. Continue reading “Turning A Classic NES Controller Into A Bluetooth Controller”

A low cost power supply unit with displays

A Low Cost Bench Supply

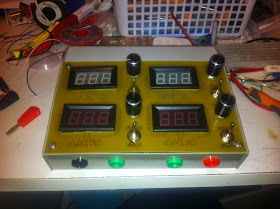
Everyone needs a power supply on their bench, but a standard lab supply isn’t cheap. [ludzinc]’s PSU Console is a cheap alternative, which provides the basic features you’d expect in a lab supply.

The basis of this PSU is a DC/DC module based on the LM2596 step down switching regulator. These modules cost less than a single LM2596, but have all the required components for a buck DC/DC converter. Sure, they might not last forever, and they’re not the most efficient regulators, but the price is right.

The front panel has four displays for voltage and current, which are just low cost voltmeter displays. The potentiometers are used for adjusting the voltage of the DC/DC, and controlling the current limiter. This limiter monitors current through a shunt, and shuts off a MOSFET when the limit is exceeded.

The final product looks like something that’s ready for daily use, and was much cheaper than most supplies with these features. These low cost DC/DC modules are worth a look if you’re considering a similar build.

LVBots CES Open House: Tabletop Challenge And Clothes Bot

LVBots, a club for robot building enthusiasts in Las Vegas, held an open house the week of CES. This was the only trip [Sophi] and I took away from the conference halls of The Strip and it was a blast! The group holds meetings twice a month in a space provided by Pololu — a well-known robotics and electronics manufacturer headquartered just south of McCarran International Airport.

Before the formal part of the gathering started there were several builds being shown off. [Claire] and [Brian] recently participated in an AT&T sponsored hackathon. Their creation is a robotic closet. The system involves moving racks of clothing which are tracked by a smartphone app. Interesting features discussed for the software include monitoring when each garment was last worn, last washed, and if it is appropriate for current weather conditions. Dig into the code in their repo.

In other parts of the room a pair of line-following robots did their thing, and a couple of sumo-bots competed to push each other out of the ring. A large group was gathered around the projector watching videos of robots of all types, brainstorming about the difficult parts, how they were overcome, and how these methods may be applied to their own build. I can attest that hanging with a group of people who are trying to cue up the most amazing robot demonstrations makes for amazing viewing!

As the organized part of the meeting began I was delighted to hear about a standing challenge from the LVbots group. The Tabletop challenge has multiple phases that serve to encourage builders to start modestly and then iterate to achieve new goals:

Phase 0: bring a robot to LVBots
Phase 1: travel back and forth without falling off
Phase 2: find an object and push it off
Phase 3: push object into a goal

[Nathan Bryant] was one of the two robot builders trying out the challenge on this night. He built this hexapod from balsa wood and three servo motors and was testing Phase 1. The bot includes a sensor dangling out in front of the robot to detect then the table surface is no long below. At that point it backs up a few steps, turns in place, and proceeds in the opposite direction. [Nathan] mentions that he worked out all the movements in a spreadsheet and that future firmware upgrades will dramatically increase the speed at which the bot moves. We love the audible cadence of the bot which is easily observed in the video above. At one point a leg dangles over the edge and it looks like [Nathan] pushed the bot back but I don’t remember him actually touching it so I’m calling this a trick of camera angle.

One phase further in the Tabletop Challenge is [Joe Carson]. He exhibited a wheeled robot he’s been working on that includes a gripper arm on the front. The robot looks around the table for a predefined color, in this case provided by a highlighting marker. When found the bot approaches, grips, and then proceeds to move the marker over the void where it is dropped out of existence; at least from the robot’s point of view.

Real World AdBlock

Every day your eyeballs are assaulted by advertisements on your box of cereal, billboards, t-shirts, magazines, milk cartons, plastered on the side of buses, buildings, bananas, and written in the sky. [Reed], [Jonathan], [Tom], and [Alex] came up with a solution to this: a Brand Killer that censors all the advertisements and brands you see every minute of every day. It’s a real-world adblock that you can build right now.

The team’s system uses a custom head mounted display made from cardboard, goggles, a webcam, and a seven-inch display. The software for the system uses Python and OpenCV to monitor the images from the webcam, compares them against a list of brands and logos, and filters them out with an unobtrusive blur.

Right now the system just has a few brands and logos that include Dr. Pepper, Hershey’s, McDonalds, Facebook, Starbucks, and clear evidence this was built at UPenn, Wawa and Tastykake. In the video below, the detection and tracking of these various brands is very good. The system is also stereoscopic, meaning this is wearable all day, every day, without a loss of depth perception.

Continue reading “Real World AdBlock”

Hacklet 31 – Software Tools

For every computer error, there are two human errors, and one of them is blaming the computer. Whenever a human blames a computer for something, there are two tools, and one of them is the computer.

Not all of your nifty tools need to be fancy robots, CNC machines, or nifty Robertson screwdrivers; a computer is equally capable of being a fantastic tool, provided it has the right software. For this week’s Hacklet, we’re going through some of the best software tools on hackaday.io.

6653681421957570397[Alan] was inspired to build a software tool for making sewing patterns. Sewing patterns are usually designed for the ‘average’ person, but if you’re making custom wearables, you should end up with a piece of clothing that fits perfectly.

The first project [Alan] is using this tool for is a fleece cap that fits the contour of his head. He captured a 3D mesh of his head, imported the mesh into Blender, and unwrapped the resulting mesh. The two halves of the hat were then plotted with a Silhouette Cameo, cut out of fleece, and sewn together. The result is a beanie that fits perfectly around [Alan]’s head. It’s an extremely cool and novel application of 3D modeling, and if you ever need to wrap a 3D object with a 2D material, this is the project you want to check out.

5869061407871295021 And you thought the autorouter in Eagle was bad.
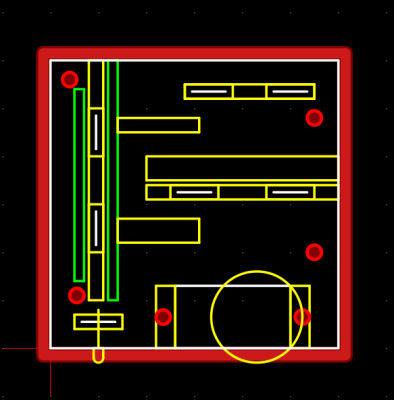
[Anderson] built a tool called Pyrite that will take a schematic and build a layout in three-dimensional space. He calls them Volumetric Circuits, and it’s basically the point-to-point wiring found in old radios and amplifiers taken to the next level. We featured this project before, and there haven’t been many updates since then. Maybe giving [Anderson]’s project a few skulls will help motivate him to get back to the project.

133031421839442989 Not satisfied with the existing free and open source CAM programs, [Snegovick] started work on his own.

[Snegovick] calls his project BCAM, and it’s exactly what you need to mill holes in PCBs, cut gears with a CNC router, engrave plastic, and anything else a 2.5 axis CNC machine can do. The project is written in Python, and yes, the source is available. Supported operations include drilling, path following, offset path following, and pocketing.

Write enough microcontroller projects, and you’ll eventually come up with your own library of common code that does one thing and one thing well. If you’re smart, you’ll reuse that code in future projects. [ericwazhung] is cutting through the hard part of developing all this code and released some things that are useful in a whole lot of projects.

Included in the commonCode library are the usual ‘heartbeat LED’, non-blocking input, a standard interface for AVR timers, bitmaps of text characters, DC motor control, and a whole bunch more. Extremely useful in any event.

That’s it for this round of the Hacklet, bringing you the best hackaday.io has to offer.

Making Mittens For A Smartphone

For those of us in the slightly inhospitable parts of the northern hemisphere, it’s freaking cold outside. Spring can’t come sooner, and smartphones won’t work if you’re wearing normal gloves. Smartphones will work if you sew a few bits of conductive thread into your gloves, but if you prefer mittens, you’re out of luck. That’s alright, because [Becky] at Adafruit has great guide for knitting your own smart phone mittens.

Intellectually, the concept of weaving fabric is fairly simple – it’s just interlaced threads that form a flexible sheet. Sewing, too, is fairly straightforward. Knitting, on the other hand, is weird. It’s a single string tied to itself that forms a 3D shell. If you’ve ever picked up a pair of knitting needles, you’ll soon realize whoever invented knitting is perhaps the greatest forgotten genius in all of human history. Lucky, then, that [Becky] has a lot of links that go through how to knit, and how to turn yarn into a pair of mittens with this pattern.

To make these mittens work with a smartphone, [Becky] is using a stainless conductive yarn stitched into the thumb and fingertips of the mitten. It works, and now you can use your touchscreen device no matter how cold it is.

Continue reading “Making Mittens For A Smartphone”

Adjustable Desk

An Adjustable Sit/Stand Desk For Under $100

[Cornel Masson] is a 46-year-old computer programmer. He’s been working on his computer for the last 30 years. Computer work can be good for the wallet but it can be bad for our health, particularly the neck and back. You can purchase adjustable desks to allow you to change positions from sitting to standing, but unfortunately these desks are often expensive. [Cornel] took matters into his own hands and build his own adjustable riser for under $100.

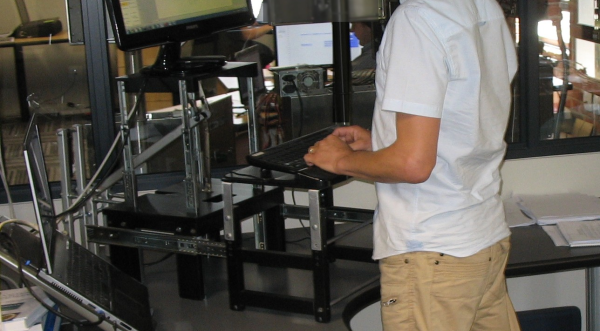
To start, [Cornel] used a typical computer desk. He didn’t want to build the entire thing from scratch. Instead he focused on building a riser that sits on top of the desk, allowing him to change the height of both the monitor and keyboard. His design used mostly wood, aluminum stock, threaded rods, and drawer slides.

The main component is the monitor stand and riser. The riser is able to slide up and down thanks to four drawer slides mounted vertically. [Cornel] wanted his monitor to move up and down with ease, which meant he needed some kind of counter weight. He ended up using a gas strut from the trunk of a Nissan, which acts as a sort of spring. The way in which it is mounted makes for a very close approximation of his monitor’s weight. The result is a monitor that can be raised or lowered very easily. The stand also includes a locking mechanism to keep it secured in the top position.

The keyboard stand is also mounted to drawer slides, only these are in the horizontal position. When the monitor is lowered for sitting, the keyboard tray is removed from the keyboard stand. The stand can then be pushed backwards, overlapping the monitor stand and taking up much less space. The keyboard stand has small rollers underneath to help with the sliding. The video below contains a slideshow of images that do a great job explaining how it all works.

Of course if replacing the entire desk is an option go nuts.

Continue reading “An Adjustable Sit/Stand Desk For Under $100”