Hackaday Prize Entry: 18-DOF Hexaopod Aiming To Float

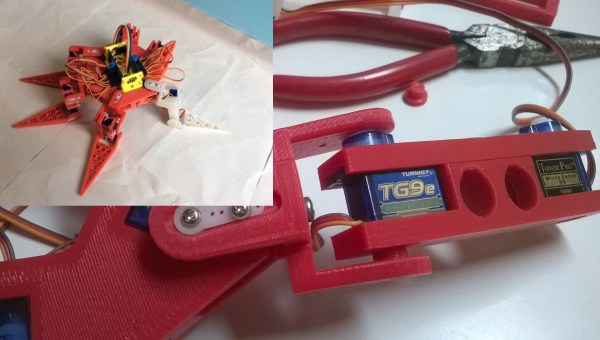
[Ken Conrad] didn’t like spiderbot projects he saw on the Internet: they mostly had 2 degrees of freedom per leg—if not fewer. He set out to make a hexapod robot with 18 DOF and the ability to move in any direction. Measuring around 20” from tip to tip, the custom, 3D-printed chassis was designed around eighteen SG90 9g micro servos. Each leg has 3 servos, one to move the tip, one for the middle, and one to move the entire leg back and forth, crab-style.

Perhaps the most intriguing notion of the project are the big paddle-like legs. [Ken] hopes get the robot to achieve some degree of flotation by laying its lower legs flat, staying afloat either due to surface tension, or maybe with the help of some buoyant material added to the legs.

[Ken] still has to figure out a control system for this beast, but we’re in awe of his creative use of zip-ties in place of traditional fasteners.

Autonomous Boat Sails The High Seas

As the human population continues to rise and the amount of industry increases, almost no part of the globe feels the burdens of this activity more than the oceans. Whether it’s temperature change, oxygen or carbon dioxide content, or other characteristics, the study of the oceans will continue to be an ongoing scientific endeavor. The one main issue, though, is just how big the oceans really are. To study them in-depth will require robots, and for that reason [Mike] has created an autonomous boat.

This boat is designed to be 3D printed in sections, making it easily achievable for anyone with access to a normal-sized printer. The boat uses the uses the APM autopilot system and Rover firmware making it completely autonomous. Waypoints can be programmed in, and the boat will putter along to its next destination and perform whatever tasks it has been instructed. The computer is based on an ESP module, and the vessel has a generously sized payload bay.

While the size of the boat probably limits its ability to cross the Pacific anytime soon, it’s a good platform for other bodies of water and potentially a building block for larger ocean-worthy ships that might have an amateur community behind them in the future. In fact, non-powered vessels that sail the high seas are already a reality.

Continue reading “Autonomous Boat Sails The High Seas”

Portable Stir-Fry Range

If you love a good stir-fry, you know that it can be a challenge to make on your stove at home. Engineer gourmet and Youtuber [Alex French Guy Cooking], in collaboration with [Make:], whipped up a portable range capable of making delectable stir-fry.

There are three major problems when it comes to cooking stir-fry: woks are typically unstable on normal burners, those burners don’t tend to heat from a center point out, and they usually aren’t hot enough. [Alex]’s 12,000BTU portable stove is great for regular applications, but doesn’t cut it when it comes to making an authentic stir-fry.

To focus the burner’s heat, he cut and bent a stainless steel baking ring into the shape of an exhaust nozzle — not unlike a jet engine — and lightly modified the range to accommodate the nozzle. He also added a larger baking ring with air flow holes for the wok to rest on. Two down, but there’s the issue of it not being hot enough.

So, why not use two butane canisters to double the output to 22,200 BTUs!

Continue reading “Portable Stir-Fry Range”

Spice Up Your Bench With 3D Printed Dancing Springs

Not all projects are made equal. Some are designed to solve a problem while others are just for fun. Entering the ranks of the most useless machines is a project by [Vladimir Mariano] who created the 3D Printed Dancing Springs. It is a step up from 3D printing a custom slinky and will make a fine edition to any maker bench.

The project uses 3D printed coils made of transparent material that is mounted atop geared platforms and attached to a fixed frame. The gears are driven by a servo motor. The motor rotates the gears and the result is a distortion in the spring. This distortion is what the dancing is all about. To add to the effect, [Vladimir Mariano] uses RGB LEDs controlled by an ATmega32u4.

You can’t dance without music. So [Vladimir] added a MEMs microphone to pick up noise levels which are used to control the servo and lights. The code, STL files and build instructions are available on the website for you to follow along. If lights and sound are your things, you must check out the LED Illuminated Isomorphic Keyboard from the past. Continue reading “Spice Up Your Bench With 3D Printed Dancing Springs”

Michael Ossmann Pulls DSSS Out Of Nowhere

[Michael Ossmann] spoke on Friday to a packed house in the wireless hacking village at DEF CON 25. There’s still a day and a half of talks remaining but it will be hard for anything to unseat his Reverse Engineering Direct Sequence Spread Spectrum (DSSS) talk as my favorite of the con.

DSSS is a technique used to transmit reliable data where low signal strength and high noise are likely. It’s used in GPS communications where the signal received from a satellite is often far too small for you to detect visually on a waterfall display. Yet we know that data is being received and decoded by every cell phone on the planet. It is also used for WiFi management packets, ZigBee, and found in proprietary systems especially any dealing with satellite communications.

[Michael] really pulled a rabbit out of a hat with his demos which detected the DSSS signal parameters in what appeared to be nothing but noise. You can see below the signal with and without noise; the latter is completely indiscernible as a signal at all to the eye, but can be detected using his techniques.

Detecting DSSS with Simple Math

[Michael] mentioned simple math tricks, and he wasn’t kidding. It’s easy to assume that someone as experienced in RF as he would have a different definition of ‘simple’ than we would. But truly, he’s using multiplication and subtraction to do an awful lot.

DSSS transmits binary values as a set called a chip. The chip for digital 1 might be 11100010010 with the digital 0 being the inverse of that. You can see this in the slide at the top of this article. Normal DSSS decoding compares the signal to expected values, using a correlation algorithm that multiplies the two and gives a score. If the score is high enough, 11 in this example, then a bit has been detected.

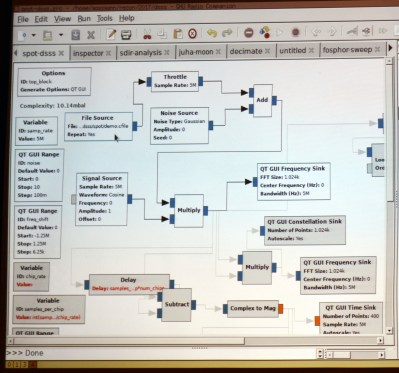
To reverse engineer this it is necessary to center on the correct frequency and then detect the chip encoding. GNU radio is the tool of choice for processing a DSSS capture from a SPOT Connect module designed to push simple messages to a satellite communication network. The first math trick is to multiply the signal by itself and then look at spectrum analysis to see if there is a noticeable spike indicating the center of the frequency. This can then be adjusted with an offset and smaller spikes on either side will be observed.

When visualized in a constellation view you begin to observe a center and two opposite clusters. The next math trick is to square the signal (multiply it by itself) and it will join those opposite clusters onto one side. What this accomplishes is a strong periodic component (the cycle from the center to the cluster and back again) which reveals the chip rate.

Detecting symbols within the chip is another math trick. Subtract each successive value in the signal from the last and you will mostly end up with zero (high signal minus high signal is zero, etc). But every time the signal spikes you’re looking at a transition point and the visualization begins to look like logic traced out on an oscilloscope. This technique can deal with small amounts of noise but becomes more robust with a bit of filtering.
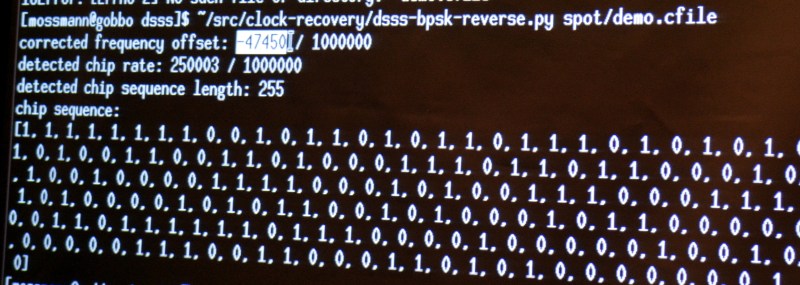
This sort of exploration of the signal is both fun and interesting. But if you want to actually get some work done you need a tool. [Michael] built his own in the form of a python script that cobbles up a .cfile and spits out the frequency offset, chip rate, chip sequence length, and decoded chip sequence.

Running his sample file through with increasing levels of noise added, the script was rock solid on detecting the parameters of the signal. Interestingly, it is even measuring the 3 parts per million difference between the transmitter and receiver clocks in the detected chip rate value. What isn’t rock solid is the actual bit information, which begins to degrade as the noise is increased. But just establishing the parameters of the protocol being used is the biggest part of the battle and this is a dependable solution for doing that quickly and automatically.

You can give the script a try. It is part of [Michael’s] Clock Recovery repo. This talk was recorded and you should add it to your reminder list for after the con when talks begin to be published. To hold you over until then, we suggest you take a look at his RF Design workshop from the 2015 Hackaday Superconference.

Injecting Code Into Mouse Firmware Should Be Your Next Hack

Here’s a DEF CON talk that uses tools you likely have and it should be your next hacking adventure. In their Saturday morning talk [Mark Williams] and [Rob Stanely] walked through the process of adding their own custom code to a gaming mouse. The process is a crash course in altering a stock firmware binary while still retaining the original functionality.

The jumping off point for their work is the esports industry. The scope of esporting events has blown up in recent years. The International 2016 tournament drew 17,000 attendees with 5 million watching online. The prize pool of $20 million ($19 million of that crowdfunded through in-game purchases) is a big incentive to gain a competitive edge to win. Contestants are allowed to bring their own peripherals which begs the questions: can you alter a stock gaming mouse to do interesting things?

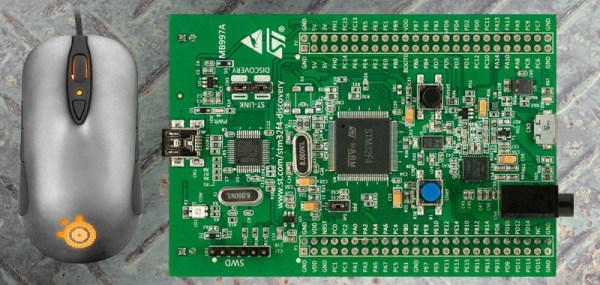
The steelseries Sensei mouse was selected for the hack because it has an overpowered mircocontroller: the STM32F103CB. With 128 KB of flash the researchers guessed there would be enough extra room for them to add code. STM32 chips are programmed over ST-Link, which is available very inexpensively through the ST Discovery boards. They chose the STM32F4DISCOVERY which runs around  $20.

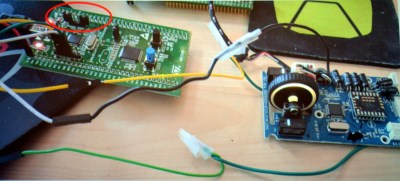
Perhaps the biggest leap in this project is that the firmware wasn’t read-protected. Once the data, clock, and ground pads on the underside of the board were connected to the Discovery board the firmware was easy to dump and the real fun began.

They first looked through the binary for a large block of zero values signifying unused space in flash. The injected firmware is designed to enumerate as a USB keyboard, open Notepad, then type out, save, and execute a PowerShell script before throwing back to the stock firmware (ensuring the mouse would still function as a mouse). Basically, this builds a USB Rubber Ducky into stock mouse firmware.
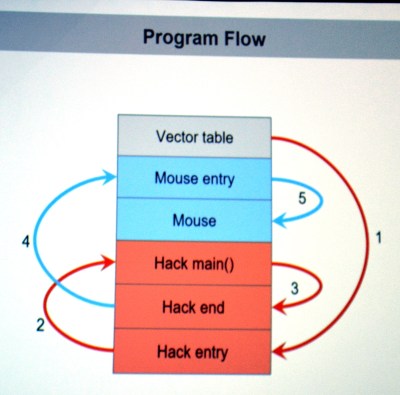
There are a few useful skills that make taking on this project a worthwhile learning experience. To compile your custom code correctly you need to choose the correct offset address for where it will end up once pasted into the firmware binary. The vector table of the original code must be rewritten to jump to the injected code first, and it will need to jump back to the mouse execution once it has run. The program flow on the left shows this. Both of these jumps require the program counter and registers to be saved and restored. The ARM stack is subtractive and the address will need to be updated to work with the added code.

The talk ended with a live demo that worked like a charm. You can check out the code in the MDHomeBrew repo. In this case the PowerShell script adds keyboard shortcuts for DOOM cheats. But like we said before, the experience of getting under the hood with the firmware binary is where the value will be for most people. With this success under your belt you can take on more difficult challenges like [Sprite_TM’s] gaming keyboard hack where the firmware couldn’t easily be dumped and an update binary was quite obsfucated.

Everything You Need To Know About Logic Probes

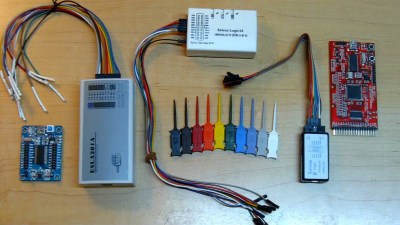
We just spent the last hour watching a video, embedded below, that is the most comprehensive treasure trove of information regarding a subject that we should all know more about — sniffing logic signals. Sure, it’s a long video, but [Joel] of [OpenTechLab] leaves no stone unturned.

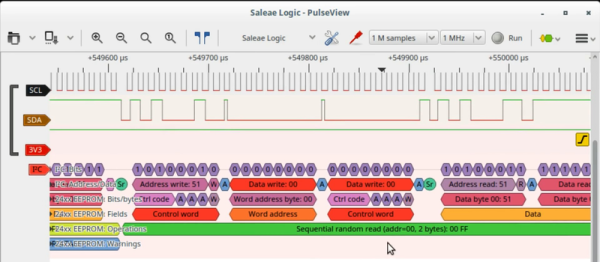
At the center of the video is the open-source sigrok logic capture and analyzer. It’s great because it supports a wide variety of dirt cheap hardware platforms, including the Salae logic and its clones. Logic is where it shines, but it’ll even log data from certain scopes, multimeters, power supplies, and more. Not only can sigrok decode raw voltages into bits, but it can interpret the bits as well using protocol decoder plugins written in Python. What this all means is that someday, it will decode everything. For free.

[Joel] knows a thing or two about sigrok because he started the incredibly slick PulseView GUI project for it, but that doesn’t stop him from walking you through the command-line interface, which is really useful for automated data capture and analysis, if that’s your sort of thing. Both are worth knowing.

But it’s actually the hardware details where this video shines. He breaks down all of the logic probes on his bench, points out their design pros and cons, and uses that basis to explain just what kind of performance you can expect for $20 or so. You’ll walk away with an in-depth understanding of the whole toolchain, from grabber probes to GUIs.
Continue reading “Everything You Need To Know About Logic Probes”