It’s sad that nearly half a century after the achievements of the Apollo program we’re still arguing with a certain subset of people who insist it never happened. Poring through the historical record looking for evidence that proves the missions couldn’t possibly have occurred has become a sad little cottage industry, and debunking the deniers is a distasteful but necessary ongoing effort.
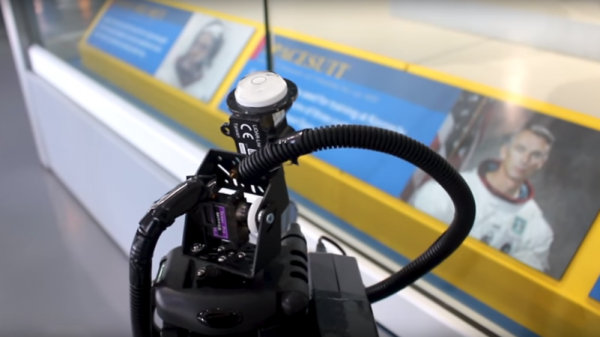
One particularly desperate denier theory holds that fully spacesuited astronauts could never have exited the tiny hatch of the Lunar Excursion Module (LEM). [AstronomyLive] fought back at this tendentious claim in a clever way — with a DIY LIDAR scanner to measure Apollo artifacts in museums. The hardware is straightforward, with a Garmin LIDAR-Lite V3 scanner mounted on a couple of servos to make a quick pan-tilt head. The rig has a decidedly compliant look to it, with the sensor flopping around a bit as the servos move. But for the purpose, it seems perfectly fine.
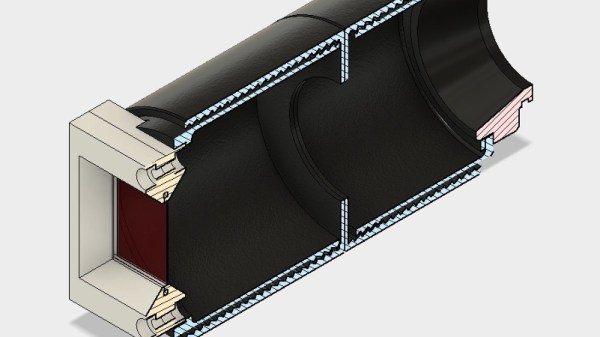
[AstronomyLive] took the scanner to two separate museum exhibits, one to scan a LEM hatch and one to scan the suit Gene Cernan, the last man to stand on the Moon so far, wore while training for Apollo 17. With the LEM flying from the rafters, the scanner was somewhat stretching its abilities, so the point clouds he captured were a little on the low-res side. But in the end, a virtual Cernan was able to transition through the virtual LEM hatch, as expected.
Sadly, such evidence will only ever be convincing to those who need no convincing; the willfully ignorant will always find ways to justify their position. So let’s just celebrate the achievements of Apollo.
Continue reading “Debunking Moon Landing Denial With An Arduino And Science” →
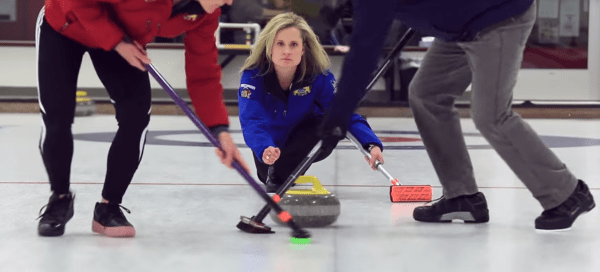
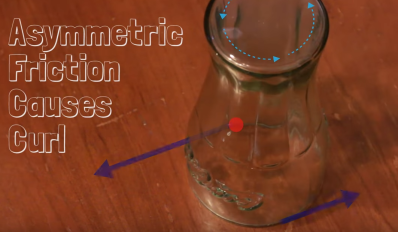 If you’ve been watching the Olympics, you’ve probably seen some curling, the Scottish sport of competitively pushing stones on ice. As the name implies, curling stones don’t go straight. The thrower pushes them with a bit of rotation, and the stones curve in the direction they are rotating. This is exactly the opposite of what one would expect — try it yourself with an inverted drinking glass on a smooth table. The glass will curl opposite the direction of rotation. Clockwise spin will result in a curl to the left, counterclockwise in a curl to the right.