Safety Systems For Stopping An Uncontrolled Drone Crash

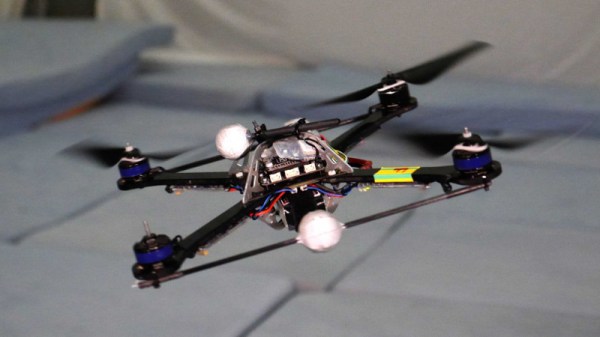
We spend a lot of time here at Hackaday talking about drone incidents and today we’re looking into the hazard of operating in areas where people are present. Accidents happen, and a whether it’s a catastrophic failure or just a dead battery pack, the chance of a multi-rotor aircraft crashing down onto people below is a real and persistent hazard. For amateur fliers, operating over crowds of people is simply banned, but there are cases where professionally-piloted dones are flying near crowds of people and other safety measures need to be considered.

We saw a skier narrowly missed by a falling camera drone in 2015, and a couple weeks back there was news of a postal drone trial in Switzerland being halted after a parachute system failed. When a multirotor somehow fails while in flight it represents a multi-kilogram flying weapon widow-maker equipped with spinning blades, how does it make it to the ground in as safe a manner as possible? Does it fall in uncontrolled flight, or does it activate a failsafe technology and retain some form of control as it descends?

Continue reading “Safety Systems For Stopping An Uncontrolled Drone Crash”

DIY PC Test Bench Puts Hardware Troubleshooting Out In The Open

If you’ve built a few PCs, you know how frustrating troubleshooting can be. Finding a faulty component inside the cramped confines of a case can be painful — whether its literal when sharp edges draw blood, or just figurative when you have to open that cramped case multiple times to make adjustments.

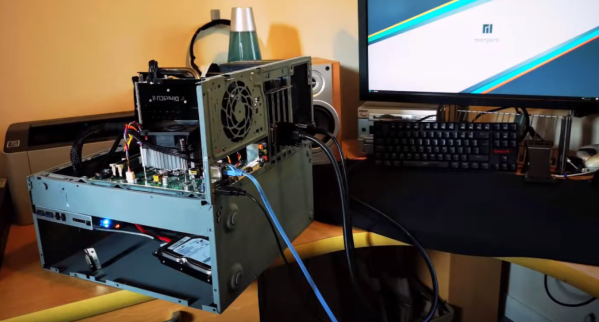
[Colonel Camp] decided to make life a bit easier by building this PC test bench which makes component troubleshooting much easier and can be built with old parts you probably have lying around. [Camp] was inspired by an old Linus PC Tech Tips video on the same topic. The key to the build is an old PC case. These cases are often riveted together, s a drill makes quick work of disassembling the chassis to easily get to all of the components. The motherboard pan and rear panel/card cage become the top shelf of the test bench, while the outer shell of the case becomes the base and a storage area. Two pieces of lumber support the upper shelf. The build was primed and painted with several coats of grey.

[Camp] built up his testbench with a modest motherboard, cooler and a 970 video card. He loaded up Manjaro Linux to verify everything worked. The basic hardware has already been replaced with a new system including a ridiculously huge cooler. But that’s all in a day’s work for a test bench PC.

We’ve seen some wild workbenches over the years, and this one fits right in for all your PC projects. Check out the video after the break!

Continue reading “DIY PC Test Bench Puts Hardware Troubleshooting Out In The Open”

Millenium Falcon HID: Get Unity To Talk To Teensy

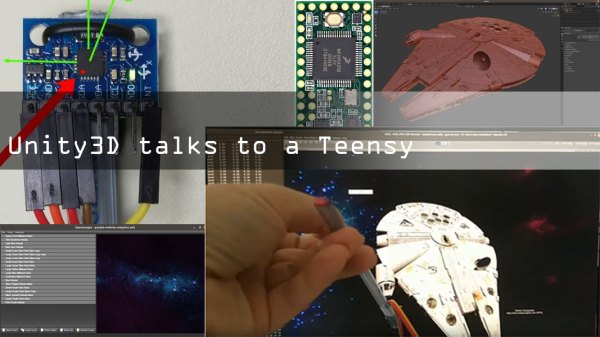
Here’s one that proves a hardware project can go beyond blinking LEDs and dumping massive chunks of data onto a serial console. Those practices are fine for some, but [dimtass] has found a more elegant hack for a more civilized age. His 3D Millennium Falcon model gets orientation data from his IMU as an an HID device.

The hardware involved is an MPU6050 6-axis sensor that is interfaced with a Teensy 3.2 board. [dimtass] documents his approach to calibrating the IMU going a bit further by using a Python script to generate offsets. We’ve advocated using Jupyter notebooks in the past and this is a good example of Jupyter plotting the data and visualizing the effect of the offsets in a second pass.

When in action, the Teensy reads IMU data and sends it over a USB RAW HID interface. For the uninitiated, HID transfers are more reliable than USB CDC transfers (virtual serial port) because they use smaller data chunks per event/transaction and usually don’t require special driversOn the computer side, [dimtass] has written a small application that gets the IMU values over the RAW HID and then provides it to the visualization application.

A 3D Millennium Falcon model is rendered in Unity, the popular open source game development engine. Even though Unity has an API, this particular approach is more OS specific using a shared-memory technique. The HID application writes to a file (/tmp/hid-shared-buffer) which is then read by Unity to make orientation changes to the rendered model.

[dimtass] provides lots of details on the tools used to bring his project to life and it can be a great starting point for more projects that need interfacing sensors with a visualization system. We have seen ways to turn a person’s head into a joystick and if you need a deeper dive into Unity, look no further.

Continue reading “Millenium Falcon HID: Get Unity To Talk To Teensy”

Overclocking In An SNES Emulator

The bsnes emulator has a new overclocking mode to eliminate slowdowns in SNES games while keeping the gameplay speed accurate. We’re emulating old SNES hardware on modern machines that are vastly more powerful. Eliminating slowdowns should be trivial, right? For an emulator such as bsnes, which is written to achieve essentially pixel-perfect accuracy when emulating, the problem is decidedly non-trivial. Stick around to learn why.

Continue reading “Overclocking In An SNES Emulator”

[Jessica] Is Soft On Robot Grippers

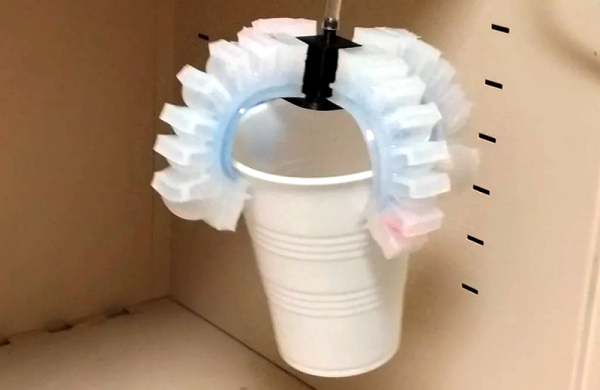
It is an old movie trope: a robot grips something and accidentally crushes it with its super robot strength. A little feedback goes a long way, of course, but futuristic robots may also want to employ soft grippers. [Jessica] shows how to build soft grippers made of several cast fingers. The fingers are cast from Ecoflex 00-50, and use air pressure.

A 3D-printed mold is used to cast the Ecoflex fingers, which are only workable for 18 minutes after mixing, so it’s necessary to work fast and have everything ready before you start.

Continue reading “[Jessica] Is Soft On Robot Grippers”

Keezer Controller Keeps The Kegs Pouring

It’s always a good idea to keep a few brews in the fridge ready to go, but being able to offer your guests a fresh-poured draught beer is another step above. It’s not trivial, but with a few kegs, a freezer and the right CO2 parts, it’s achievable for the average hacker. [Ben Brooks] had a keezer (keg freezer) setup that had been doing the job quite well, but wanted to take things up a notch.

Wishing to know when it was time to start brewing more beer, [Ben] needed a way to measure how much was left in the individual kegs. Opting to weigh them, initial experiments with a hand-made capacitive sensor failed when moisture in the freezer began to ruin the sensor’s performance. Switching to a strain-gauge based setup enabled more accurate readings to be taken with no drift over time. Solenoids were added to enable the taps to be shutdown outside of beer o’clock, and a Particle Photon and Raspberry Pi were put to work to give the whole project a slick web interface. There’s even a monitor to show guests what’s on tap!

It’s a tidy improvement to a home keg setup, and ensures [Ben]’s guests won’t be left thirsty in the middle of a party. We’ve seen other instrumented beer rigs before, too. If you’re working on your own homebrewing masterpiece, be sure to drop us a line.

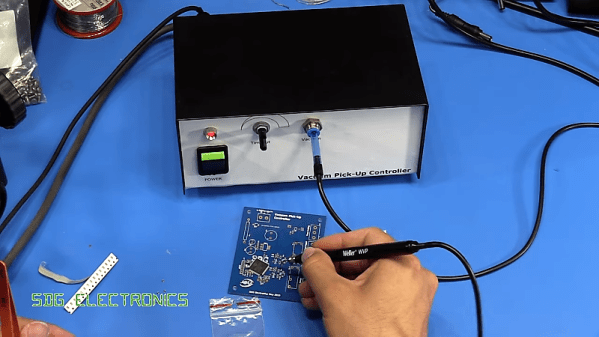
Control The Suck With This Manual Vacuum Pick-And-Place Tool

The tapes that surface-mount devices come in may be optimized for automated pick and place, but woe betide those who try to dig components out manually. No matter what size package, the well on the tape seems to be just a wee bit too small to allow tweezers to grip it, so you end up picking the thing up edgewise or worse, pinching too tight and launching the tiny thing into The Void. We hope you ordered extra.

Such circumstances are why vacuum handlers were invented, but useful as they are for picking and placing SMDs, they aren’t perfect. [Steve Gardener]’s sub-optimal experience with such tools led him to build this custom vacuum pick-and-place tool. It’s based on an off-the-shelf Weller unit, of which only the handpiece remains. A bigger, more powerful vacuum pump is joined in a custom enclosure by a PCB with a PIC18F13K22 microcontroller, a power supply, a solenoid to control the vacuum, and a relay to switch the pump. A footswitch starts the pump and closes the vacuum vent; letting off the pedal opens the vent to drop the part, while the pump keeps running for a variable time. This lets him rapidly work through a series of parts without having to build vacuum back up between picks. The video below shows the build and the tool in action.

We love the idea of this tool, and the polished look is pretty slick too. If manual pick-and-place isn’t for you, though, maybe converting a 3D-printer into an automated PnP is something to check out.

Continue reading “Control The Suck With This Manual Vacuum Pick-And-Place Tool”