Tindie Seller Reviews A Knock-Off Of His Own Product

If imitation is the sincerest form of flattery, online creators are being sincerely flattered at an alarming rate these days. We Hackaday scribes see it all the time, as straight copy-pastes of our articles turn up on other websites under different bylines. It’s annoying, but given prevailing attitudes toward intellectual property rights, there’s very little point in getting upset about it anymore. But what if it’s hardware that’s being infringed upon?

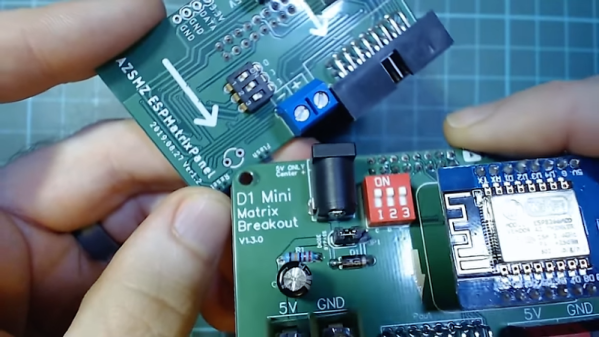
Hacker and Tindie store proprietor [Brian Lough] recently ran into this problem with one of his products, but rather than get upset, he did a remarkably fair and thoughtful review of the knock-off. The board in question, a D1 Mini Matrix Shield, makes it a snap to use LED matrix panels in projects like his Tetris-themed YouTube sub counter. The knock-off came via Ali Express, with the most “flattering” aspect being the copy and the images on the Ali Express listing, some of which are pulled straight from [Brian]’s Tindie store. While the board’s layout is different, it’s pretty clear that it was strongly inspired by the original. And the changes they did make – like terminal choices and undersizing some traces – only serve to lower the quality of the knock-off. Surely this was a cost-cutting move, so they could undercut sales of the original, right? Apparently not – the knock off is more expensive. Yes, [Brian]’s board is a kit and the imitator is fully assembled, but it still begs the question of why?

Hats off to [Brian] for not only making a useful product, but for taking the time to engineer it properly and having the ambition to put it on the market. It’s a pity that someone felt the need to steal his work, but it seems to be a rite of passage these days.

Continue reading “Tindie Seller Reviews A Knock-Off Of His Own Product”

Adding Sensors To Improve Your Curling Game? Turns Out It’s Really Hard

Sometimes, a project turns out to be harder than expected at every turn and the plug gets pulled. That was the case with [Chris Fenton]’s efforts to gain insight into his curling game by adding sensors to monitor the movement of curling stones as well as the broom action. Luckily, [Chris] documented his efforts and provided us all with an opportunity to learn. After all, failure is (or should be) an excellent source of learning.

The first piece of hardware was intended to log curling stone motion and use it as a way to measure the performance of the sweepers. [Chris] wanted to stick a simple sensor brick made from a Teensy 3.0 and IMU to a stone and log all the motion-related data. The concept is straightforward, but in practice it wasn’t nearly as simple. The gyro, which measures angular velocity, did a good job of keeping track of the stone’s spin but the accelerometer was a different story. An accelerometer measures how much something is speeding up or slowing down, but it simply wasn’t able to properly sense the gentle and gradual changes in speed that the stone underwent as the ice ahead of it was swept or not swept. In theory a good idea, but in practice it ended up being the wrong tool for the job.

The other approach [Chris] attempted was to make a curling broom with a handle that lit up differently based on how hard one was sweeping. It wasn’t hard to put an LED strip on a broom and light it up based on a load sensor reading, but what ended up sinking this project was the need to do it in a way that didn’t interfere with the broom’s primary function and purpose. Even a mediocre curler applies extremely high forces to a broom when sweeping in a curling game, so not only do the electronics need to be extremely rugged, but the broom’s shaft needs to be able to withstand considerable force. The ideal shaft would be a clear and hollow plastic holding an LED strip with an attachment for the load sensor, but no plastic was up to the task. [Chris] made an aluminum-reinforced shaft, but even that only barely worked.

We’re glad [Chris] shared his findings, and he said the project deserves a more detailed report. We’re looking forward to that, because failure is a great teacher, and we’ve celebrated its learning potential time and again.

Simulate City Blocks With Circuit Blocks In A LEGO Box

Have you ever looked around your city’s layout and thought you could do better? Maybe you’ve always wanted to see how she’d run on nuclear or wind power, or just play around with civic amenities and see how your choices affect the citizens.

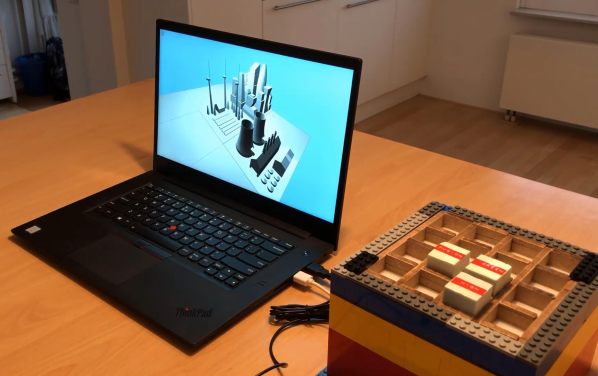
[Robbe Nagel] made this physical-digital simulator for a Creative Programming class within an industrial design program. We don’t have all the details, but as [Robbe] explains in the video after the break, each block has a resistor on the bottom, and each cubbyhole has a pair of contacts ready to mate with it. An Arduino nestled safely in the LEGO bunker below reads the different resistance values to determine what block was placed where.

[Robbe] wrote a program that evaluates various layouts and provides statistics for things like population, overall health, education level, pollution, etc. As you can see after the break, these values change as soon as blocks are added or removed. Part of what makes this simulator so cool is that it could be used for serious purposes, or it could be totally gamified.

It’s no secret that we like LEGO, especially as an enclosure material. Dress it up or dress it down, just don’t leave any pieces on the floor.

Continue reading “Simulate City Blocks With Circuit Blocks In A LEGO Box”

Azobenzene Stores Solar Energy

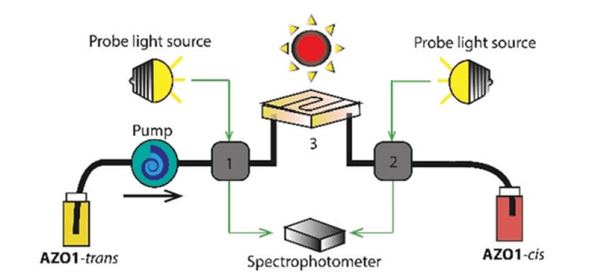
Probably the most efficient way to convert solar energy into electricity is the old fashioned way, heating water into steam and turning a turbine. This remains a messy affair though and you don’t really want a steam boiler on your roof, so solar cells are popular. However, there’s some new research showing how a molecule can absorb solar energy, store it, and then release the heat on demand years later. This could offer new ways to collect and even transport solar power. This new molecule, derived from azobenzene, holds immense promise to change the way we work with solar power.

Continue reading “Azobenzene Stores Solar Energy”

Core XY Explained

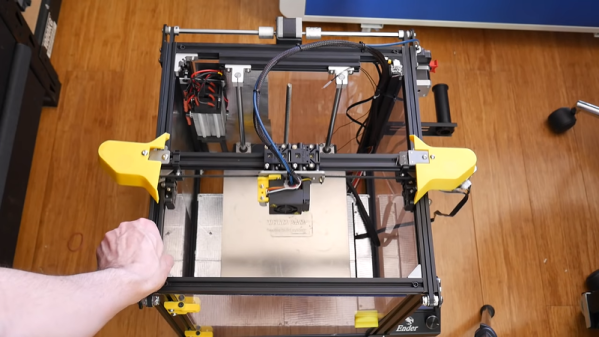
If you are building a CNC machine, a 3D printer, or even a plotter, you have a need for motion in both the X and Y directions. There are many ways to accomplish this, for example, some printers move the tool in the X direction and the bed in the Y direction while others move the entire X carriage in the Y direction and yet more use a delta mechanism. However, one of the oldest means of doing this is the Core XY method. It is interesting because both motors remain stationary and the business end moves entirely on belts or cords. This is similar to the H-Bot technique, but with some differences. [Michael Laws] has a video (see below) that explains how two stationary motors can move a tool anywhere in an XY region.

The idea behind Core XY goes back to at least old drafting tables. You can think of it as an object held by two ends of the same belt. As one end of the belt gets shorter the other end gets longer. The belts are arranged so that motion of one motor causes the tool to move at a 45 degree angle. That means you have to move both motors to go in a straight line.

Continue reading “Core XY Explained”

Improving Exposure On A Masked SLA Printer

It’s taken longer than some might have thought, but we’re finally at the point where you can pick up an SLA 3D printer for a few hundred bucks. These machines, which use light to cure a resin, are capable of far higher resolution than their more common FDM counterparts, though they do bring along their own unique issues and annoyances. Especially on the lower end of the price spectrum.

[FlorianH] recently picked up the $380 SparkMaker FHD, and while he’s happy with the printer overall, he’s identified a rather annoying design flaw. It seems that the upgraded UV backlight in the FHD version of the SparkMaker produces somewhat irregular light, which in turn manifests itself as artifacts on the final print. Due to hot spots on the panel, large objects printed on the SparkMaker show fairly obvious scarring.

Now you might expect the fix for this problem to be in the hardware, but he’s taken it in a different direction. These printers use an LCD panel to block off areas of the UV backlight, thereby controlling how much of the resin is exposed. This is technique is officially known as “masked SLA”, and is the technology used in most of these new entry level resin printers.

As luck would have it, the SparkMaker FHD allows showing various levels of grayscale on the LCD rather than a simple binary value for each pixel. At least in theory, this allows [FlorianH] to compensate for the irregular backlight by adjusting how much the UV is attenuated by the LCD panel. He’s focusing on the printer he personally owns, but the idea should work on any masked SLA printer that accepts grayscale values.

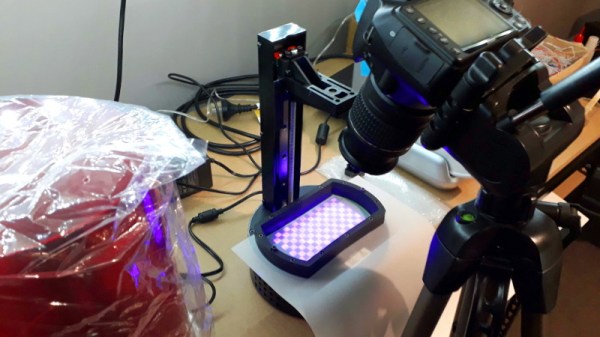
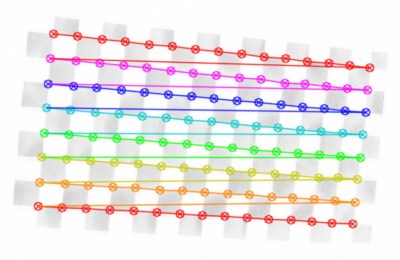
The first step was to map the backlight, which [FlorianH] did by soaking thin pieces of paper in a UV reactant chemical, and draping them over the backlight. He then photographed the illumination pattern, and came up with some OpenCV code that takes this images and uses the light intensity data to compensate for the local UV brightness underneath the sliced model.

So far, this method has allowed [FlorianH] to noticeably reduce the scarring, but he thinks it’s still possible to do better. He’s released the code for this backlight compensation script, and welcomes anyone who might wish to take a look at see how it could be improved.

An uneven backlight is just one of the potential new headaches these low-cost “masked” SLA printers give you. While they’re certainly very compelling, you should understand what you’re getting into before you pull the trigger on one.