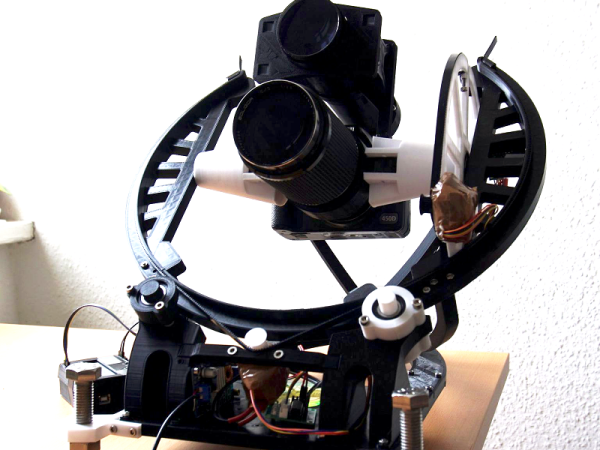
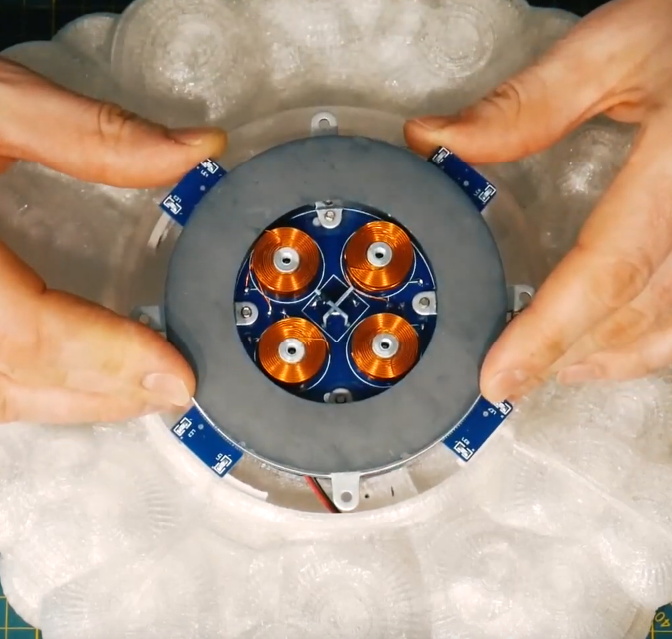
If you want to take beautiful night sky pictures with your DSLR and you live between 15 degrees and 55 degrees north latitude you might want to check out OpenAstroTracker. If you have a 3D printer it will probably take about 60 hours of printing, but you’ll wind up with a pretty impressive setup for your camera. There’s an Arduino managing the tracking and also providing a “go to” capability.
The design is over on Thingiverse and you can find code on GitHub. There’s also a Reddit dedicated to the project. The tracker touts its ability to handle long or heavy lenses and to target 180 degrees in every direction.
Would you like to know the great thing about this community we have here? All the spitballing that goes on every day in the comments, the IO chat rooms, and in the discussion threads of thousands of projects. One of our favorite things about the Hackaday universe is that we help each other out, and because of that, our collective curiosity pushes so many designs forward.
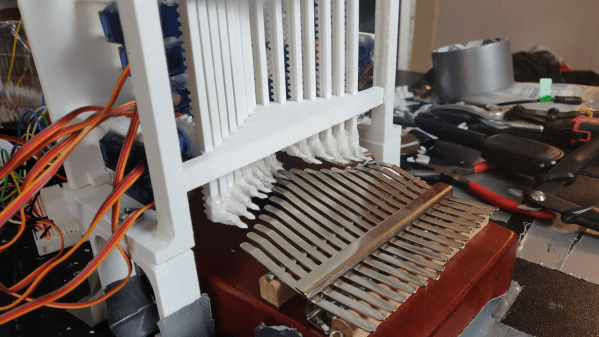
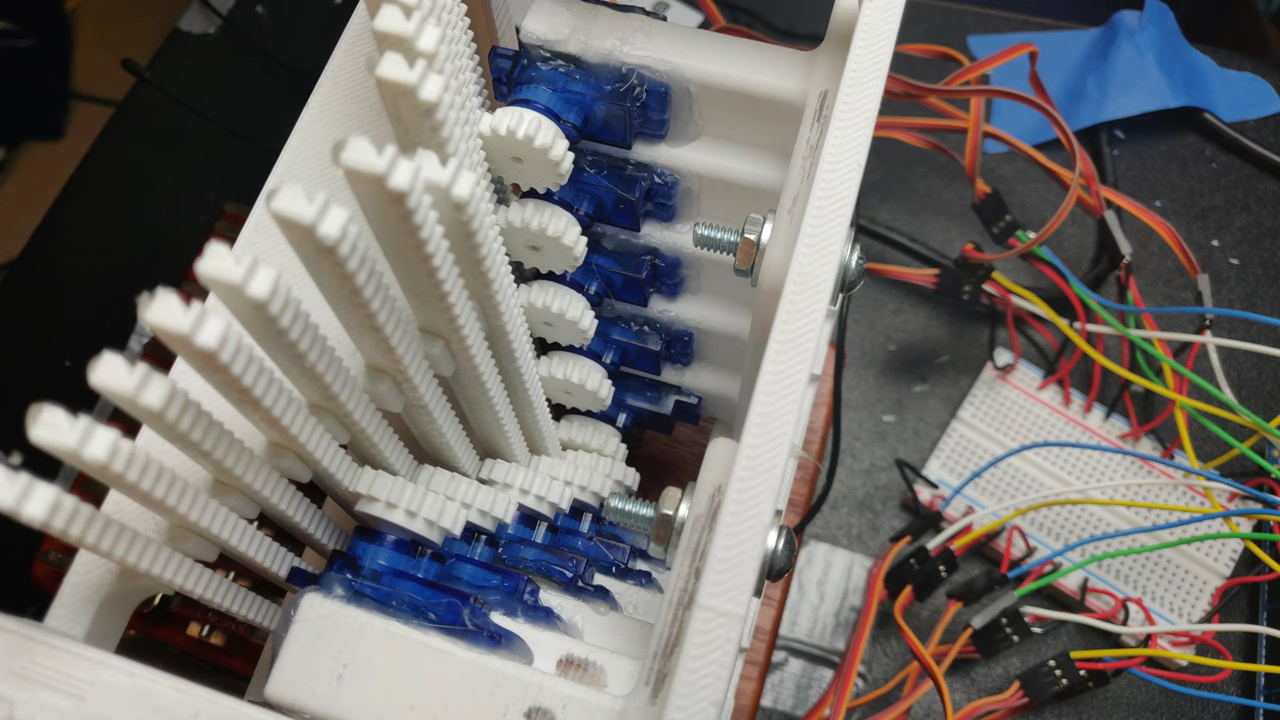
[Gurpreet] knows what we’re talking about. He’s back with version two of his self-playing kalimba, driven as strongly as ever by the dulcet tones of the Avatar theme. Now the robo-kalimba is rocking two full octaves, and thanks to your comments and suggestions, has relocated the servos where they can’t be picked up by the soundboard.
We gasped when we saw the new mechanism — a total of 15 rack and pinion linear actuators that make the kalimba look like a tiny mechanical pipe organ. Now the servos float, fixed into a three-part frame that straddles the sound box. [Gurpreet] melted servo horns to down to their hubs rather than trying to print something that fits the servos’ sockets.
Thumb your way past the break to check out the build video. [Gurpreet] doesn’t shy away from showing what went wrong and how he fixed it, or from sharing the 3D printering sanity checks along the way that kept him going.
Plucking kalimba tines is a difficult problem to solve because they’re stiff, but with timbre sensitive to many degrees of pressure. A slightly easier alternative? Make a toy player piano.
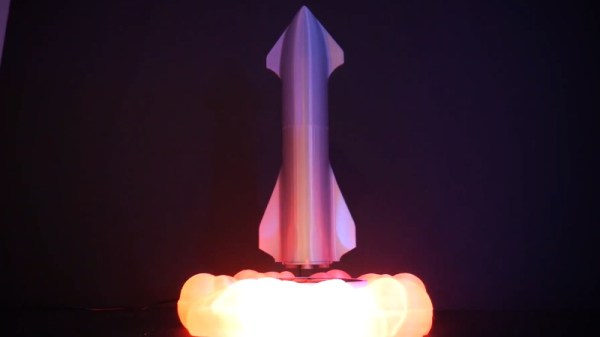
If everything goes according to plan, Elon Musk says the first generation of SpaceX’s massive Starship will make an orbital flight before the end of 2020. That’s a pretty bold claim, but when you’ve made landing rockets on their tails as in the old science fiction pulp magazines seem routine, we suppose you’ve earned the right to a bit of bravado. We’re excited to see the vehicle evolve over the next several months, but even if the real one stays grounded, we’ll gladly take this “flying” Starship model from [Chris Chimienti] as a consolation prize.
A magnetic levitation module, we’re officially in the future.
Feeling a bit let down by the 3D printable models of the Starship he found online, [Chris] set out to build his own. But it wasn’t enough to just make his bigger, stronger, and more accurate to Starship’s current design; he also wanted to make it a bit more exciting. Some RGB LEDs an Arduino embedded in the “cloud” stand the rocket sits on was a good start, and the landing pad inspired by SpaceX’s real autonomous spaceport drone ship Just Read the Instructions looks great all lit up.
But this is Starship we’re talking about, a vehicle that could literally push humanity towards being a multi-planet species. To do it justice, you’ve really got to knock it out of the park. So [Chris] found a magnetic levitation module online that could support a few hundred grams, and set to work on making his plastic Starship actually hover over the landing pad.
As you might imagine, it was a bit tricky. The first versions of the rocket looked great but came out too heavy, so he switched over to printing the model in so-called “spiral vase mode” which made it entirely hollow. Now far lighter and with a magnetic plate fit into the bottom, it was stable enough to float on its own. For the final touch, [Chris] added some red LEDs and a coin cell battery to the base of the Starship so it looks like the sleek craft is performing a last-second landing burn with its “impossible” full-flow staged combustion engines.
This isn’t the first time we’ve seen a model rocket with an electronic glowing cloud under it, but it’s certainly the first one we’ve seen that could levitate in mid-air. While this little rocket might not make it all the way to Mars, we wouldn’t be surprised to see it touching down on the desks of other hackers and makers in the near future.
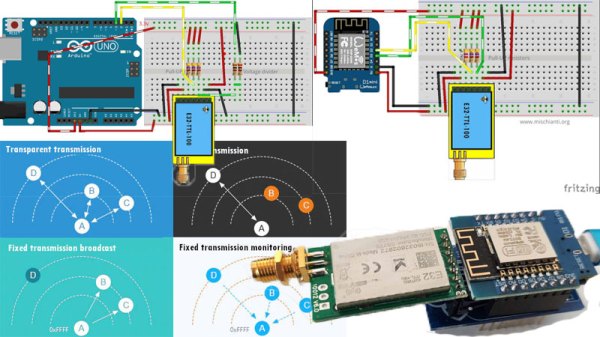
LoRa is the go-to tech for low power, long range wireless sensor networks. Designing with off-the-shelf modules can be a boon or a bane depending on the documentation and support. Luckily, [Renzo] has prepared a set of tutorials to get you started.
In his seven part series of write-ups, [Renzo] starts by connecting the E32 module from AliExpress to an Arduino as well as an ESP8266 to demonstrate essential communications. Then he discusses the configuration options and the library he created to make like a bit easier. Following that is a series of posts discussing transmission types as well as power saving methods including sleep modes and wake-on-radio.
The information will be extremely handy for someone starting off with the SX1276/SX1278 Wireless Modules which are relatively inexpensive as opposed to more standardized development kits. We love the abundance of fritzing diagrams, arduino code and helper library and hope someone will build on it. You can get the library from Github for your tinkering pleasure.
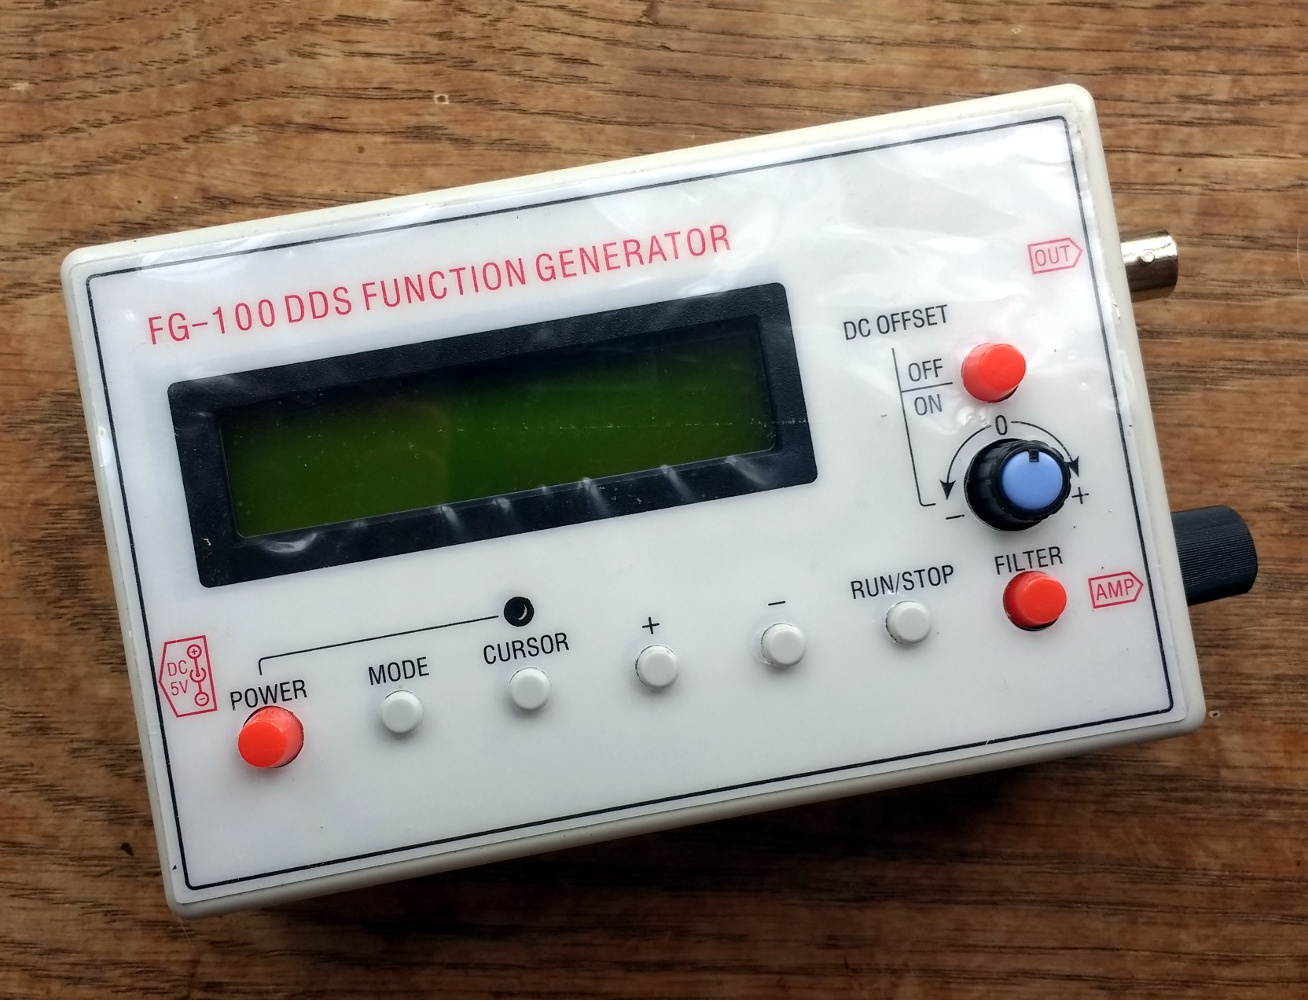
A lifetime of amassing random pieces of test equipment has left me with a gap in my armoury, namely that I don’t possess a low frequency function generator. This could easily be addressed, but for two things. I have a love for exploring the cheaper end of exported electronics and my need for a function generator is less than my desire to spend significant cash. I’ve tried to balance these competing forces in the past by picking up an astoundingly cheap instrument; that time I ended up with a lemon, but will lightning strike twice in the same spot? I spent £10 ($13) on a different cheap function generator and set off to find out. Continue reading “Review: Unnamed Chinese DDS Function Generator”→
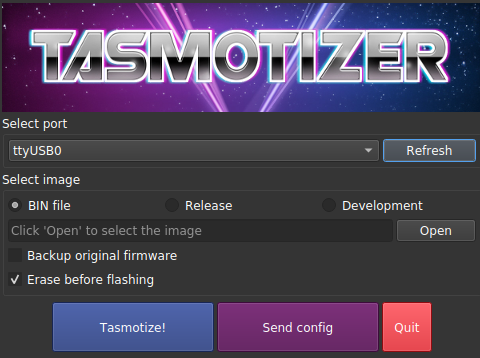
Tasmota is an alternative firmware for ESP boards that provides a wealth of handy features, and [Mat] has written up a guide to flashing with far greater ease by using Tasmotizer. Among other things, it makes it simple to return your ESP-based devices, like various Sonoff offerings, to factory settings, so hack away!
Tasmotizer is a front end that also makes common tasks like backing up existing firmware and setting configuration options like, WiFi credentials, effortless. Of course, one can’t really discuss Tasmotizer without bringing up Tasmota, the alternative firmware for a variety of ESP-based devices, so they should be considered together.
Hacks based on Sonoff devices are popular home automation projects, and [Mat] has also written all about what it was like to convert an old-style theromostat into a NEST-like device for about $5 by using Tasmota. A video on using Tasmotizer is embedded below, so give it a watch to get a head start on using it to hack some Sonoff devices.
With the notable exception of the Space Shuttle, rockets and spacecraft have always been considered disposable. It’s a slow and expensive way to travel, akin to building a new airliner for every flight, but it was the easiest option. These vehicles have always represented the pinnacle of engineering and material science of their time, and just surviving the trip to space once was an incredible accomplishment. To have another go around would have been asking too much of the technology. Even looking back on the Space Shuttle program, there’s plenty of debate about whether or not the reusable design really paid off in the end.
So SpaceX’s ability to land, refurbish, and refly the first stage of their Falcon 9 booster is no small accomplishment. After demonstrating the idea was possible in 2017, the company made numerous changes to the latest iteration of the rocket with reusability in mind. Known as Block 5, this version of the Falcon 9 is designed to be more survivable and require minimal servicing between flights. The company says its cheaper and faster to reuse the Block 5 than it would be to build a new one for each flight, allowing the company to approach spaceflight more like commercial aviation.
Falcon 9 launch and landing streaks. (Source: SpaceX)
With a fleet of Block 5 boosters now in rotation, SpaceX has given them serial numbers not unlike an airplane’s tail number. It might not be the kind of thing the general public would normally be aware of, but these serial numbers have allowed a dedicated community of space aficionados to keep track of the missions each booster has flown.
Unfortunately the story of one of these rockets, officially referred to as “Cores” in SpaceX parlance, was recently cut short. Core B1056, returning from the Starlink 4 mission on February 17th, failed to land on the autonomous spaceport drone ship (ASDS) Of Course I Still LoveYou and splashed down in the ocean. It’s still unclear what condition the booster was in after its soft landing in the water, but when the recovery ships returned to port empty handed, there was no question as to the fate of B1056.
From a purely business standpoint, the failure of any of SpaceX’s boosters means lost time and revenue. But in some ways B1056 had established itself as the vanguard of the fleet, managing to either set or break a number of records in its relatively short life. The destruction of the most thoroughly flight proven Block 5 booster is a stark reminder that there’s very little about spaceflight that could be called routine.