Hex Matrix Clock Is Spellbinding

Just when we think we’ve seen all possible combinations of 3D printing, microcontrollers, and pretty blinkenlights coming together to form DIY clocks, [Mukesh_Sankhla] goes and builds this geometric beauty. It’s kaleidoscopic, it’s mosaic, and it sorta resembles stained glass, but is way cheaper and easier.

The crucial part of the print does two jobs — it combines a plate full of holes for a string of addressable RGB LEDs with the light-dividing walls that turn the LEDs into triangular pixels. [Mukesh] designed digits for a clock that each use ten triangles. You’d need an ESP8266 to run the clock code, or if you’d rather sit and admire the rainbow light show unabated by the passing of time, just use an Arduino Uno or something similar.

Most of the aesthetic magic here is in the printed pieces and the FastLED library. It has a bunch of really cool animations baked in that look great with this design. Check out the demo video after the break. The audio is really quiet until the very end of the video, so be warned. In our opinion, the audio isn’t necessary to follow along with the build.

The humble clock takes many lovely forms around here, including pop art.

Continue reading “Hex Matrix Clock Is Spellbinding”

Concentric Rings Keep This Calendar Perpetually Up To Date

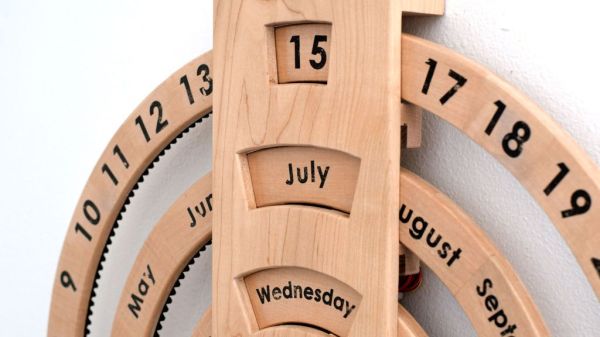
The variety of ways that people find to show the passage of time never ceases to amaze us. Just when you think you’ve seen them all, someone comes up with something new and unusual, like the concentric rings of this automated perpetual calendar.

What we really like about the design that [tomatoskins] came up with is both its simplicity and its mystery. By hiding the mechanism, which is just a 3D-printed internal ring gear attached to the back of each ring, it invites people in to check it out closely and discover more. Doing so reveals that each ring is hanging from a pinion gear on a small stepper motor, which rotates it to the right point once a day or once a month. Most of the clock is made from wood, with the rings themselves made using the same technique that woodturners use to create blanks for turning bowls — or a Death Star. We love the look the method yields, although it could be even cooler with contrasting colors and grains for each segment. And there’s nothing stopping someone from reproducing this with laser-cut parts, or adding rings to display the time too.

Another nice tip in this write up is the trick [tomatoskins] used to label the rings, by transferring laser-printed characters from paper to wood using nothing but water-based polyurethane wood finish. That’s one to file away for another day.

This Four-Axis Stencil Printer Is The Ultimate In SMD Alignment Tools

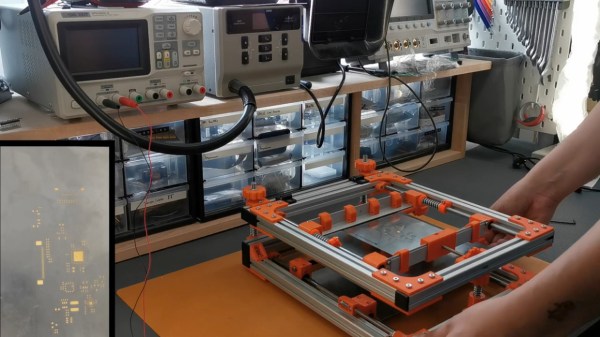
Here at Hackaday we love all kinds of builds, and we celebrate anytime anyone puts parts together into something else. And while we love the quick and dirty builds, there’s just something about the fit and finish of this four-axis SMD stencil printer that really pushes our buttons.

This build comes to us from [Phillip], who like many surface-mount users was sick of the various tape-and-PCB methods that are commonly used to align the solder stencil with the PCB traces. His solution is this fully adjustable stencil holder made from aluminum extrusions joined by 3D-printed parts. The flip-up frame of the device has a pair of clamps for securely holding the stainless steel stencil. Springs on the clamp guide rods provide some preload to keep the stencil taut as well as protection from overtensioning.

The stencil can move in the X-, Y-, and Z-axes to line up with a PCB held with 3D-printed standoffs on a bed below the top frame. The bed itself rotates slightly to overcome any skew in alignment of the PCB. [Phillip] was aghast at the price of an off-the-shelf slew-ring bearing for that axis, but luckily was able to print up some parts and just use simple roller bearing to do the same thing for a fraction of the cost. The frame is shown in use below; the moment when the pads line up perfectly through the stencil holds is oddly satisfying.

This puts us in mind of a recent, similar stencil printer we covered. That one was far simpler, but either one of these beats the expedient alignment methods hands down.

Continue reading “This Four-Axis Stencil Printer Is The Ultimate In SMD Alignment Tools”

Son Of Rothult

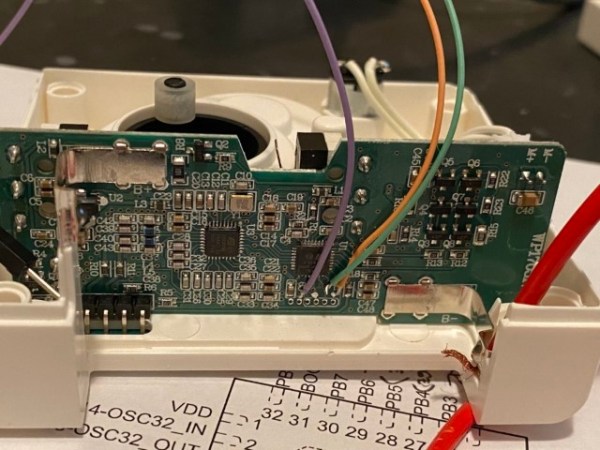
We are continuously inspired by our readers which is why we share what we love, and that inspiration flows both ways. [jetpilot305] connected a Rothult unit to the Arduino IDE in response to Ripping up a Rothult. Consider us flattered. There are several factors at play here. One, the Arduino banner covers a lot of programmable hardware, and it is a powerful tool in a hardware hacker’s belt. Two, someone saw a tool they wanted to control and made it happen. Three, it’s a piece of (minimal) security hardware, but who knows where that can scale. The secure is made accessible.

The Github upload instructions are illustrated, and you know we appreciate documentation. There are a couple of tables for the controller pins and header for your convenience. You will be compiling your sketch in Arduino’s IDE, but uploading through ST-Link across some wires you will have to solder. We are in advanced territory now, but keep this inspiration train going and drop us a tip to share something you make with this miniature deadbolt.

Locks and security are our bread and butter, so enjoy some physical key appreciation and digital lock love.

Breadboarding Console Has The Power

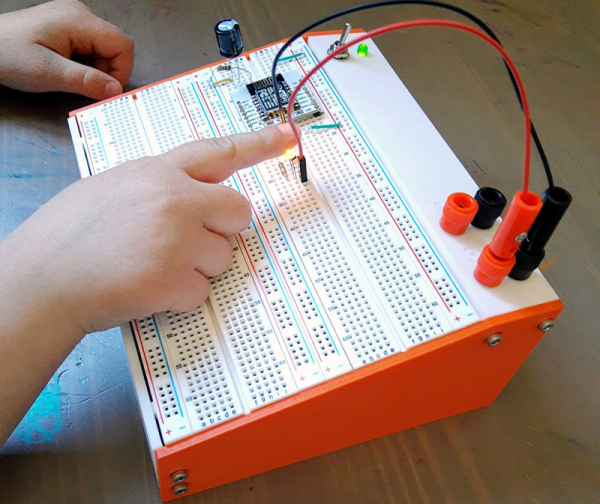
It is hard to remember how expensive an electronic hobby used to be. It wasn’t long ago, for example, that a solderless breadboard was reasonably expensive and was likely to have some sort of baseboard. The nicer ones even had a power supply or some simple test instruments. While you can still buy that sort of thing today, the low cost of bare breadboards have made them much more common. [Sebastian] decided to use his 3D printer to give those cheap breadboards a nice home.

The design looks great, and frankly isn’t much of a technical triumph, but it is useful and clean looking. The build uses some banana jacks, a switch, an LED, a 9V battery, and a common small power supply module. Of course, you also need a few breadboards.

Continue reading “Breadboarding Console Has The Power”

Vintage Aircraft Controls Turned USB Button Box

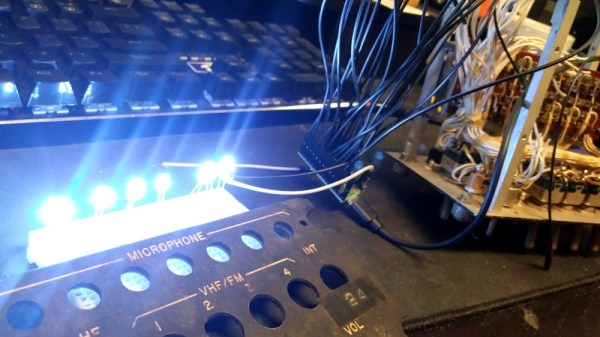
The Gables Engineering G-2789 audio selector panels aren’t good for much outside of the aircraft they were installed in, that is, until [MelkorsGreatestHits] replaced most of the internals with a Teensy 3.2. Now they are multi-functional USB input devices for…well, whatever it is you’d do with a bunch of toggle switches and momentary push buttons hanging off your computer.

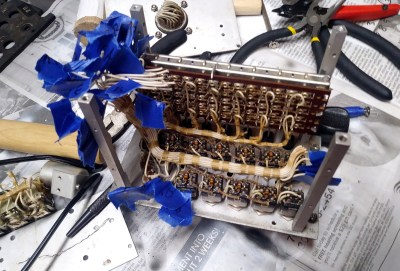
Tracing wires from the panel switches.

With the Teensy going its best impression of a USB game controller, the host operating system has access to seven momentary buttons, twelve toggles, and one rotary axis for the volume knob.

Right now [MelkorsGreatestHits] says the code is set up so the computer sees a button press on each state change; in other words, the button assigned to the toggle switch will get “pressed” once when it goes up and again when it’s flicked back down. But of course that could be modified depending on what sort of software you wanted to interface the device with.

As we’ve seen with other pieces of vintage aircraft instrumentation, lighting on the G-2789 was provided by a series of incandescent bulbs that shine through the opaque front panel material. [MelkorsGreatestHits] replaced those lamps with white LEDs, but unfortunately the resulting light was a bit too harsh. As a quick fix, the LEDs received a few coats of yellow and orange paint until the light was more of an amber color. Using RGB LEDs would have been a nice touch, but you work with what you’ve got.

This isn’t the first time that [MelkorsGreatestHits] has turned an old aircraft cockpit module into a USB input device, and we’re certainly interested in seeing what the next project will look like. Though we’re perhaps more interested in finding out where all all these old school airplane parts are coming from…

3D Printed Doggie Braces

[Tye’s] dog Lucifur unfortunately has degenerative arthritis causing her a lot of pain in her feet. The vet suggested orthotic carpal braces to help alleviate the pain, but they come at a price tag of at least $1600. Given her current budgetary limitations, [Tye] decided to try the DIY route.

The first task was to cast Lucifur’s paws in plaster to make a mold of her feet in both the weight-bearing and non-weight-bearing orientations. According to [Tye], the non-weight-bearing orientation is more representative of the shape of a “normal” paw, but she also needed to model the weight-bearing orientation to better design the braces for walking.

Then it was time to print a PLA-based dog splint from a design she found on Thingiverse. Since PLA softens when it’s in boiling water, the splint can be easily molded to Lucifur’s paw. This is where the paw molds [Tye] made earlier come in handy, since nobody would want Lucifur wearing a PLA splint fresh out of boiling water. Finally, she added a bit of super glue to the heel of the splint in hopes that it will hold up better over time.

We certainly can’t recommend DIY solutions to medical problems and [Tye] made sure she stressed the importance of following the recommendations of your vet if you’re ever in her position. Either way, we hope Lucifur finds some momentary reprieve, and that she can eventually receive those $1600 braces she desperately needs.