Hackaday Prize Worldwide : Maker’s Asylum New Delhi

Join me on July 18th for Hackaday Prize Worldwide: New Delhi — a KiCad workshop, hardware show & tell, and a chance for you to meet other hackers and makers in the area.

Hacker spaces are on the rise in India, a development that really excites me. When I helped co-found India’s first, community Hacker Space – Maker’s Asylum – in Mumbai, things were pretty lonely. And this was less than 2 years back in 2013 November. Last month, we opened New Delhi’s latest, and the Maker’s Asylum’s second space. There’s already a couple of other hacker spaces in New Delhi, and you can now find hacker spaces in Mumbai, New Delhi, Pune, Bangalore, Chennai, Cochin, Meerut, Kolkatta, Surat, Ahmedabad, Dharamsala, Hyderabad, Ramachandrapuram – and the list continues to grow.

To help build the community, and to bring the opportunity presented by the Hackaday Prize to local hackers, I hosted Hackaday Prize Worldwide events at the Maker’s Asylum in Mumbai and at Workbench Projects in Bangalore. This month, on July 18th, I’ll do another Hackaday Prize Worldwide event at the Maker’s Asylum in New Delhi. I love talking about, and supporting, Open Source Hardware at every opportunity. So for this event, I’ll be doing a fairly long and detailed workshop on KiCad – the awesome, open source EDA tool – lasting several hours. At the end of the day long workshop, I hope to get fellow hackers to complete a design that can be sent off for PCB fabrication. After a short break in the evening, we will have a Show-n-Tell, getting the assembled folks to show off the projects they are working on. There are a number of them who have submitted entires for the Hackaday Prize, so it will be interesting to hear them talk about their experience and share tips and ideas.

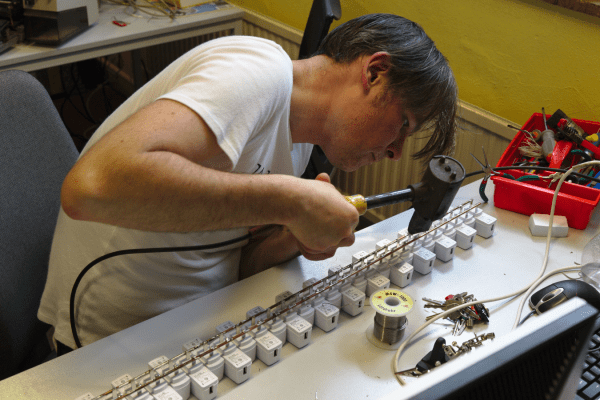
We can hold only a limited number of folks at the event, and slots are quickly filling up. So, if you’re in New Delhi or somewhere close by, do RSVP at this link quickly. Looking forward to an interesting event. Check out some pictures from the opening party of the New Delhi Maker’s Asylum after the break.

Continue reading “Hackaday Prize Worldwide : Maker’s Asylum New Delhi”

Insane 33 Port USB Charger

Like it or not, Hackers gonna hack. And when your hackerspace has someone who looks like Doc Brown from Back to the Future, the builds can get a bit weird, like this Hack42 FestivalCharger.

The Hack42 hackerspace in Arnhem, The Netherlands had collected a large number of TP-Link 5V USB chargers – but all of them had the North American NEMA plug (flat, 2 pin) which wouldn’t fit the Schuko sockets prevalent in The Netherlands. [Simon “MacSimski” Claessen] decided to whip out his giant soldering iron and use it to solder two long pieces of welding filler metal rods to 33 of the chargers, effectively wiring them up in parallel. He did apply his obvious skill and experience to good use. For one, the diameter of the filler metal rods he used were just about the right size to fit in the Shucko Schuko socket. And the gap between the two turned out to be the right distance too, thus creating a sort of Schucko Schuko plug. All that was needed to power up all the chargers was to connect a socket extension to the FestivalCharger. The unit was built to allow crowds of festival-goers to charge their phones and battery-powered gadgets simultaneously. To make sure the visitors didn’t get electrocuted, he used a piece of PVC pipe to cover up the exposed pins and keep it all safe.

Thanks to Hack42 member [Dennis van Zuijlekom] for sending in this tip.

Ducted Fan Drone Flies

A while back, we wrote about the ducted fan, single rotor, VTOL drone that [Armin Strobel] was working on. It wasn’t quite finished then, and hadn’t got off the ground yet. He’s posted an update, and from the looks of it, he’s made tons of progress, including a first flight with successful take-off and landing.

The successful flight was no coincidence. Tuning any kind of ‘copter is a tricky business. Handling them manually during testing could be outright dangerous. So he built two different test-beds from pieces of wood, some 3D printed parts and bearings. One lets him mount the drone and tune its pitch (and roll), while the other lets him tune the yaw parameters. And just like they do in wind tunnel testing, he fixed short pieces of yarn at various points on the air frame to check for turbulence. Doing this also gave him some insight into how he could improve the 3D printed air-frame in the next iteration. He repeated the tests on the two test beds, going back and forth to make sure the tuning parameters were not interfering with each other. He also modified the landing gear to improve stability during take-off and landing and to prevent tipping. [Armin] is using the PixHawk PX4 for flight control and a BeagleBone Black for higher level functions and control.

Once the first flight showed that the drone could do stable flight, he attached a Go-Pro and recorded some nice video on subsequent flights. The next steps are to fine tune the flight control parameters to ensure stable hovering with position hold and way point following. He may also 3D print an improved air-frame. For details about the build, check out our earlier blog post on the Ducted Fan Drone. Check out the two videos below – one showing the first flight of the Drone, and the other one about the test beds being used for tuning.

Continue reading “Ducted Fan Drone Flies”

Rotary Indexer Gives Mill A 4th Axis (sort Of)

Rotary indexer’s are standard issue in most machine shops. These allow you to hold or chuck a work piece, and then a graduated handle lets you to rotate the workpiece. Useful when you want to drill or tap axial or radial features. A rack and pinion drive ensures that the workpiece does not move under machining load. Quite often, these indexers also have a manual lock to take care of gear backlash and play. Automating them is not too difficult either. You could use just a stepper motor (open loop) or servo+encoder (closed loop) to drive the turntable.

[smashedagainst] needed to drill six radial holes on a part. And he had to do it on 500 pieces for a total of 3000 holes. That was just for the first initial run, with more drilling likely in the future. The part in question was small and light weight. So instead of using a heavy duty, industrial grade unit, he built an all-electric rotary indexing jig using a stepper motor and an Arduino, giving him a sort of rotary 4th axis. His idea was to directly use the stepper motor to rotate the workpiece without any gearing, but he needed to build his own rig to do so.

Continue reading “Rotary Indexer Gives Mill A 4th Axis (sort Of)”

Retro-fit Old Radio With Arduino And FM Module

“You can’t put new wine in old bottles” – so the saying goes. But you would if you’re a hacker stuck with a radio built in 2005, which looked like it was put together using technology from 1975. [Marcus Jenkins] did just that, pulling out the innards from his old radio and converting it to an Arduino FM radio.

His cheap, mains powered radio was pretty bad at tuning. It had trouble locating stations, and tended to drift. One look at the insides, and it was obvious that it was not well engineered at all, so any attempts at fixing it would be pointless. Instead, he drew up a simple schematic that used an Arduino Nano, an FM radio module based on the TEA5767, and an audio amplifier based on the LM386.

A single button on the Arduino helps cycle through a range of preset frequencies stored in memory. The Arduino connects to the FM radio module over I2C. The existing antenna was connected to the TEA5767 module. The radio module outputs stereo audio, but [Marcus] was content with using just a mono channel, as it would be used in his workshop. The audio amplifier is pretty straightforward, based on a typical application found in the data sheet. He put it all together on proto-board, although soldering the FM radio module was a bit tricky. The Arduino code is quite simple, and available for download (zip file).

He retained the original tuning knob, which is no longer functional. The AM-FM selector knob was fitted with a micro-switch connected to the Arduino for selecting the preset stations. Almost everything inside was held together with what [Marcus] calls “hot-snot” glue. The whole exercise cost him a few Euros, and parts scavenged from his parts bin. A good radio could probably be had for a few Euros from a yard sale and much less effort, but that wouldn’t be as cool as this.

Go deeper and explore how FM signals are modulated and demodulated for playback.

Pneumatic Multiplexer

This is a pretty cool project [Sebastian Morales] is working on – a 3D printed Pneumatic Multiplexer. Large interactive installations, kinetic art and many other applications require large numbers of actuators to be controlled. For these type of projects to work, a large number of actuators equals higher resolution and that allows the viewer to be captivated by the piece.

The larger the system becomes, the more complex it becomes to control all of those actuators. [Sebestian] wanted to move a large number of components with a relatively low number of inputs. He thought of creating a mechanical equivalent of the familiar electronic X-Y matrix that can control large quantities of outputs using only a few inputs – in a more descriptive form, Outputs=(Inputs/2)^2.

airlogic_01He looked at chemical reactions that change liquids in to gases, but that seemed pretty complicated. Refrigerants used in air conditioning looked promising, but their handling and safety aspects looked challenging.

Eventually, he decided to look at using “air logic“. Air logic uses pneumatic devices to create relays, limit switches, AND gates, NAND gates, OR gates, amplifiers, equivalent to electrical circuits. Electrical energy is replaced with compressed air. His plan was to build a multiplexer whose elements would open only if the combination of pressure between both lines was the right one. As in electronics, NAND logic is easy to implement. A moving element creates a seal and only allows air out if the bottom line was low and the top line was high.

He had access to a high resolution, resin based 3D printer which allowed him to create fully air-tight systems. He started with prototyping a small 4×4 matrix to test out his design, and had to work through 6 to 7 iterations before he could get it to work. The next step was to create a larger matrix of 100 elements controlled by 20 inputs (10×10 matrix). He created Omnifarious – a kinetic sculpture demonstrating the concept of shapeshifting objects. The Omnifarious is a hexecontahedron which would be able to transform its surface to render different geometries via 59 balloons on its surface. Below, you can check the videos of his progress building the various prototypes and another video showing the Omnifarious sculpture.

Continue reading “Pneumatic Multiplexer”

Wireless Weather Station

High schooler [Vlad] spent about a year building up his battery-operated, wireless weather station. Along the way, not only has he learnt a lot and picked up useful skills, but also managed to blog his progress.

The station measures temperature, humidity, pressure and battery voltage, and he plans to add sensors for wind speed, wind direction and rainfall soon. It is powered via a solar panel and can run on a charged battery for a full month. The sensor module transmits data to a remote receiver connected to a computer from where it is published to the internet. Barometric pressure is measured using the BMP180 and the DHT22 provides temperature and humidity values. The link between the transmit and receive sections uses a 433MHz Superhetrodyne RF Kit which gives [Vlad] a range of 50m. There’s an ATMega328 on the transmitter and receiver side. He’s taking measurements once every 12 minutes, and putting the micro controller in low power mode using the Rocket Scream Low Power Library. A 5W, 12V solar panel charges the 6V Lead Acid battery via a LM317 based charge circuit. This ensures the battery gets charged even when the solar panel is not receiving optimal radiation. One hour of sunlight provides enough charge to keep it going for 2 days. And a fully charged battery will keep it running for a full month even when there’s no sunlight.

The server software consists of two parts. The first pushes serial data to a mySQL database. This is written in Visual Studio C# using help from Oracle mySQL connector. The second part publishes the entries in the mySQL database to the web server. This is written in php, and uses  Libchart for graphing. He’s got the code, schematics, parts list and a lot of other information available for download on his blog. There’s a couple of items pending on his to-do list, so if you have any tips to offer post your comments below.