Control Anything With A Chat Bot

In the world of Internet of Things, it’s easy enough to get something connected to the Internet. But what should you use to communicate with and control it? There are many standards and tools available, but the best choice is always to use the tools you have on hand. [Victor] found himself in this situation, and found that the best way to control an Internet-connected car was to use the Flask server he already had.

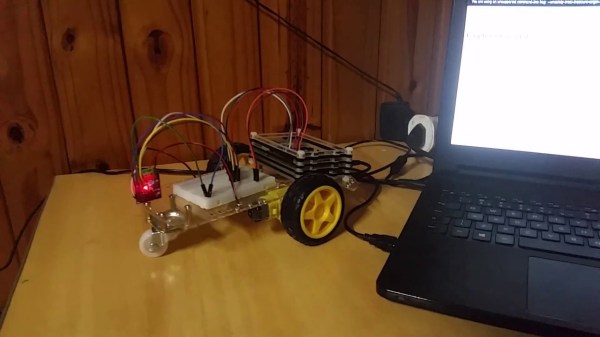
The remote controlled car was originally supposed to come with an Arduino, but the microcontroller was missing upon arrival. He had a Raspberry Pi around, and was able to set that up to replace the Arduino. He also took the opportunity to use the expanded functionality of the Pi compared to the Arduino and wrote a Flask server to control it, which is accessed as if you are communicating with a chat bot. Sending the words “go left/forward” to the Flask server will control the car accordingly, for example.

The chat bot itself contains some gems as well, and would be useful for any project that makes use of regular expressions. It also seems to be easily expandable. The project also uses voice commands, and does so by making extensive use of Mozilla’s voice recognition suite. If you want to get deep in the weeds of voice recognition on your own though, you can also explore TensorFlow at your leisure.
BSD Breathes New Life Into Obsolete Equipment

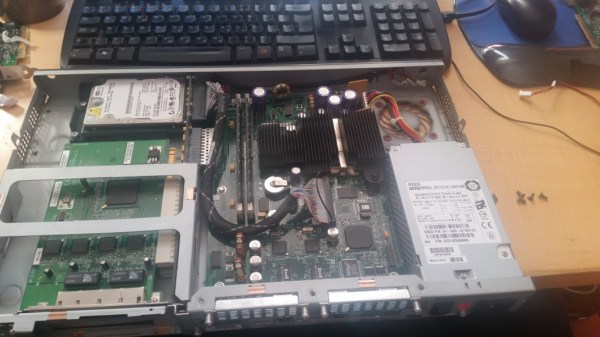
An old laptop or desktop computer that’s seen better days might still have a little bit of use left in it for a dedicated task. Grabbing a lightweight flavor of Linux and running a web server, firewall, or Super Nintendo emulator might get a few more years out of it. You can also get pretty creative repurposing obsolete single purpose  machines, as [Kristjan] did with some old Cisco server equipment.

The computer in question isn’t something commonly found, either. It’s an intrusion detection system meant to mount in a server rack and protect the server itself from malicious activity. While [Kristjan] mentions that Cisco equipment seems to be the definition of planned obsolescence, we think that this Intel Celeron machine with an IDE hard drive may have gone around the bend quite some time ago. Regardless, it’s modern enough to put back to work in some other capacity.

To that end, a general purpose operating system was installed, and rather than use Linux he reached for BSD to get the system up and running. There’s one other catch, though, besides some cooling issues. Since the machine was meant to be used in a server, there’s no ACPI which means no software shutdown capability. Despite all the quirks, you can still use it to re-implement a network security system if you wanted to bring it full-circle.

A Low Cost VR Headset

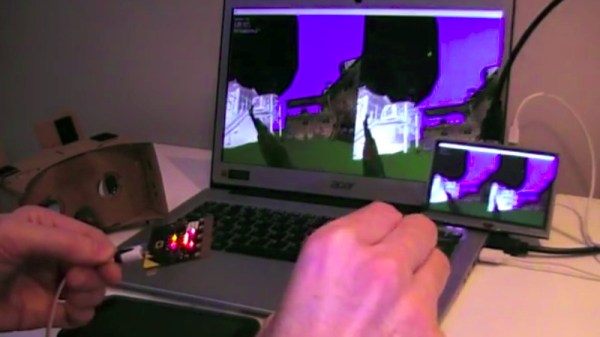
Virtual reality systems have been at the forefront of development for several decades. While there are  commercial offerings now, it’s interesting to go back in time to when the systems were much more limited. [Colin Ord] recently completed his own VR system, modeled on available systems from 20-30 years ago, which gives us a look inside what those systems would have been like, as well as being built for a very low cost using today’s technology.

The core of this project is a head tracker, which uses two BBC Microbits as they have both the accelerometer and compass needed to achieve the project goals. It is also capable of tracking an item and its position in the virtual space. For this project, [Colin] built everything himself including the electronics and the programming. It also makes use of Google Cardboard to hold the screen, lenses, and sensors all in the headset. All of this keeps the costs down, unlike similar systems when they were first unveiled years ago.

The ground-up approach that this project takes is indeed commendable. Hopefully we can see the code released, and others can build upon this excellent work. You could even use it to take a virtual reality cycling tour of the UK.

Continue reading “A Low Cost VR Headset”

Adaptive Infotainment Plays Tunes To Match Your Dangerous Driving

Part of the fun of watching action movies is imagining yourself as the main character, always going on exciting adventures and, of course, being accompanied by the perfect soundtrack to score the excitement and drama of your life. While having an orchestra follow you around might not always be practical, [P1kachu] at least figured out how to get some musical orchestration to sync up with how he drives his car, Fast-and-Furious style.

The idea is pretty straightforward: when [P1kachu] drives his car calmly and slowly, the music that the infotainment system plays is cool and reserved. But when he drops the hammer, the music changes to something more aggressive and in line with the new driving style. While first iterations of his project used the CAN bus, he moved to Japan and bought an old Subaru that doesn’t have CAN. The new project works on something similar called Subaru Select Monitor v1 (SSM1), but still gets the job done pretty well.

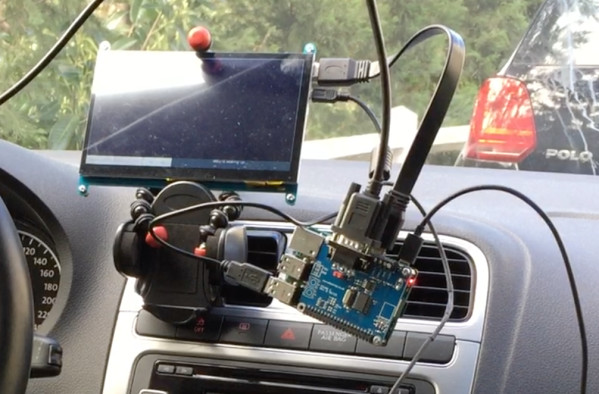
The hardware uses an Asus Tinkerboard and a Raspberry Pi with the 7″ screen, and a shield that can interface with CAN (and later with SSM1). The new music is selected by sensing pedal position, allowing him to more easily trigger the aggressive mode that his previous iterations did. Those were done using vehicle speed as a trigger, which proved to be ineffective at producing the desired results. Of course, there are many other things that you can do with CAN bus besides switching up the music in your car.

Continue reading “Adaptive Infotainment Plays Tunes To Match Your Dangerous Driving”

Machine Learning On Tiny Platforms Like Raspberry Pi And Arduino

Machine learning is starting to come online in all kinds of arenas lately, and the trend is likely to continue for the forseeable future. What was once only available for operators of supercomputers has found use among anyone with a reasonably powerful desktop computer. The downsizing isn’t stopping there, though, as Microsoft is pushing development of machine learning for embedded systems now.

The Embedded Learning Library (ELL) is a set of tools for allowing Arduinos, Raspberry Pis, and the like to take advantage of machine learning algorithms despite their small size and reduced capability. Microsoft intended this library to be useful for anyone, and has examples available for things like computer vision, audio keyword recognition, and a small handful of other implementations. The library should be expandable to any application where machine learning would be beneficial for a small embedded system, though, so it’s not limited to these example applications.

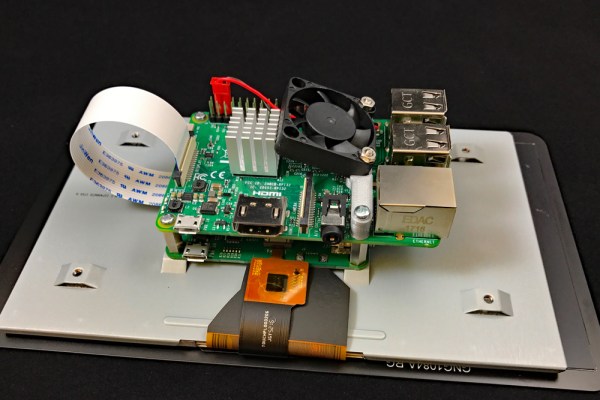
There is one small speed bump to running a machine learning algorithm on your Raspberry Pi, though. The high processor load tends to cause small SoCs to overheat. But adding a heatsink and fan is something we’ve certainly seen before. Don’t let your lack of a supercomputer keep you from exploring machine learning if you see a benefit to it, and if you need more power than just one Raspberry Pi you can always build a cluster to get your task done just a little bit faster, too.

Thanks to [Baldpower] for the tip!

A Scratch Instrument For Ants

If you think that this scratch instrument looks as though it should be at least… three times larger in order to be useful, you’d be wrong. This mighty pocket-sized instrument can really get the club hopping despite its diminuitive size. Despite that, the quality of the build as well as its use of off-the-shelf components for almost every part means that if you need a small, portable turntable there’s finally one you can build on your own.

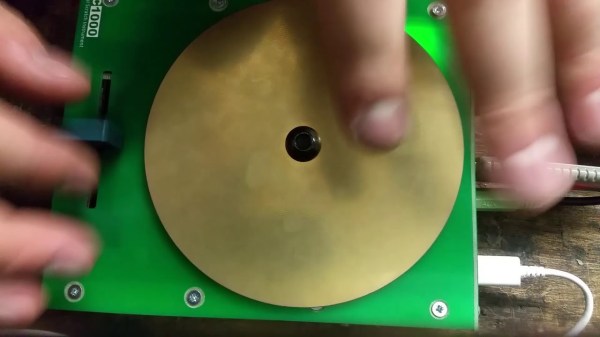
[rasteri] built the SC1000 digital scratch instrument as a member of the portabilist scene, focusing on downsizing the equipment needed for a proper DJ setup. This instrument uses as Olimex A13-SOM-256 system-on-module, an ARM microprocessor, and can use a USB stick in order to load beats to the system. The scratch wheel itself uses a magnetic rotary encoder to sense position, and the slider is miniaturized as well.

If you want to learn to scratch good and learn to do other things good too, there’s a demo below showing a demonstration of the instrument, as well as a how-to video on the project page. All of the build files and software are open-source, so it won’t be too difficult to get one for yourself as long as you have some experience printing PCBs. If you need the rest of the equipment for a DJ booth, of course that’s also something you can build.

Continue reading “A Scratch Instrument For Ants”

Build Your Own Anechoic Chamber

For professional-level sound recording, you’ll need professional-level equipment. Microphones and mixing gear are the obvious necessities, as well as a good computer with the right software on it. But once you have those things covered, you’ll also need a place to record. Without a good acoustic space, you’ll have all kinds of reflections and artefacts in your sound recordings, and if you can’t rent a studio you can always build your anechoic chamber.

While it is possible to carpet the walls of a room or randomly glue egg crate foam to your walls, [Tech Ingredients] tests some homemade panels of various shapes, sizes, and materials against commercially available solutions. To do this he uses a special enclosed speaker pointed at the material, and a microphone to measure the sound reflections. The tests show promising results for the homemade acoustic-absorbing panels, at a fraction of the cost of ready-made panels.

From there, we are shown how to make and assemble these panels in order to get the best performance from them. When dealing with acoustics, even the glue used to hold everything together can change the properties of the materials. We also see a few other cost saving methods in construction that can help when building the panels themselves as well. And, while this build focuses on acoustic anechoic chambers, don’t forget that there are anechoic chambers for electromagnetic radiation that use the same principles as well.

Thanks to [jafinch78] for the tip!

Continue reading “Build Your Own Anechoic Chamber”