Smart Station Runs Entertainment, Is Entertainment

It’s that special time of year—time for the parade of student projects from [Bruce Land]’s embedded microcontroller design course at Cornell. [Timothy], [Dhruv], and [Shaurya] are all into remote sensing and control applications, so they built a smart station that combines audiovisual entertainment with environmental sensing.

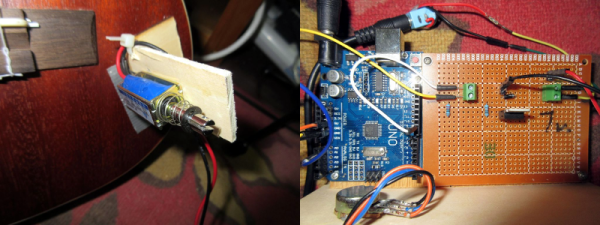
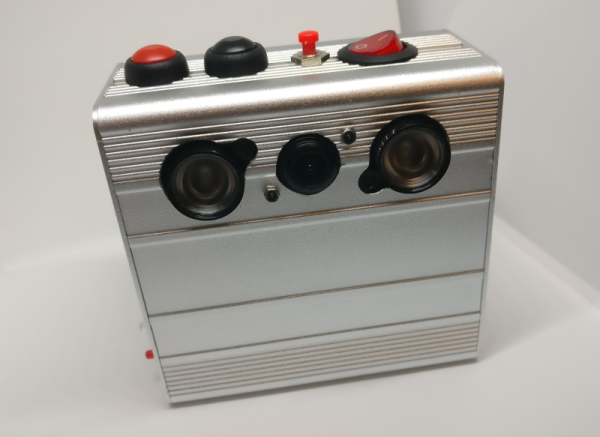
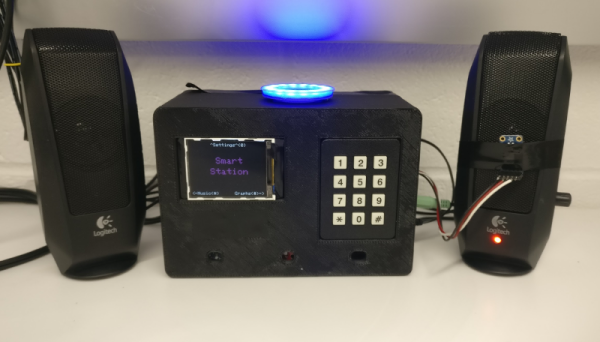
As with the other projects in this course, the smart station is built on a PIC32 dev board. It does Bluetooth audio playback via RN-52 module and has a beat-matching light show in the form of a NeoPixel ring mounted atop the 3D-printed enclosure. But those blinkenlights aren’t just there to party. They also provide visual feedback about the environment, which comes from user-adjustable high and low trigger values for the mic, an accelerometer, a temperature and humidity sensor, and a luminosity sensor.

The group wanted to add an ultrasonic wake-up feature, but it refused to work with the 3.3V from the PIC. The NeoPixel ring wanted 5V too, but isn’t as picky. It looks to be plenty bright at 3.3V. Another challenge came from combining I²C, UART, analog inputs, and digital outputs. They had to go to the chip’s errata to verify it, but it’s there: whenever I²C1 is enabled, the first two analog pins are compromised, and there’s no official solution. The team got around it by using a single analog pin and a multiplexer. You can check out those blinkenlights after the break.

Maybe you prefer working in wood. If so, you might like this hexagonal take on audio-visualization.

Continue reading “Smart Station Runs Entertainment, Is Entertainment”

The Incredible Shrinking Coin Cell Battery Pack

How’s it going with your project for the coin cell challenge? You can only use a single one, but Hackaday alum [Jeremy S Cook] has a great way to package coin cells into a sleek little power packs whether you need one, two, or even four.

[Jeremy] is building a wireless Wii nunchuk, so he needs a small battery that won’t short out or get punctured in the confines of the controller body. A single coin cell holder is already a bit bulky, and he needs to use two in series. He thought, why not try shrink wrapping them together? The only downside here is that the biggest tube that came with your average heat shrink multi-pack is probably a bit too tight to fit around them, so you might have to buy more (aw, shucks!).

After trying a few ways to make a good connection between the leads and the bare coin cell faces, [Jeremy] settled on generously stripping stranded wire and wrapping the long strands around the end to form a conductive swab. This slides in nicely between the coin cell and preshrunk tube. A little more heat will make a good connection, and some hot glue secures the wires. Click past the break for his build video and the other connection methods he tried. Have you come up with something better? Let us know in the comments.

Stray a bit further from the bench and you might come up with something like this googly eye battery holder we saw a few months ago.

Continue reading “The Incredible Shrinking Coin Cell Battery Pack”

Print A Plywood Bending Jig

Ever wanted to bend plywood but don’t have the equipment or the space to use it? Whatever the issue, dust off those project ideas and take a look at [Ryo Kosaka]’s experimental bending jig.All you need are some boards, a couple of fasteners, and [Ryo]’s 3-D printed connectors.

This is quite the elegant solution for bending in a small space with little noise. The main departure from standard bending methods is that instead of making the bend by clamping the veneers between a pair of positive and negative mold halves, most of the clamping pressure comes from air pumped into a rubber ball. That’s not even the best part: not only is the mold reconfigurable, it’s modular. Want another bend in your thing? Just print another connector and grab another piece of wood.

[Ryo]’s pivoting connectors screw into the end of one board and move freely along the length of a second board. Once the bend angle is dialed up, he locks it in place with a bolt. For the first test, [Ryo] made a lamp base with two bends.The jig worked great except for a small gap that didn’t get enough clamping pressure from the ball. We wonder if rotating the jig during the process would have let gravity address the issue. For the second test, [Ryo] added another piece to make the jig rectangular and made a floating wall shelf. Bend your way past the break for the video version.

In making the lamp base, [Ryo] found it easier to pre-bend the veneers with a heat gun. If the project were smaller, he could have softened up the wood in a microwave.

Continue reading “Print A Plywood Bending Jig”

Modified Uke Keeps The Beat With A Solenoid

A classic one-man band generally features a stringed instrument or two, a harmonica in a hands-free holder, and some kind of percussion, usually a bass drum worn like a backpack and maybe some cymbals between the knees. The musician might also knock or tap the sound-boards of stringed instruments percussively with their strumming hand, which is something classical and flamenco guitarists can pull off with surprising range.

The musician usually has to manipulate each instrument manually. When it comes to percussion, [JimRD] has another idea: keep the beat by pounding the soundboard with a solenoid. He built a simple Arduino-driven MOSFET circuit to deliver knocks of variable BPM to the sound-board of a ukulele. A 10kΩ pot controls the meter and beat frequency, and the sound is picked up by a mic on the bridge. So far, it does 3/4 and 4/4 time, but [JimRD] has made the code freely available for expansion. Somebody make it do 5/4, because we’d love to hear [JimRD]  play “Take Five“.

He didn’t do this to his good uke, mind you—it’s an old beater that he didn’t mind drilling and gluing. We were a bit skeptical at first, but the resonance sweetens the electromechanical knock of the solenoid slug. That, and [JimRD] has some pretty good chops. Ax your way past the break to give it a listen.

Got a cheap ukulele but don’t know how to play it? If you make flames shoot out from the headstock, that won’t matter as much. No ukes? Just print one.

Continue reading “Modified Uke Keeps The Beat With A Solenoid”

Purely Functional Selfies: Thermal Printer Speaks Haskell

[Dan] recently got a cheap POS thermal printer to chooch remotely over ESP32. Having conquered that project, he decided to see what else he could get the printer to do. Why not use it to print pictures? Sure, it’s been done, but not with Haskell. And yeah, the pictures will be grainy and weird-ish and limited to black and white, but hey, we love black and white around here as much as the idea of doing something simply because you can.

In the first project, [Dan] had to figure out how to talk to the printer since the RS422 cable it came with didn’t seem to work. He bought a TTL-to-RS485 adapter, but then realized he could use TTL directly and wired up a ESP32/OLED dev board to it. During the course of turning it into a photo booth, he had to switch to a bigger screen with a better refresh rate.

Unfortunately, [Dan] was unable to use Haskell by itself. He blames this on the cobwebs in the Haskell ecosystem, something that isn’t a problem for languages like Python that celebrate wide usage and support. [Dan] wrote a Python script that handles image capturing, display, and listening for touch activity on the screen, but Haskell ultimately controls the printer. Check out [Dan]’s demo after the break.

This project may have been trying at times, but at least [Dan] didn’t have to give it a brain transplant to get it to do what he wanted.

Continue reading “Purely Functional Selfies: Thermal Printer Speaks Haskell”

Car-Cade Build Drives Unthrottled Determination

Remember those dashboard-shaped racing games from the ’80s, like Tomy Turnin’ Turbo? [Daniel] has long wanted to bring one of those into the modern age. After finding that someone beat him to it, he went in another direction and built his own mini-cabinet from the ground up, dedicated to Dirt Rally.

The idea was to build the smallest possible computer than can run SteamOS and fit inside of a cabinet printed on a Prusa clone. At first, [Daniel] tried driving a MinnowBoard around. The frame rate was atrocious, so he switched to an ASUS mini-STX board and went from there.

The printed steering wheel and throttle are both analog inputs—each uses a 10kΩ pot connected to a Pimoroni PiCade controller. We love [Daniel]’s lo-tech way of using rubber bands to self-center them. We also love the post-processing he did on the steering wheel to give it that just-right grippy feel (it’s Plasti-Dip rubber paint), because it looks fantastic.

The lovely blue cabinet is an homage to [Daniel]’s Dirt Rally destroyer of choice, the rally blue ’95 Subaru Impreza. He had an arduous print/sand/prime/paint plan all worked out for the prototype, but ultimately printed the parts in different colors to get the look right. [Daniel] went through four different blue filaments alone before he was satisfied.

Motor around the break for a quick walk around the completed cabinet, and park it for the teaser video that scored [Daniel] a swag bag from the Dirt Rally devs through the magic of social media. Now that it’s cold and flu season in the northern hemisphere, maybe you’d prefer to play driving games without touching anything.

Continue reading “Car-Cade Build Drives Unthrottled Determination”

Rage Against The Dying Of The Light With A Raspi Night Vision Camera

One of the most interesting things about hacking is the difference between the vision we have at the beginning and the reality of we’ve built at the end. What began as a simple plan to build a night vision VR headset turned into a five-month adventure for [facelessloser] that culminated in this great-looking camera. He thought it would be easy, but almost every aspect presented some kind of challenge. The important thing is that he kept at it.

One of the major issues [facelessloser] encountered was power. He found that the Pi (Zero W), the screen, and the IR LEDs draw between 1.5 and 2A altogether. He was able to solve this one by using the charging board from a 2A power bank paired with a 1200mAh Li-Po built for the high draw required by vaping. If not for space issues, he might have used a 18650 or two.

Another challenge he faced was storing the video and images. He’d considered setting up the Pi as an access point to view them from a phone browser, but ultimately extended a USB port with an OTG cable to use flash drives. With a bit of Python he can watch for the drive to mount and then write to it. If the flash drive suddenly disappears, the Pi starts saving to the SD card.

There are two videos after the break, a walk through and a night vision demo. You’ll see a bit of a lag happening in the demo video—that’s because [facelessloser] is running the feed through PyGame first. No matter what nightlife you want to peep, it might be nice to add automated zoom with a rangefinder or get a closer look with some PiNoculars.

Continue reading “Rage Against The Dying Of The Light With A Raspi Night Vision Camera”