Retrotechtacular: The Bessemer Converter

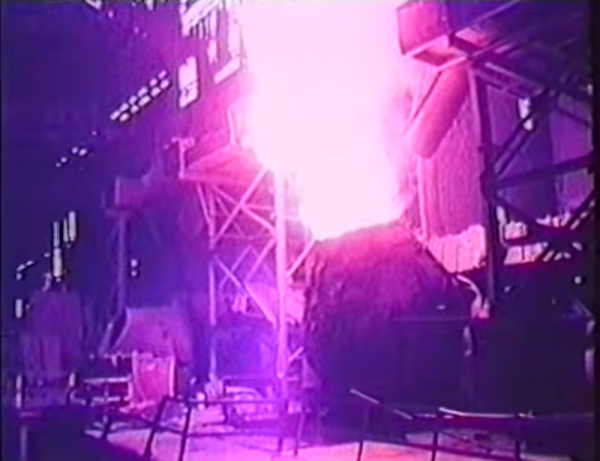
Here’s a rose-colored look into the steelworks at Workington, Cumbria in northern England. At the time of filming in 1974, this plant had been manufacturing steel nonstop for 102 years using the Bessemer process. [Sir Henry Bessemer]’s method for turning pig iron into steel was a great boon to industry because it made production faster and more cost-effective.

hot ingotsMore importantly, [Bessemer]’s process resulted in steel that was ten times stronger than that made with the crucible-steel method. Basically, oxygen is blown through molten iron to burn out the impurities. The silicon and manganese burn first, adding more heat on top of what the oxygen brings. As the temperature rises to 1600°C, the converter gently rocks back and forth. From its mouth come showers of sparks and a flame that burns with an “eye-searing intensity”. Once the blow stage is complete, the steel is poured into ingot molds. The average ingot weighs four tons, although the largest mold holds six tons. The ingots are kept warm until they are made into rail.

The foreman explains that Workington Works would soon be switching over to a more modern process. As it was, Workington ran a pair of Bessemer converters on a 40-minute schedule, ensuring constant steel production from ore to rail. Between 1872 and 1974, these converters created an estimated 25 million metric tons of steel.
Continue reading “Retrotechtacular: The Bessemer Converter” →

LEGO Computer Case

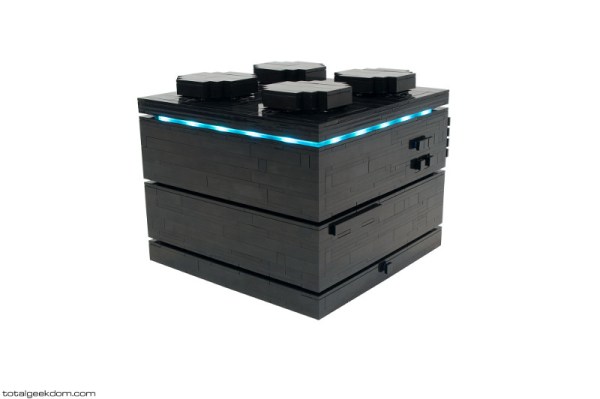
With over 40,000 pieces in his possession, [Mike] is definitely a huge fan of LEGO. Given that he’s also very much a fan of technology, it’s no surprise that he has built more than one type of LEGO computer case. He wrote in to tell us that he’s finished work on a well-rounded system designed for everyone.

[Mike] is no stranger to interesting case builds. In the last couple of years, he’s also made a functioning wind tunnel case and a bio computer that uses generated heat to warm soil for wheat grass plants. In the course of planning the LEGO computer, he thought a lot about heat and airflow, ultimately deciding on a top-down cooling path.

He’s quoting custom LEGO computer builds, providing the choice between an i3, i5, or i7 with either 8 or 16 gigs of RAM. They will run Linux or Windows 7/8 and are 10-compatible. There are a few choices for the top of the case: classic LEGO brick, the industrial look with diagonal slats, and a colored, tiled top. These systems are completely upgradeable and are held firmly together with great engineering and the occasional support rod.

Retrotechtacular: Wising Up With The SAGE System

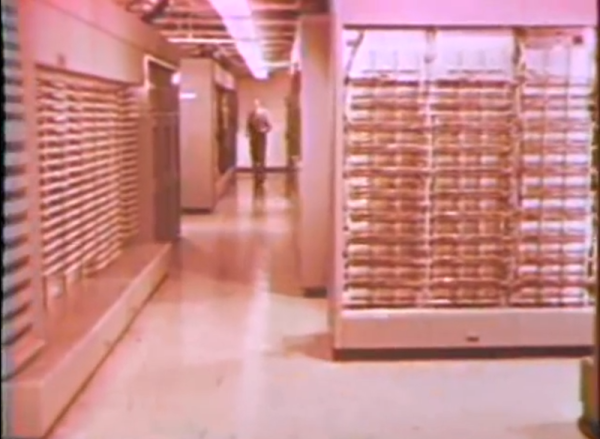
The birth of the supersonic jet made the United States’ airstrike defenses look antiquated. And so, during the Cold War, the government contracted a number of institutions and vendors to create and maintain the Semi-Automatic Ground Environment (SAGE) aircraft detection system with Western Electric as project manager.

SAGE was developed at MIT’s Lincoln Laboratory on computers built by IBM. It used the AN/FSQ-7 in fact, which was The Largest Computer Ever Built. SAGE operated as a network of defense sectors that divided the continental U.S. and Canada. Each of these sectors contained a directional center, which was a four-story concrete blockhouse that protected and operated a ‘Q7 through its own dedicated power station. The SAGE computers employed hot standby processors for maximum uptime and would fail over to nearby direction centers when necessary.

Information is fed into each directional center from many radar sources on land, in the air, and at sea. The findings are evaluated on scopes in dimly-lit rooms on the front end and stored on magnetic cores on the back end. Unidentifiable aircraft traces processed in the air surveillance room of the directional center are sent to the ID room where they are judged for friendliness. If found unfriendly, they are sent to the weapons direction room for possible consequences.

Continue reading “Retrotechtacular: Wising Up With The SAGE System” →

Fail Of The Week: Easy Cheese? Printer Says No

Well, this is timely. We saw a lot of things at Midwest RepRap Festival this year on both the printer and the material fronts. We told you about the delicious offerings made possible through remote extruder setups, strong and heavy filaments infused with copper and other metals, and a printer built out of K’NEX. No one was printing with canned cheese, though, and maybe for good reason.

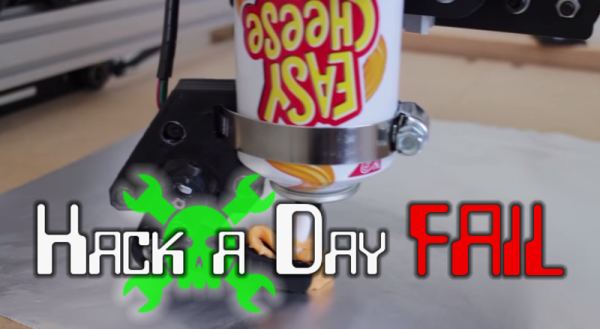
[Andrew] here has created a 3D-printed arm that holds a can of aerosol cheese-like substance in place. A motor causes the holder to move the spout to the side, dispensing the goo. At first he squirts it in a coiled pile on to a cracker. That goes pretty well until it’s time to move away from the cracker. [Andrew]’s later attempt to build up four cheesy walls had us cheering. You can see what we mean after the break.

There are a couple of issues at play. Sometimes the add-on just plain falls off the end of the spout. Other times, air in the can interrupts the flow, just as it does during manual operation. And every once in a while, it just seems that the spout was too close to the substrate.

What do you think about the viability of cheese printing? Would it work better if the extrusion took place remotely, and the cheese was pushed through a thinner tip? Would a cooled print bed help? Let us know.

Continue reading “Fail Of The Week: Easy Cheese? Printer Says No” →

In Which Robots Fight The Console Wars

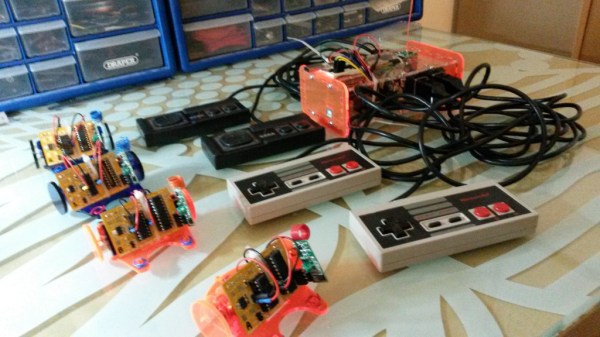
Though the names have changed over the years, the console wars wage on. [moop] must have been feeling nostalgic for the NES vs. SEGA days when he started his current project, Foobot, which is a tabletop football (soccer) game played by robots that are controlled with classic NES and SEGA controllers.

Each team has two robots that tool around on laser-cut perspex wheels attached directly to 16,000RPM motors. An SN754410 controls the motors, and each robot has an ATtiny2313 brain. They all communicate with a single transmitter over their 433MHz 1402 radio receiver modules. To avoid collisions, [moop] used a packet system, wherein each robot has an ID. The messages all contain a robot ID, message payload, and checksum. The robots ignore messages addressed to others, and any message with an invalid checksum.

[moop] has made everything available on his github, including the PCB layouts and CAD files for the robot chassis and transmitter case. Watch them battle it out after the break. If the Foobots have riled you up about vintage gaming, check out these sweet arcade hacks.

Continue reading “In Which Robots Fight The Console Wars” →

Retrotechtacular: Basic Telephony In The Field

Here is a great introduction to a practical application of electromagnetic theory—the field telephone. It’s a training film from 1961 that covers the sound-powered, local battery, and common battery systems along with the six basic components they use: generators, ringers, transmitters, receivers, induction coils, and capacitors.

Clear illustrations and smart narration are the hallmarks of these Army training films, and this one begins with a great explanation of generator theory. The phone’s ringer uses electromagnetic attraction and repulsion to do the mechanical work of striking the bells. Similarly, the sound waves generated by a caller’s speech move an armature to create an alternating electrical current that is transmitted and converted back to sound waves on the receiving end.

In the local battery system, the battery pushes pulsating DC to carry the voice transmission. An induction coil increases the capabilities of this system, but capacitors are required to filter out the frequencies that would overload the receiver, passing only the higher speech frequencies.

In order for several stations to communicate, the use of a switchboard is required to patch the calls through. There are many advantages of a common battery system with regard to call switching: no local battery is necessary, nor is a generator needed at each station. Calls are easier to place, and communication is much faster.

Continue reading “Retrotechtacular: Basic Telephony In The Field” →

MRRF: Flexible 3D Printing

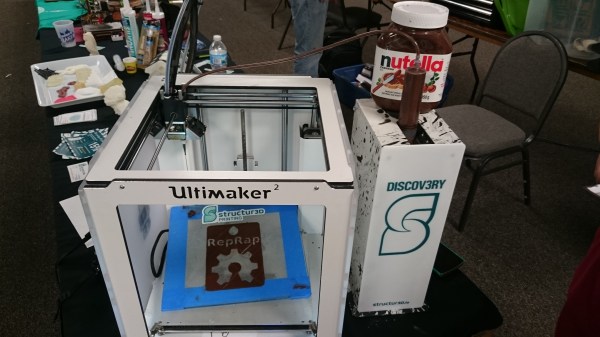
The concession stand at the Midwest Rep Rap Festival did not disappoint when it came to the expected fare: hot dogs, walking tacos, and bananas for scale. But the yummiest things there could not be bought—the Nutella prints coming off the Ultimaker² at the structur3D booth.

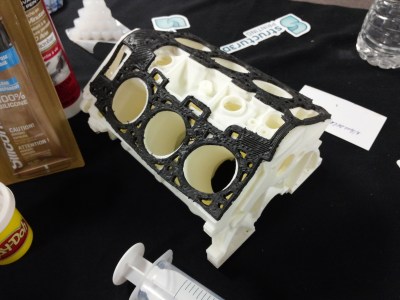
3D printed gasket
Flexible gasket printed in silicone atop a rigid 3D printed engine block.

Hey, what? Yes, an Ultimaker² that can print in Nutella, icing sugar, silicone, latex, wood filler, conductive ink, polyurethane, peanut butter, and a growing list to which you should contribute. This is possible because of their Discov3ry Universal Paste Extruder add-on, which is compatible with most filament printers, especially those that use a RAMPs or Arduino control board.

A large syringe containing the substance of your choice is loaded business end up in the Discov3ry. It gets pushed through tubing that runs to the print head and out through one of many commonly available polypropylene or stainless steel tips. The structur3D team has found that printing on waxed paper works best for the materials they’ve proven out. Each syringe holds 60cc of stuff, and the Discov3ry comes with three of them. They are currently available for pre-order, with a shipping forecast of early summer.