[iforce2d] has an interesting video exploring whether the OpenMV H7 board is viable as a flyby camera for pick and place, able to quickly snap a shot of a moving part instead of requiring the part to be held still in front of the camera. The answer seems to be yes!
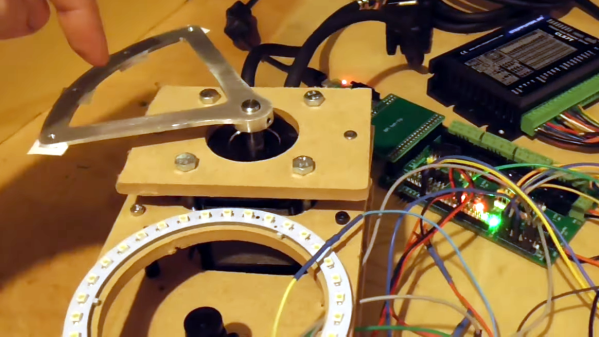
The H7 is OpenMV‘s most recent device, and it supports a variety of useful add-ons such as a global shutter camera sensor, which [iforce2d] is using here. OpenMV has some absolutely fantastic hardware, and is able to snap the image, do blob detection (and other image processing), display on a small LCD, and send all the relevant data over the UART as well as accept commands on what to look for, all in one neat package.
It used to be that global shutter cameras were pretty specialized pieces of equipment, but they’re much more common now. There’s even a Raspberry Pi global shutter camera module, and it’s just so much nicer for machine vision applications.
Watch the test setup as [iforce2d] demonstrates and explains an early proof of concept. The metal fixture on the motor swings over the camera’s lens with a ring light for even illumination, and despite the moving object, the H7 gets an awfully nice image. Check it out in the video, embedded below.
Continue reading “OpenMV Promises “Flyby” Imaging Of Components For Pick And Place Project”