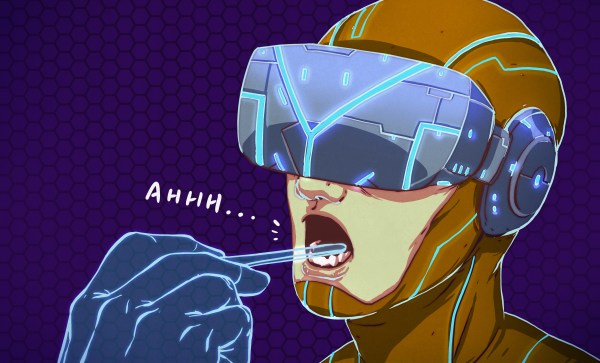
DIY Haptic-Enabled VR Gun Hits All The Targets

This VR Haptic Gun by [Robert Enriquez] is the result of hacking together different off-the-shelf products and tying it all together with an ESP32 development board. The result? A gun frame that integrates a VR controller (meaning it can be tracked and used in VR) and provides mild force feedback thanks to a motor that moves with each shot.

But that’s not all! Using the WiFi capabilities of the ESP32 board, the gun also responds to signals sent by a piece of software intended to drive commercial haptics hardware. That software hooks into the VR game and sends signals over the network telling the gun what’s happening, and [Robert]’s firmware acts on those signals. In short, every time [Robert] fires the gun in VR, the one in his hand recoils in synchronization with the game events. The effect is mild, but when it comes to tactile feedback, a little can go a long way.

The fact that this kind of experimentation is easily and affordably within the reach of hobbyists is wonderful, and VR certainly has plenty of room for amateurs to break new ground, as we’ve seen with projects like low-cost haptic VR gloves.

[Robert] walks through every phase of his gun’s design, explaining how he made various square pegs fit into round holes, and provides links to parts and resources in the project’s GitHub repository. There’s a video tour embedded below the page break, but if you want to jump straight to a demonstration in Valve’s Half-Life: Alyx, here’s a link to test firing at 10:19 in.

There are a number of improvements waiting to be done, but [Robert] definitely understands the value of getting something working, even if it’s a bit rough. After all, nothing fills out a to-do list or surfaces hidden problems like a prototype. Watch everything in detail in the video tour, embedded below.

Continue reading “DIY Haptic-Enabled VR Gun Hits All The Targets”

3D Printable Bearings That Actually Work, No CAD Tweaking Required

3D printing bearings with an FDM printer can be an iffy endeavor, but it doesn’t have to be that way. [Matvey Kukuy]’s Ultimate 608 Bearing with Calibration Kit is everything you’ll need to dial in and print functional 608-style print-in-place bearings on your 3D printer.

Calibration pieces have a handy label attached for identification.

[Matvey] found that there are two key tolerances to get right. And by “get right” he means “empirically determine which works best with your filament and printer”. But don’t worry, there’s no need to get into CAD work to make that happen. [Matvey] has exported a staggering 64 slightly different calibration models (and their matching production versions) along with a printable testing tool. With the help of a step-by-step process that resembles a sort of binary search, one can take the Goldilocks approach to find just the right model for one’s filament and printer in a minimum of steps.

There’s one more tip as well: [Matvey] says that once you determine the best model to use, don’t fill the print bed with copies, unless you want a bed full of possibly non-working bearings! Why is this? A 3D printer prints a bed full of objects slightly differently than it prints a single one, and since the margin for error on the perfectly-selected bearing is so small, that can be enough to keep it from working. To print more than one bearing at a time, position them far from each other and use something like PrusaSlicer’s sequential printing, which is an option to print each object completely before starting the next one.

[Matvey]’s own best results came from printing with PLA at a layer height of 0.16 mm. He also used grease in the bearing to improve performance and extend its life. He doesn’t specify what kind of grease he used, but we’d recommend a plastic-safe grease like PTFE-based Super Lube.

Have you used 3D printed bearings in a project? Would [Matvey]’s design be helpful to you? Let us know all about it in the comments.

What’s Old Is New Again: GPT-3 Prompt Injection Attack Affects AI

What do SQL injection attacks have in common with the nuances of GPT-3 prompting? More than one might think, it turns out.

Many security exploits hinge on getting user-supplied data incorrectly treated as instruction. With that in mind, read on to see [Simon Willison] explain how GPT-3 — a natural-language AI —  can be made to act incorrectly via what he’s calling prompt injection attacks.

This all started with a fascinating tweet from [Riley Goodside] demonstrating the ability to exploit GPT-3 prompts with malicious instructions that order the model to behave differently than one would expect.

Continue reading “What’s Old Is New Again: GPT-3 Prompt Injection Attack Affects AI”

Gaze Upon Just How Thin ATM Skimmers Are Getting

ATM skimmers are electronic devices designed to read financial card information, and they are usually paired with a camera to capture a user’s PIN. These devices always have to hide their presence, and their design has been a bit of an arms race. Skimmers designed to be inserted into a card slot like a parasite have been around for several years, but [Brian Krebs] shows pictures of recently captured skimmer hardware only a fraction of a millimeter thick. And that’s including the battery.

As hardware gets smaller, cameras to capture PIN entry are more easily hidden in things like fake panels.

The goal of these skimmers is to read and log a card’s magnetic strip data. All by itself, that data is not enough to do anything dastardly. That’s why the hardware is complemented by a separate device that captures a user’s PIN as they type it in, and this is usually accomplished with a camera. These are also getting smaller and thinner, which makes them easier to conceal. With a copy of the card’s magnetic strip data and the owner’s PIN, criminals have all they need to create a cloned card that can be used to make withdrawals. (They don’t this so themselves, of course. They coerce or dupe third parties into doing it for them.)

Retrieving data from such skimmers has also led to some cleverness on the part of the criminals. Insertable readers designed to establish a connection to the skimmer and download data is how that gets done. By the way, retrieving data from an installed skimmer is also something criminals don’t do themselves, so that data is encrypted. After all, it just wouldn’t do to have an intermediary getting ideas about using that data for their own purposes. Continue reading “Gaze Upon Just How Thin ATM Skimmers Are Getting”

Engraving A Puzzle Box? Here’s A Collection Of Single-Line Cryptex Fonts

Here’s a neat resource from [MSRaynsford] that is worth bookmarking for anyone who gets creative with laser engravers, CNC routers, or drawing robots: SVGFonts are single-line symbol fonts that [MSRaynsford] created for his laser-cut and engraved cryptex puzzle boxes. They provide an easy way to engrave text as symbols.

Single-line fonts for engraving that include a runic-looking alphabet, a Greek-inspired set, and two symbol sets based on Flag Semaphore.

CNC engraving of letters and symbols is one of those things that seems simple, but is actually more complex than it may appear. It is often desirable to use a tool to engrave symbols with a single line, in much the same way a person would write them if using a pen. But fonts and art for letters and numbers aren’t normally a single line. Thankfully there is a solution in the form of Hershey text, an extension for which is included in Inkscape. It turns out that Hershey Fonts have their origin back in the 1960s, when the changing landscape of electronics and industry opened new opportunities and demanded new solutions.

That’s why, when [MSRaynsford] needed fonts in different styles and symbols for creating his puzzle boxes, he had to design them himself and they had to be single-line vector art, just like Hershey Text. The small collection includes English letters designed to resemble a runic alphabet, a Greek-inspired series, and two coded alphabets based on flag semaphore.

Grab ’em on GitHub, because you never know when you’ll need to make a quick cryptex.

A Crowned Pulley Keeps Robot’s Treads On Track

[Angus] at Maker’s Muse recently created a new and tiny antweight combat robot (video, embedded below) and it has some wonderfully clever design elements we’d like to highlight. In particular: how to keep a tracked robot’s wheel belt where it belongs, and prevent it from slipping or becoming dislodged. In a way, this problem was elegantly solved during the era of the steam engine and industrial revolution. The solution? A crowned pulley.

Silicone bracelet and crowned pulley result in a self-centering belt with a minimum of parts.

A crowned pulley is a way of automatically keeping a flat belt centered by having a slight hump in the center of the pulley, which tapers off on either side. Back when steam engines ran everything, spinning axles along the ceiling transferred their power to machinery on the shop floor via flat belts on pulleys. Crowned pulleys kept those flat belts centered without any need for rims or similar additions.

The reason this worked so well for [Angus]’s robot is partly its simplicity, and partly the fact that it works fantastically with the silicone wrist bracelets he uses as treads. These bracelets are like thick rubber bands, and make excellent wheel substitutes. They have great grip, are cheap and plentiful, and work beautifully with crowned pulleys as the hubs. It’s a great solution for a tiny robot, and you can how it self-centers in the image here.

Antweight robots are limited to 150 grams which means every bit counts, and that constraint leads to some pretty inventive design choices. For example, [Angus]’s new robot also has a clever lifter mechanism that uses a 4-bar linkage designed to lever opponents up using only a single motor for power. Watch [Angus] explain and demonstrate everything in his usual concise and clear manner in the video, embedded below.

Continue reading “A Crowned Pulley Keeps Robot’s Treads On Track”

The Big List Of Naughty Strings Helps Find Those User Input Problems

Any software that accepts user input must take some effort to sanitize incoming data, lest unexpected and unwelcome things happen. Here to make that easier is the Big List of Naughty Strings, an evolving list of edge cases, unusual characters, script-injection fragments, and all-around nonstandard stuff aimed at QA testers, developers, and the curious. It’s a big list that has grown over the years, and every piece of it is still (technically) just a string.

These strings have a high probability of surfacing any problems with handling user input. They won’t necessarily break anything, but they may cause unexpected things to happen and help point out any issues that need fixing. After all, many attacks hinge on being able to send unexpected inputs that don’t get properly sanitized.

Finding bad inputs is not always entirely straightforward, but at least the Big List of Naughty Strings is available in a variety of formats to make it easy to use. [Max Woolf] has been maintaining the list for years, but if you haven’t heard of it yet and think it might come in useful, now’s the time to give it a look. Now you can help ensure your system can handle things like someone registering a company named ; DROP TABLE “COMPANIES”;– LTD.