3D-Printed Extension For Extreme Macro Photography Includes Lens Electronic Control

Macro photography — the art of taking pictures of tiny things — can be an expensive pastime. Good lenses aren’t cheap, and greater magnification inflates the price even further. One way to release a bit more performance from your optics comes in the form of an extension tube, which mounts your lens further from the camera to zoom in a little on the image. Back in the day with a film SLR you could make a rough and ready tube with cardboard and tape, but in the age of the digital camera the lens has become as much a computer peripheral as an optical device. [Nicholas Sherlock] has solved this problem by creating a 3D-printed extension tube for his Canon that preserves connections between camera and lens.

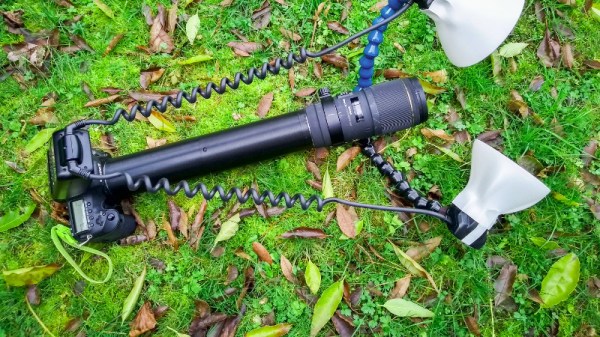
More details of this 300mm monster’s construction go so far beyond a plastic tub formed of two threaded sections with adapter plates at the ends. He’s using off-the-shelf metal rings to fit camera and lens just right, but making the electronic contacts is where it gets interesting. On end uses pogo pins, the other provides a contact block made of nail heads. In both cases the 3D-printed parts are designed to provide mounting points for the pins and nails. The assembly technique is worth a look both because of the design and as an example of how to document all the juicy details we’re constantly looking for in a great hack.

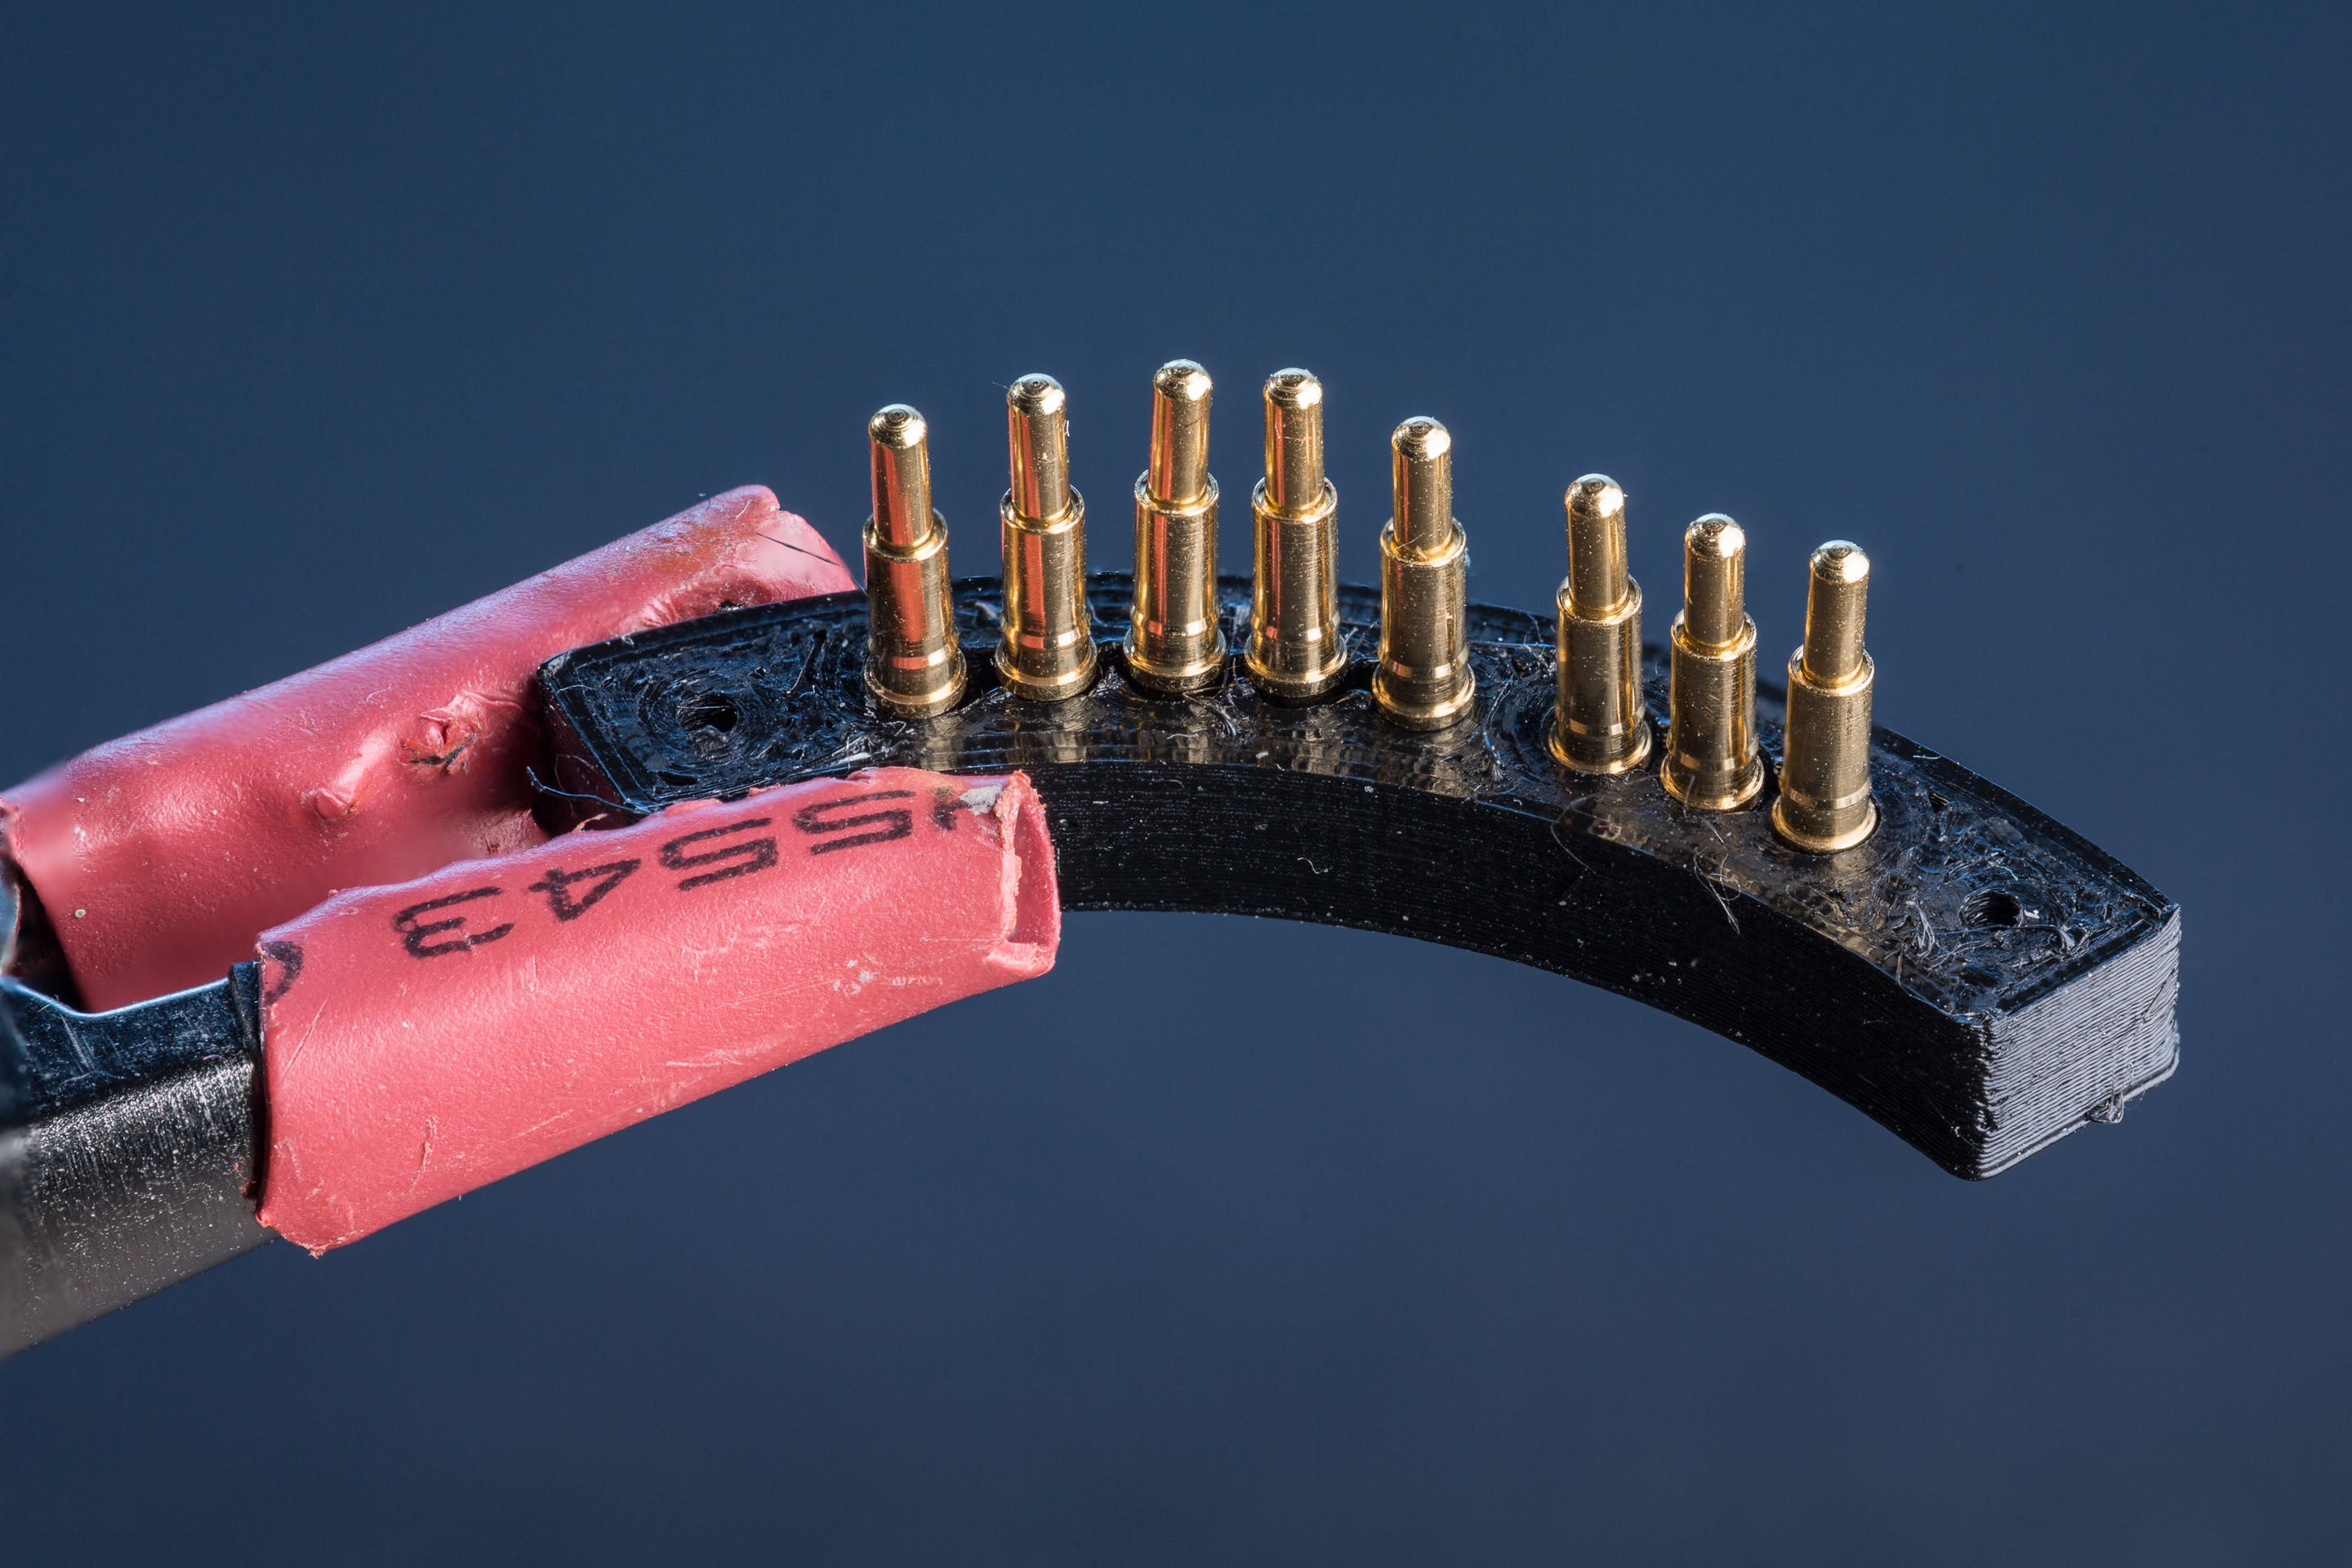
The results speak for themselves, in that the photography provides an impressive level of close-up detail. If you would like to build your own tube, it is available on Thingiverse.

Macro extensions seem far between here, but we’ve brought you a few lens repairs in our time.

[via /r/photography]

Espionage On Display As GCHQ Hosts A Temporary Exhibit

At the top of the British electronic intelligence agency is the Government Communications Headquarters (GCHQ), a very public entity whose circular building can easily be found by any inquisitive soul prepared to drive just off the A40 in Cheltenham which is about two hours west of London. But due to the nature of its work it is also one of the most secretive of UK agencies, from which very little public information is released. With over a century of history behind it and with some truly groundbreaking inventions under its belt it is rumoured to maintain a clandestine technology museum that would rewrite a few history books and no doubt fascinate the Hackaday readership.

Perhaps the most famous of all its secrets was the wartime Colossus, the first all-electronic stored program digital computer, which took an unauthorised book in the 1970s to bring to public attention. Otherwise its historical artifacts have been tantalisingly out-of-reach, hinted at but never shown.

A temporary exhibition at the Science Museum in London then should be a must-visit for anyone with an interest in clandestine technology. Top Secret: From ciphers to cyber security occupies the basement gallery, and includes among other exhibits a fascinating selection of artifacts from the Government agency. On a trip to London I met up with a friend, and we went along to take a look.

Continue reading “Espionage On Display As GCHQ Hosts A Temporary Exhibit”

A Tiny Train Departure Board, Just Like The Real Thing

If you travel on the British rail system, you’ll be familiar with the ubiquitous orange dot-matrix departure display boards. At a glance they tell you the expected arrival times of the next few trains, where they are headed, and at the bottom the current time.  [Chris Crocker-White] was inspired by a Tweet to recreate one of these displays in miniature and hang it under his monitor.

The hardware is a Raspberry Pi Zero with an OLED screen, in a custom 3D-printed case. A soldered USB cable takes power from the monitor’s USB ports. Software wise it’s a demonstration vehicle for the Balena cloud service that pulls its data from their transport API, but the choice of dot matrix typeface is perfect and absolutely looks the part.

There is some question as to whether a project such as this one should need a cloud service as its backend, and of course it serves as a demonstration piece rather than a definitive way to enact a departure board. It does however bring a ready-packaged API for transport data, which given that many data sources can be opaque, is a useful feature.

Train time displays seem to be a popular choice on the Eastern side of the Atlantic, here’s another British one, and one from Ireland.

Thanks [Pyrofer] for the tip.

Reverse Engineering An Ancient SBC With An Apple ][

We spend a lot of time in our community discussing the many home computers from the 8-bit era, while almost completely ignoring their industrial equivalents. While today a designer of a machine is more likely than not to reach for a microcontroller, four decades ago they would have used a single-board computer which might have shared a lot of silicon with the one you used to play Pac Man.

[Epooch] recently came into possession of a CMS 9619A Advanced Single Board Microcomputer, a rather unique Programmable Logic Controller intended for industrial applications. It’s powered by a Motorola 6809 CPU and features the usual array of peripheral chips. To unlock its secrets he reached not for an array of tools from 2019 but for a venerable Apple ][e microcomputer.

In this type of 8-bit machine the various peripherals are enabled through address decoding logic that toggles their chip select line when a particular I/O address is called. Sometimes this task is performed by a set of 74 or similar logic chips, but in the case of the CMS 9619A it falls upon a Programmable Array Logic (PAL). These chips, which could be thought of as a simple precursor to today’s FPGAs, were ideal for creating custom decoding logic.

As you might expect though, a PAL is an opaque device, so to deduce the address map it was necessary to reverse engineer it using the Apple ][‘s printer card and a bit of BASIC code. It then remained to do some ROM disassembly work and wire up the serial ports, before some ROM patching with the Apple ][ as an EPROM programmer to finally access the machine’s debugger.

The 6809 is famous as the brains of Radio Shack’s CoCo and the Dragon computers, but this isn’t the first time we’ve seen it in an SBC.

Add A Microscope To Your 3D Printer

There are many ways to keep an eye on your 3D printer as it churns out the layers of your print. Most of us take a peek every now and then to ensure we’re not making plastic vermicelli, and some of us will go further with a Raspberry Pi camera or similar. [Uri Shaked] has taken this a step further, by adding a USB microscope on a custom bracket next to the hot end of his Creality Ender 3.

The bracket is not in itself anything other than a run-of-the-mill piece of 3D printing, but the interest comes in what can be done with it. The Ender 3 has a resolution of 12.5μm on X/Y axes, and 2.5μm on Z axes, meaning that the ‘scope can be positioned to within a hair’s-breadth of any minute object. Of course this achieves the primary aim of examining the integrity of 3D prints, but it also allows any object to be tracked or scanned with the microscope.

For example while examining a basil leaf, [Uri] noticed a tiny insect on its surface and was able to follow it with some hastily entered G-code. Better still, he took a video of the chase, which you can see below the break. From automated PCB quality control to artistic endeavours, we’re absolutely fascinated by the possibilities of a low-cost robotic microscope platform.

[Uri] is a perennial among Hackaday-featured projects, and has produced some excellent work over the years. Most recently we followed him through the production of an event badge.

Continue reading “Add A Microscope To Your 3D Printer”

Raspberry Pi Helps Vintage Psion Find Its Voice

Ask a hacker to imagine computing in the 1980s, and they might think of the classic 8-bit all-in-one machines from the likes of Commodore and Atari, or perhaps the early PCs and Macs. No matter the flavor, they’ll likely have one thing in common: a lack of mobility thanks to being anchored down by a bulky CRT screen in the form of either a television or a dedicated monitor. Mobile computing at the time was something of an expensive rarity, consisting of various quirky handhelds that today have been all but forgotten.

Looking to see if one of these so-called “pocket computers” could still be of use in 2019, [James Fossey] set out to get his circa 1986 Psion Organiser II connected to the Internet. With a Hitachi CPU, two-line text-only LCD and ABCD keyboard it’s a world away from the modern smartphone, yet as an early stab at a PDA as well as general purpose computer it’s visibly an ancestor of the devices we carry today. Of course, as the Psion was produced before the advent of affordable mobile data and before even the invention of the Web, it needed a bit of help connecting to a modern network.

Psion sold an RS-232 cable accessory which came with both serial terminal and file transfer in ROM, so with one of these sourced and a little bit of hackery involving an RS-232 to TTL converter and a DB-25 connector, he was able to hook it up to a Raspberry Pi. That means it’s reduced to being a dumb terminal for a more powerful machine that can do the heavy lifting, but those with long memories will tell you that’s exactly what would have been done with the help of a modem to connect to a BBS back in 1986. So far he’s got a terminal on the Pi and a Twitter client, but he’s declined to show us the Hackaday Retro Edition.

Psion has rarely featured directly on these pages, but despite being forgotten by many today they were a groundbreaking company whose influence on portable computing stretched beyond their own line of devices. One we have shown you is an effort to put more recent hardware into a Psion Series 5 clamshell.

An All-Iron Battery Isn’t Light, But It’s Cheap

Rechargeable batteries are a technology that has been with us for well over a century, and which is undergoing a huge quantity of research into improved energy density for both mobile and alternative energy projects. But the commonly used chemistries all come with their own hazards, be they chemical contamination, fire risk, or even cost due to finite resources. A HardwareX paper from a team at the University of Idaho attempts to address some of those concerns, with an open-source rechargeable battery featuring electrode chemistry involving iron on both of its sides. This has the promise of a much cheaper construction without the poisonous heavy metal of a lead-acid cell or the expense and fire hazard of a lithium one.

A diagram of the all-iron cell.

The chemistry of this cell is split into two by an ion-exchange membrane, iron (II) chloride is the electrolyte on the anode side where iron is oxidised to iron 2+ ions, and Iron (III) chloride on the cathode where iron is reduced to iron hydroxide. The result is a cell with a low potential of only abut 0.6V, but at a claimed material cost of only $0.10 per kWh Wh of stored energy. The cells will never compete on storage capacity or weight, but this cost makes them attractive for fixed installations.

It’s encouraging to see open-source projects coming through from HardwareX, we noted its launch back in 2016.

Thanks [Julien] for the tip.