A 3D-Printed Robot Actuator

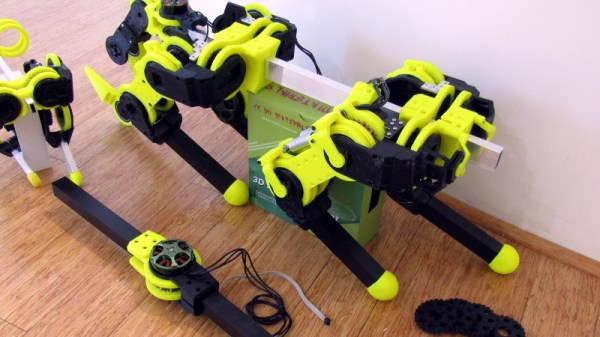
Somehow, walking robots at our level never really seem to deliver on the promise that should be delivered by all those legs. Articulation using hobby servos is simple enough to achieve, but cumbersome, slow, and not very powerful. [Paul Gould] has a plan to make a better, 3D-printed articulated robot actuator.

His solution is both novel and elegant, a fairly conventional arm geometry that has at its joints a set of brushless motors similar to but a little larger than the kind you might be more familiar with on multirotors, paired with 3D-printed cycloidal gearboxes. Magnetic encoders provide the necessary positional feedback, and the result is a unit that is both compact and powerful.

With such a range of small brushless motor controllers on the market, it’s at first sight unexpected that he’s designed his own controller board. But this gives him complete control over his software, plus the CAN bus that ties everything together. He’s given us a video which we’ve placed below the break, showing the build process, the impressive capabilities of his system, and a selection of builds including a robot dog complete with tail. This is definitely a project to watch.

Continue reading “A 3D-Printed Robot Actuator”

Field Trip! Hackaday Visits Pimoroni

If you have a Raspberry Pi and have any interest in its peripherals, you may be familiar with the grinning pirate logo of the British company, Pimoroni. The Sheffield, UK based outfit first established a niche for itself as one of the go-to places for much of the essentials of Pi ownership, and has extended its portfolio beyond the Pi into parts, boards, and components across the spectrum of electronic experimentation. Their products are notable for their distinctive and colourful design language as well as their  constant exploration of new ideas, and they have rapidly become one of those companies to watch in our sphere. On our way up to Newcastle for Maker Faire UK, we passed close enough to the Pimoroni HQ to be able to ask nicely if we could drop in and have a tour.

[Paul] showing off some of the Pimoroni attention to design detail. This artwork is hidden behind a display panel on the finished product.
Paul showing off some of the Pimoroni attention to design detail. This artwork is hidden behind a display panel on the finished product.
The Pimoroni HQ can be found in a nondescript unit with a discreetly placed sign on an industrial estate after a short drive through the city from the motorway. Inside it’s the same as thousands of other units, a set of offices at the front and a cavernous warehouse behind, except this one is filled with the kinds of goodies that get our blood pumping! And we’re told this toybox warehouse is soon to be joined by another nearby unit, as the Pimoroni business is expanding.

Our guide was the company co-founder Paul Beech, whose work you will be familiar with even if this is the first time you’ve heard his name;  Paul was the designer of the Raspberry Pi logo! The company is not exclusive to that platform but it’s fair to say they have a strong connection with the Pi, starting in 2012 with as their website puts it: “One laser cutter and a kettle” on which they produced the first of their iconic PiBow laser-cut sandwich Raspberry Pi cases.

Continue reading “Field Trip! Hackaday Visits Pimoroni”

Rescuing K-9

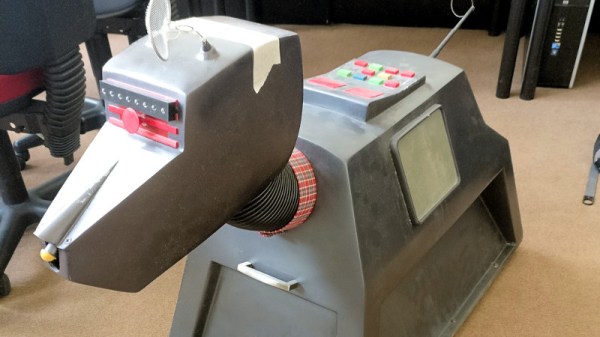
Fans of the long-running and ever-fantastic British TV show Dr. Who will no doubt hold a soft spot in their hearts for the Doctor’s little robot companion. No, not one of his many human sidekicks, we’re talking about K-9, the angular dog-like android that burst onto British screens back in 1977.

There were a number of original [K-9] props made by the BBC, and these were eventually sold by the corporation. One found its way to Abertay University, and it was there that [Gary Taylor], a computer science student found it. Sadly the years had not been kind to the robotic mutt, in particular water from a roof leak had damaged its internals beyond repair. With little more than the fibreglass shell to work with, he set out to rebuild K-9 and make the task the subject of his dissertation.

The original robo-dog was little more than a 1970s remote-controlled car, but its upgrades bring it firmly into the 21st century. At its heart is the inevitable Raspberry Pi 3, coupled with an Arduino mega 2560 that handles motor control and interfacing to an array of ultrasonic sensors. The Pi’s Bluetooth radio talks to an app on an Android phone, that serves as the K-9’s controller. All of which makes for an impressive upgrade, but we hope has disturbed as little of the original prop work as possible

Not everyone is lucky enough to find an original K-9, but for those destined for classic BBC prop disappointment there is always the possibility that you could build your own.

3D Print A Remote Control Flame Thrower

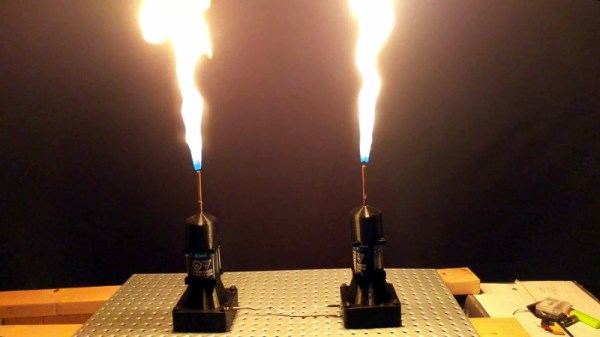
We all have a weakness for a good flamethrower project, but sometimes they can look a little hairy, even if losing hairs to them seems to be the order of the day. [Hyper_Ion] has a ‘thrower that might satisfy the need for fire among the cautious though, because he’s created a remote control flamethrower.

Fuel for the flames is provided from a butane canister held within a 3D-printed frame, and is delivered via a piece of copper tube to a welding nozzle. A plunger beneath the can is connected to a rack-and-pinion driven by a servo, connected to a straightforward radio control receiver. The position of the can is adjusted until there is just enough gas to sustain a pilot flame at the nozzle, and a command to the servo releases a burst of gas that results in a satisfying puff of fire.

This is more of a static stage effect than the wearable flamethrowers or flamethrower guitar projects we’ve seen in the past, but it is no less a neat project. And unlike many other flamethrowers, it’s simple to build. We have to deliver the usual exhortation though: take care with your fire, we’d prefer not to be writing either obituaries of Fail Of The Week posts about smoking ruins.

Custom Buttons For Your Game Controller

Console gamers have relatively few options when it comes to hardware hacking, unless they wish to partake of some extreme modifications that threaten the very integrity of their machines. So without reaching for a Dremel, how can you insert a little individuality into the same standard components all your friends have?

It seems one answer is to customise your controller with some different buttons. There are commercial outfits that will supply your needs in this direction, but they aren’t always cheap, and plenty of older machines have no products available. This isn’t  a problem for [RockerGaming] though, who shows us how to cast your own set of custom buttons using a silicone mold taken from the originals.

The video is a step-by-step walkthrough of the molding process that could just as easily be applied to any other small plastic parts and is not unique to console buttons. The subjects come from a Sega Saturn controller, in the video a beige model, which raises a passing interest among European Hackaday scribes who remember the Saturn as a black console.

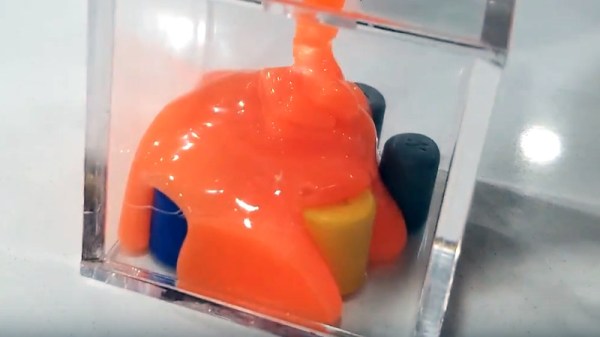
We see the preparation of the original buttons and mold. An acrylic golf ball trophy display case is pressed into service. (Who knew those were even a thing!) A dye is added to the two-part silicone to provide a visual mixing aid, and once the cast mold is separated from the buttons the final resin is poured into it. The cloned buttons are tidied up underneath with a Dremel, and the controller is reassembled.

A set of custom buttons will not improve your gaming, but underlying this is the fact that resin casting is a useful skill. It’s somewhere we’ve been before in depth, so it’s worth reading our guide from back in 2016.

Continue reading “Custom Buttons For Your Game Controller”

Fail Of The Week: Never Trust A Regulator Module

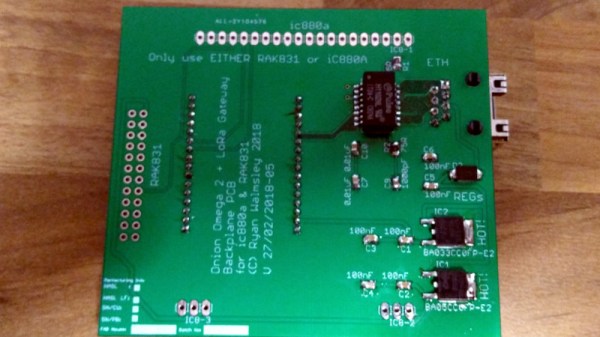
[Ryan Wamsley] has spent a lot of time over the past few months working on a new project, the Ultimate LoRa backplane. This is as its name suggests designed for LoRa wireless gateways, and packs in all the features he’d like to see in a LoRa expansion for the Nano Pi Duo.

His design features a three-terminal regulator, and in the quest for a bit more power efficiency he did what no doubt many of you will have done, and gave one of those little switching regulator modules in a three-terminal footprint a go. As part of his testing he inadvertently touched the regulator, and was instantly rewarded with a puff of smoke from his Nano Pi Duo. As it turned out, the regulator was susceptible to electrical noise, and had a fault condition in which its input voltage was routed directly to its output. As a result, a component in the single board computer received way more than its fair share, and burned out.

If there is a moral to be extracted from this story, it is to never fully trust a cheap drop-in module to behave exactly as its manufacturer claims. [Ryan]’s LoRa board lives to fight another day, but the smoke could so easily have come from more components.

So that’s the Fail of The Week part of this write-up complete, but it would be incomplete without the corresponding massive win that is [Ryan]’s LoRa board itself. Make sure to take a look at it, it’s a design into which a lot of attention to detail has been put.

A Lesson In K40 Laser Repair

The K40 laser cutter has become ubiquitous in hackerspaces and well-equipped home workshops over the past few years, as a relatively inexpensive introduction to laser cutting and a machine that is readily hackable. Tokyo Hackerspace have one, but sadly their laser tube failed after relatively little use. Replacing a laser tube might be a routine component change for some readers, but it’s still worth looking at in some detail.

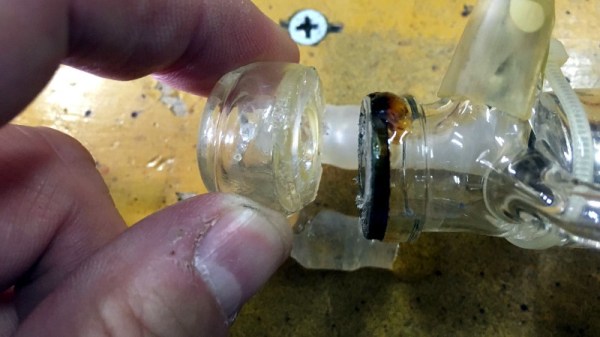
Their tube had failed at its output lens cooling cap, a component that is glued onto the end of the tube rather than bonded, and which had snapped off. There had been no mechanical stress upon it, but it was found  that the arrangement of their cooling system caused it to drain between uses and thus air bubbles could accumulate. The resulting cooling inefficiency caused enough thermal stress for the bond between the tube and the end piece to fail.

The in-depth analysis of what caused the failure and step-by-step description of the procedure should be of interest to any K40 owner. Little things such as ensuring that the tube is rotated to the right angle for all air bubbles to make their way out of it, or making sure that when the pump is switched off the water isn’t all pulled out of it by gravity seem obvious, but these are traps that will have caught more than one K40 owner.

We’ve covered many K40 stories over the years, but a good place to start for the novice might be this commissioning story, or even this tale of a hackerspace’s modifications to their model.