Precise Temperature Control Of A Coffee Urn

coffee-urn-temperature-controller

Hackaday Alum [Nick Schulze] decided to help out a friend who needed a controller to hold water at a precise temperature. Coffee guzzling hackers of the world should rejoice, as [Nick] targeted a coffee urn as the vessel for the project. What he came up with was a couple of custom boards and a roll-your-own temperature probe which does a fantastic job of regulating the temperature of the liquid.

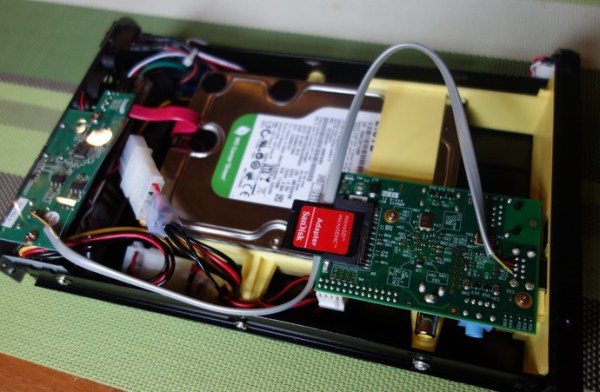
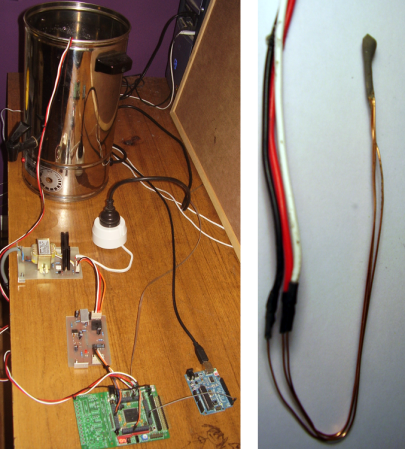
Needing to switch the mains going to the heating element he immediately thought of an AC chopper circuit based on a Triac. What didn’t come to mind immediately was the need to detect the zero crossing. In the image above you can see nearest the urn his high voltage board. Below that is the zero crossing detector circuit. For feedback he created his own temperature probe using a TC1047 temperature sensor. After soldering on a filtering cap and the leads he dipped it in JB Weld to make it water tight. If you’re using this for coffee may we recommend seeking out a food safe probe.

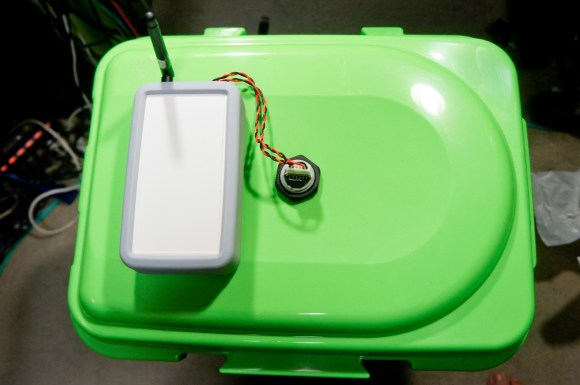
After successful testing he added a user interface and buttoned it up in the enclosure seen in the video below.

Continue reading “Precise Temperature Control Of A Coffee Urn”

Hackaday Links: September 1, 2013

hackaday-links-chain

[Anton] has been doing some Commodore 64 Datasette experiments. He managed to connect the C64 audio traces to his smartphone and use it for tape playback.

Not wanting to actually disassemble his Mendel 3D printer, [SteveDC] figured out how to make extenders that increase his build height by about 40%.

We have fond memories of owning an 8088 PC. We did a lot of experimental programming on it but never anything as impressive as getting the TCP/IP stack to run on it. Then again, we’re not sure there was such a thing back when we owned the 10 MHz hardware. That’s right, the microcontrollers we mess around with now days are much faster than that old beast was.

When he goes running at night [Tall-drinks] straps a pico projector to his chest. We guess you’d call the readout a heads-up display… but it’s really more heads-down since it’s projecting on the pavement.

See how things heat up as a Raspberry Pi boots. This video was made using a thermal imaging camera to help diagnose a misbehaving board.

We don’t have very many trinkets on our desk (that would steal space normally reserved for clutter). But be would happily make room for this motorcycle model made from VCR parts (translated).

Obstacle Avoiding LEGO Rover Uses CDs For Wheels

lego-rover

This rover built by [Sath02] is a great example that you don’t have to be a mechanical engineering wizard to get into robotics. He used LEGO pieces to help ease the difficulty of getting a rover up and running.

In this case the use of LEGO is strictly structural. The electronics are not the NXT parts you would expect to see when working with these popular toy blocks. Instead he’s put the Arduino Palm Plus into service. It’s an Arduino board that has rows of holes at either end to make it LEGO compatible. It also carries an LM293D motor controller and [Sath02] added an XBee module for wireless control.

At the top of the assembly is an IR distance sensor which is used for obstacle avoidance. You may not be interested in building and exact replica, but the techniques he uses for attaching the distance sensor, CD wheels,  and fabricating the rest of the rover are good examples if you take on a LEGO build in the future.

Continue reading “Obstacle Avoiding LEGO Rover Uses CDs For Wheels”

Build A File Server Inside An Old External Optical Drive Enclosure

This one nearly ended up in today’s Links post, but on second look we think it deserves a feature of its own. [Profezzorn] designed some mounting brackets to house a file server inside of an external drive enclosure. Click on the instructions tab to get a bit more of the story.

The enclosure that he’s using is meant for a 5.25″ optical drive. It comes with a USB to SATA converter which is how he connects the hard drive to the Raspberry Pi serving the files. His mounting system uses the original holes in the enclosure, the threaded holes of the drive, and the holes in the RPi PCB to mount everything with just ten screws. The enclosure included a Molex power connector. He sacrificed an old connector to make a custom cable for the Pi’s power.

Add a portable power supply, do a little work with the Linux configuration, and you could easily turn this into a pirate box.

Scratch-built Gigapixel Scanner

scratch-built-gigapixel-scanner

The presence of a camera in this image may be a bit confusing since we’re calling it a scanner. What’s actually going on is that macro-images this piece of art are being captured automatically. The multiple shots will later be assembled into one fascinatingly high-resolution image. The CNC scanner rig is [Charlie Romer’s] summer project.

Unfortunately [Charlie] hasn’t yet collected all the information on the project into one place. After the break you’ll find more images, as well as a few demo videos. The best place to start is probably his proof-of-concept from this Spring. He shows a single-axis CNC mount for the camera. It takes an entire row of images. The assembled photo from that test is shown below. We believe the faint yellow dots in the macro part of the example are fingerprints purposefully left by the printer called printer stenography to help prevent forgery.

The larger rig uses movement on two axes. The idea is that the artwork will be perfectly positioned so that manual focus set at one point will work along all points in the capture routine. He’s using a lamp for a light source but we’re sure he will upgrade so something like a ring light as the project continues.

Continue reading “Scratch-built Gigapixel Scanner”

A Think-tank Solution For Monitoring Radioactive Water Storge Tanks

SONY DSC

When we hear reports of radioactive water leaking into the ocean from the [Fukushima Dai-Ichi] plant in Japan we literally have to keep ourselves from grinding our teeth. Surly the world contains enough brain power to overcome these hazards. Instead of letting it gnaw at him, [Akiba] is directing his skills at one solution that could help with the issue. There are a number of storage tanks on site which hold radioactive water and are prone to leaking. After hearing that they are checked manually each day, with no automated level monitoring, he got to work. Above is the wireless non-contact tank level sensor rig he built to test out his idea.

A couple of things made this a quick project for him. First off, he just happened to have a MaxSonar MB7389 waterproof sonar sensor on hand. Think of this as a really fancy PING sensor that is water tight and can measure distance up to five meters. [Akiba’s] assumption is that the tanks have a hatch at the top into which this sensor would be positioned. The box next to it contains a Freakduino of his own design which includes hardware for wireless communications at 900 MHz. This is the same hardware he used for that wireless toilet monitor.

We really like seeing hacker solutions to environmental problems. A prime example is some of the cleanup hacks we saw around the time of the BP Gulf of Mexico oil spill.


Radar Detector Integrated With Dashboard Display Screens And Steering Wheel Controls

CAN Bus hacking is all the rage right now. This particular project uses an early development version of an Arduino compatible CAN bus tool to integrate radar detector control into a Mazda dashboard. This image shows the output as the Whistler Pro-3600 radar detector boots up. The self test demonstrates what you would see on the dashboard display if your speed is checked using any of a handful of technologies. But it’s not just the dash display that’s working. The steering wheel controls are also capable of affecting the radar detector so that it can always be hidden from sight.

With auto manufacturers adding more numerous and larger displays to our vehicles it’s refreshing to see someone come up with a hack that makes pushing our own info to those screens possible. The CANBus Triple is an Arduino compatible board which patches into the data bus found in all modern vehicles. To integrate the Whistler for this hack [TheDukeZip] prototyped the interface on a regular Arduino board, then moved it over to the CANBus Triple once he had it working. Check out the video after the break to see the setup in action.

Continue reading “Radar Detector Integrated With Dashboard Display Screens And Steering Wheel Controls”