VCF East Roars Back To Life

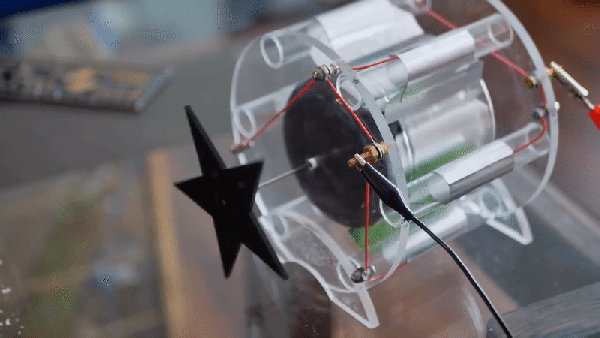
It didn’t take long to realize that the 2021 Vintage Computer Festival East — returning to the InfoAge Science and History Museum in Wall, New Jersey after being held virtually last year — was a massive success. In fact, the first clue came before I even got out of my car. When a volunteer came up to my window to apologetically explain that the primary parking lot was already full and I’d have to drive down the road to an overflow lot, there was no question about it; a whole lot of folks were more than ready to shake off those pandemic blues and get back to business.

They certainly picked a great event for it. While VCF East has always been a highlight of the East Coast hacker’s year, it was obvious things were really turned up to the max for this much-anticipated return to an in-person festival. With respect to all those involved in previous events, things just felt more cohesive and better organized this time around.

Veteran attendees I spoke to all felt like they were witnessing the event going through an evolutionary change into something bigger and better, while first time fliers were impressed with the buzz of activity and breadth of what was on display. In short, admiration for the event and the people working behind the scenes to make it possible was unanimous.

It’s simply not possible to adequately summarize a multi-day event like VCF East in a single post, so I won’t try to. This article, and the ones to follow it, serve only to document some of the highlights from my own personal time wandering through the sprawling InfoAge campus. Ultimately, there’s no real substitute for making the trip to Wall, NJ and experiencing this incredible event for yourself. But if that’s not an option for you, hopefully the following will give you a little taste of what the Vintage Computer Federation labors so hard over every year.

Continue reading “VCF East Roars Back To Life”

Drone And High Voltage Spin Up This DIY Corona Motor

The average Hackaday user could probably piece together a rough model of a simple DC motor with what they’ve got kicking around the parts bin. We imagine some of you could even get a brushless one up and running without too much trouble. But what about an electrostatic corona motor? If your knowledge of turning high voltage into rotational energy is a bit rusty, let [Jay Bowles] show you the ropes in his latest Plasma Channel video.

Like many of his projects, this corona motor relies on a few sheets of acrylic, a handful of fasteners, and a healthy dose of physics. The actual construction and wiring of the motor is, if you’ll excuse the pun, shockingly simple. Of course part of that is due to the fact that the motor is only half the equation, you still need a high voltage source to get it running.

An earlier version of the motor ended up being too heavy.

In this case, [Jay] is revisiting his earlier experiments with atmospheric electricity to provide the necessary jolt. One side of the motor is connected to a metallic mesh electrode that’s carried 100 m into the air by a DJI Mini2 drone, while the other side is hooked up to several large nails driven into the ground.

The potential between the two gets the motor spinning, and makes for an impressive demonstration, but it’s not exactly the most practical way to experiment with your new corona motor. If you’d rather get it running on the workbench, he also shows that a more traditional high voltage source like a Van de Graaff generator will do the job nicely. As an added bonus, it can even power the device wirelessly from a few feet away.

So what can you do with a corona motor? While [Jay] is quick to explain that these sort of devices aren’t exactly known for their torque, he does show that his motor is able to lift a 45 gram weight suspended from a string. That’s frankly more power than we expected, and makes us wonder if there is some quasi-practical application for this contraption. If there is we suspect it’ll be featured in a future Plasma Channel video, so stay tuned.

Continue reading “Drone And High Voltage Spin Up This DIY Corona Motor”

Arduino Brings USB Mouse To Homebrew Computer

When building your own homebrew computer, everything is a challenge. Ultimately, that’s kind of the point. If you didn’t want to really get your hands dirty with the nuts and bolts of the thing, you wouldn’t have built it in the first place. For example, take the lengths to which [rehsd] was willing to go in order to support standard USB mice on their 6502 machine.

Code for mapping mouse movement to digital output.

The idea early on was to leverage existing Arduino libraries to connect with a standard USB mouse, specifically, the hardware would take the form of an Arduino Mega 2560 with a USB Host Shield. There was plenty of code and examples that showed how you could read the mouse position and clicks from the Arduino, but [rehsd] still had to figure out a way to get that information into the 6502.

In the end, [rehsd] connected one of the digital pins from the Arduino to an interrupt pin on the computer’s W65C22 versatile interface adapter (VIA). Then eleven more digital pins were connected to the computer, each one representing a state for the mouse and buttons, such as MOUSE_CLICK_RIGHT and MOUSE_LEFT_DOWN.

Admittedly, [rehsd] says the mouse action is far from perfect. But as you can see in the video after the break, it’s at least functional. While the code could likely be tightened up, there’s obviously some improvements to be made in terms of the electrical interface. The use of shift registers could reduce the number of wires between the Arduino and VIA, which would be a start. It’s also possible a chip like the CH375 could be used, taking the microcontroller out of the equation entirely.

From classic breadboard builds to some impressively practical portable machines, we’ve seen our fair share of 6502 computers over the years. Despite the incredible variation to be found in these homebrew systems, one thing is always the same: they’re built by some of the most passionate folks out there.

Continue reading “Arduino Brings USB Mouse To Homebrew Computer”

QB64 Hits Version 2.0, Gets Enhanced Debugging

Despite the name, BASIC isn’t exactly a language recommended for beginners these days. Technology has moved on, and now most people would steer you towards Python if you wanted to get your feet wet with software development. But for those who got their first taste of programming by copying lines of BASIC out of a computer magazine, the language still holds a certain nostalgic appeal.

If that sounds like you, then may we heartily recommend QB64. The open source project seeks to modernize the classic programming language while retaining compatibility for QBasic 4.5, the late-80s BASIC environment Microsoft included with MS-DOS. That modernization not only includes the addition of contemporary technology like OpenGL, but cross-platform support that lets you run the same code on Windows, Linux, and Mac OS.

The new debug mode in QB64 v2.

The QB64 team released version 2.0 just a few days ago, making this the perfect time to give the project a test drive if you haven’t tried it out yet. The changelog includes platform specific improvements for each supported operating system, as well as a long list of general fixes and updates. But arguably the biggest feature for this release is the inclusion of the $Debug metacommand.

When this command is included in your code, the IDE will insert a debugging stub into the compiled program. During execution, the QB64 IDE will switch over to debugging mode, and communicate with your program in real-time over a local TCP/IP connection. The debugging mode lets you step through the code line-by-line, check the values of variables, and set breakpoints. Once you’re done fussing with the code and want to release a final binary, you just need to remove that single $Debug command and recompile.

We’ve talked in the past about using QB64 to revitalize vintage code, and think the project is a fantastic melding of old and new technology. You never know when you might suddenly have the urge to dust off some code you wrote back in the 80s and run it on an OS that didn’t even exist at the time.

Valve Reluctantly Shows How To Mod The Steam Deck

As the narrator in this official instructional video from Valve reminds the viewer several times, the gaming company would really rather you not open up your brand new Steam Deck and start poking around. They can’t guarantee that their software will function should you start changing the hardware, and since there’s no source for replacement parts yet anyway, there’s not much you can do in the way of repairs.

That said, Valve does believe you have the right to take apart your own device, and has produced the video below as an aid to those who are willing risk damaging their new system by opening it up. Specifically, the video goes over how to replace the most likely wear items on the handheld, namely the thumb sticks and the SSD. It seems inevitable that the stock thumb sticks will wear down after a couple years of hard use, so we’re glad to see they are easily removable modules. As for the SSD, it stands to reason that users would want to swap it out for faster and higher capacity models as they become available in the coming years.

Sooner or later, these are going to need to be replaced.

Now to be clear, we appreciate Valve making this video, and would love to see other manufacturers be so forthcoming. But we have to admit that some of its messaging does seem a bit heavy handed. The narrators admonition that users who open their Steam Deck are literally taking their lives into their own hands due to the danger of potentially rupturing the system’s lithium-ion battery is a bit hyperbolic for our tastes. The constant reminders of how badly you could bungle the job just comes off as overly preachy, though to be fair, we probably aren’t the intended audience.

Outside of its obvious gaming functions, we’re excited too see what the community can do with the Steam Deck. With official reference material like this, perhaps we’ll even start seeing some hardware modifications before too long. Though we wouldn’t blame you for hitting the Mute button halfway through.

Continue reading “Valve Reluctantly Shows How To Mod The Steam Deck”

These First Remoticon Speakers Are Just A Taste Of What’s To Come

With the 2021 Hackaday Remoticon fast approaching, we’ve been hard at work crafting a schedule filled with thought-provoking presentations from knowledgeable speakers; precisely what you’ve come to expect from one of our events, virtual or otherwise. We’ve already announced that Laser Interferometer Gravitational-Wave Observatory (LIGO) astrophysicist Keith Thorne will be presenting a literally out-of-this-world keynote on the incredible engineering it takes to detect gravitational waves with the highest precision interferometers ever devised, but that’s only the beginning.

To make doubly sure we’ll be able to pack every available minute of our second Remoticon with fascinating content, we’ve decided to extend the deadline on talk proposals for a few more days to see what the late-bloomers can bring to the table. If you’ve ever wanted to present at a Hackaday event, but couldn’t swing the trip to Pasadena or Belgrade, this is your chance to take the stage virtually and show off what you’re passionate about.

In the meantime, we’ve churned through enough of the early proposals to let slip the first four talks that we’ll be beaming out between November 19th and 20th. There is plenty more to announce over the coming weeks, but hopefully this gives you an idea of what we’ve got in store for our global audience of hardware hackers. So grab your Remoticon ticket right now!

Continue reading “These First Remoticon Speakers Are Just A Taste Of What’s To Come”

3D Printing Toothpaste In The Name Of Science

While we don’t often see them in the hobbyist community, 3D printers that can extrude gels and viscous liquids have existed commercially for years, and are increasingly used for biological research. [Ahron Wayne] has recently been working with such a printer as part of a project to develop a printed wound dressing made of honey and blood clotting proteins, but for practice purposes, wanted to find a cheaper and more common material that had similar extrusion properties.

The material he settled on ended up being common toothpaste. In the video below you can see him loading up the cartridge of a CELLINK INKREDIBLE+ bioprinter with the minty goop, which is then extruded through a thin blunt-tip needle by compressed air. After printing out various shapes and words using the material, often times directly onto the bristles of a toothbrush, he’s come up with a list of tips for printing similarly viscous substances.

First and foremost, go slow. [Ahron] says the material needs a moment to contract after being extruded if it’s going to have any hope of supporting the next layer of the print. Thick layer heights are a necessity, as is avoiding sharp curves in your design. He also notes that overhangs must be avoided, and though it probably goes without saying, clarifies that an object printed from toothpaste will never be able to support anything more than its own weight.

In addition to the handful of legitimate DIY bioprinters that have graced these pages over the years, we’ve seen the occasional chocolate 3D printer that operated on a similar principle to produce bespoke treats, so the lessons learned by [Ahron] aren’t completely lost on the hacker and maker crowd. Who knows? Perhaps you’ll one day find yourself consulting this video when trying to get a modified 3D printer to lay down some soldering paste.

Continue reading “3D Printing Toothpaste In The Name Of Science”